Page 16 of 17

Re: 535is Turbo (ex 633 Callaway)- 2020 Update

Posted: Sep 04, 2020 8:01 PM
by tschultz
Thanks Charlie!
Ken, it was great to see yo' momma out on the mountain. :moon: :rofl:

I didn't get any driving videos unfortunately but maybe can come up with some later this year. My brother got a bit of me running down the mountain pulling away from the E39 M5 which was no surprise with the weight difference. But boost in those cool temps sure felt great!


I did forget to mention the week before the trip the car stalled out on me in front of my house and would not restart. It turned out that the coil went bad and had failed. It was also the source of the slight misfire I described above. I had checked the plugs and they looked good so I had been thinking of Wasted Spark. For my low boost setting, no need so far. The (used) replacement did just fine as I understand they rarely fail. Surprising that it failed, but otherwise smooth sailing. Deciding if I want to buy new or just a cheaper used unit that will work just fine.

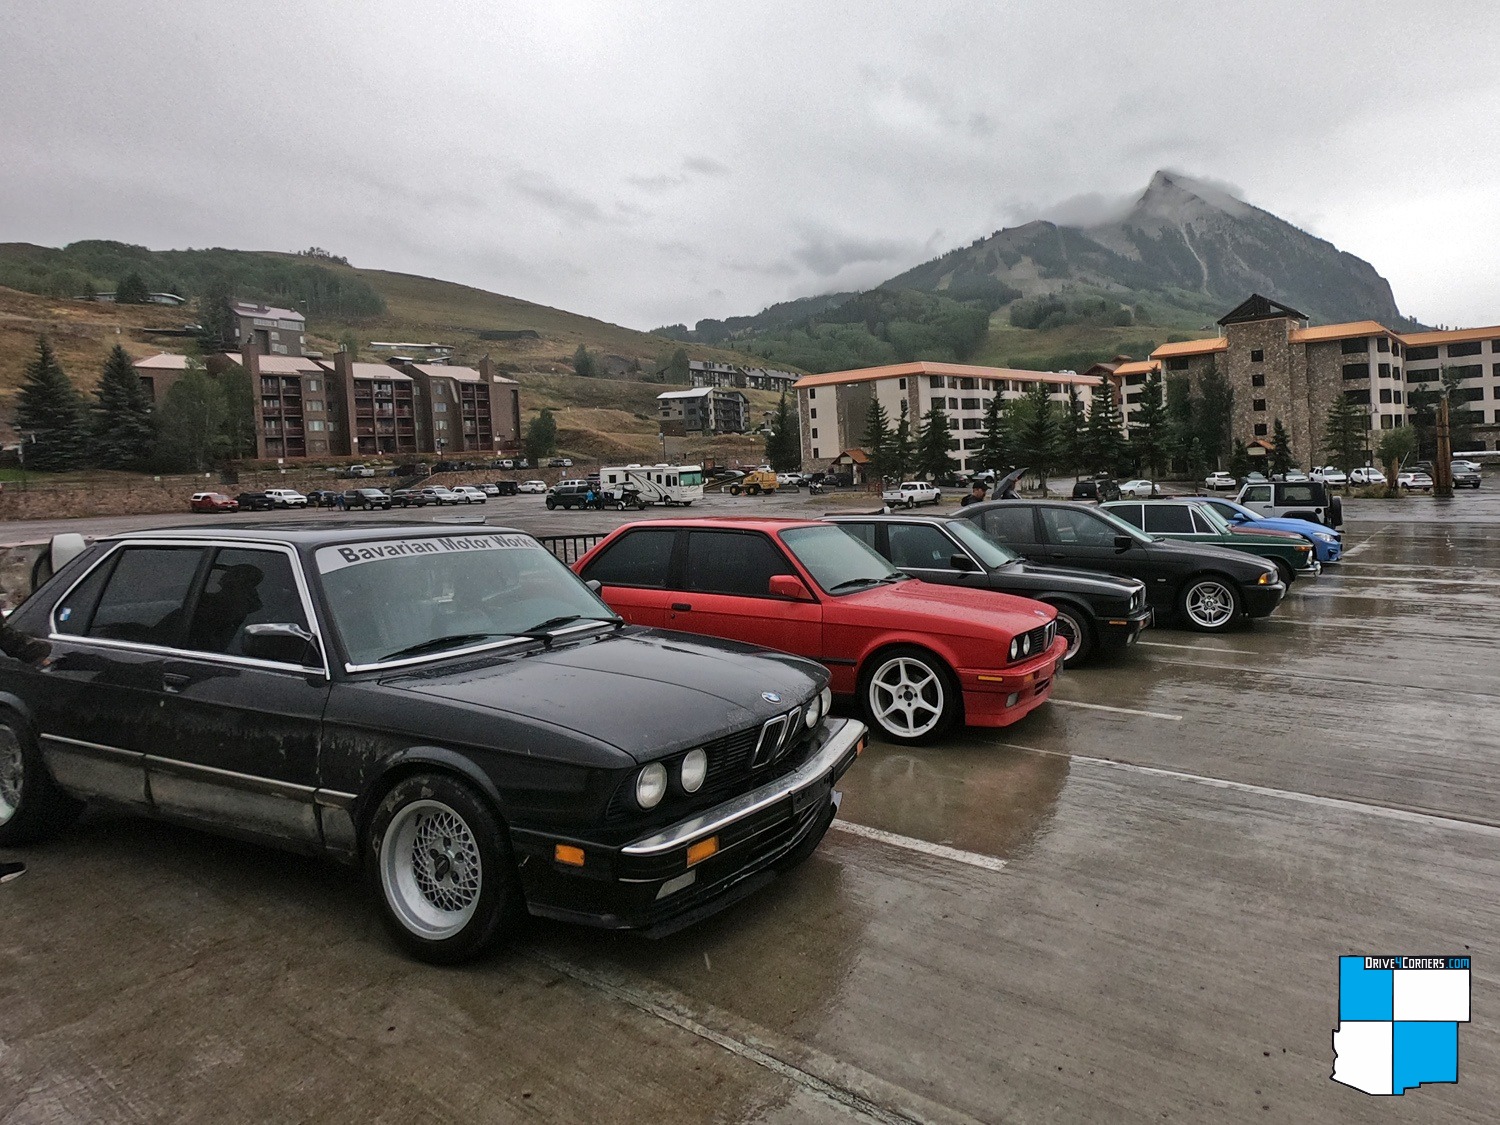
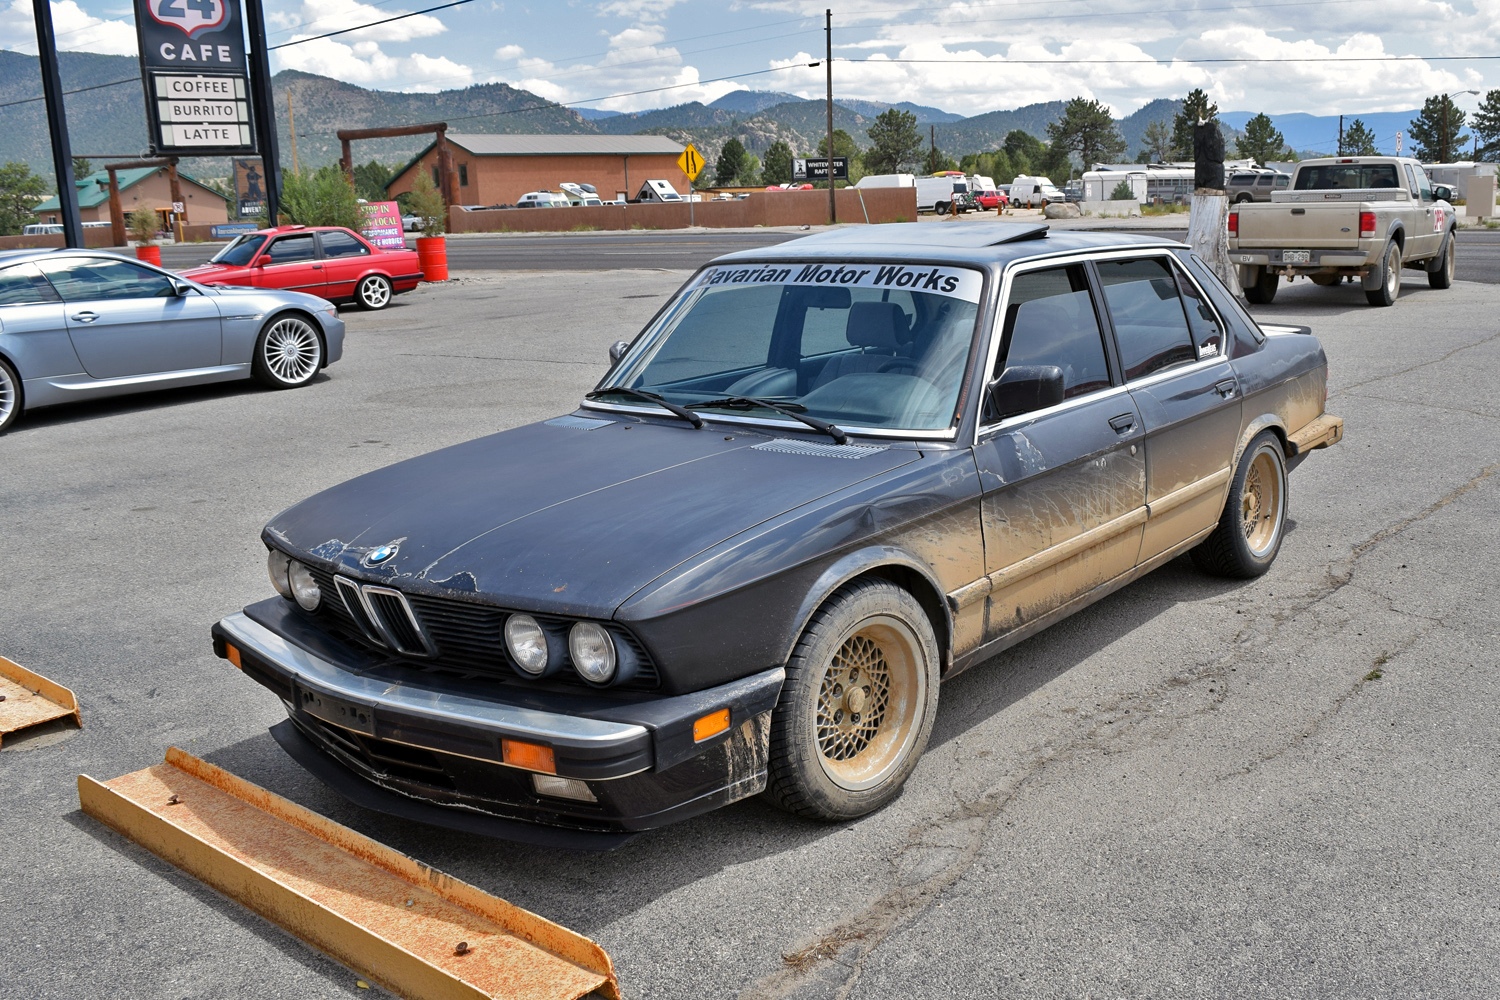
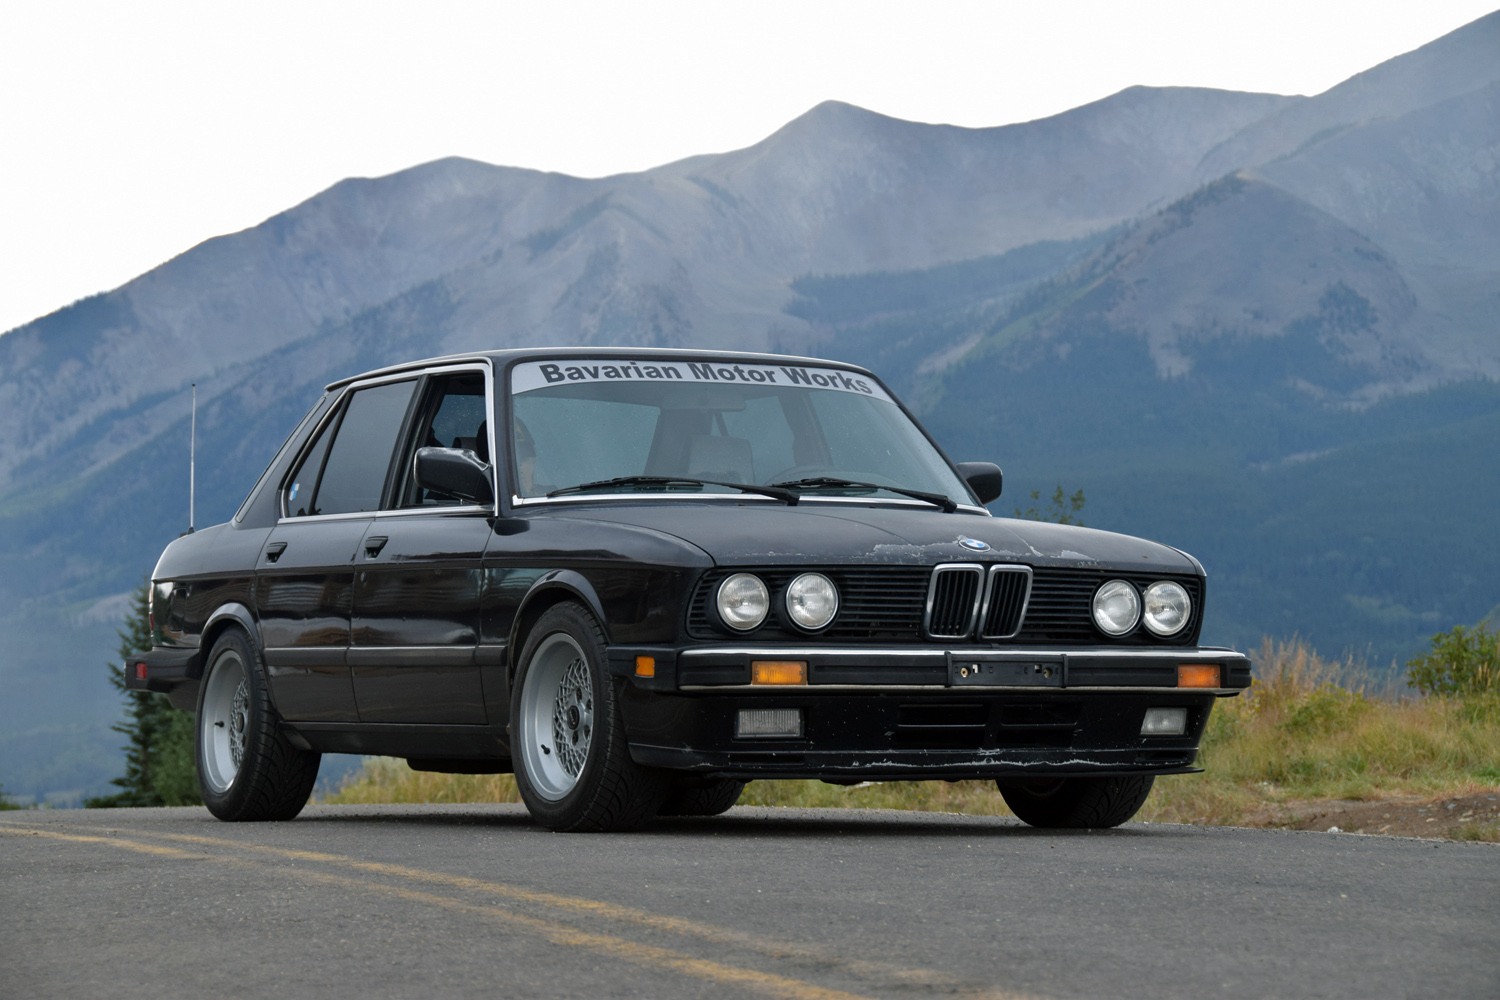
A couple more photos.
Image

Image

Re: 535is Turbo (ex 633 Callaway)- 2020 Update

Posted: Nov 03, 2020 9:42 AM
by tschultz
I have been letting you all down with my lack of updates and photos, I know!

The cooler temperatures mean I haven't yet swapped out the radiator but plan to do away with the south African unit--harder driving and the temps just creep up and up if the ambient temperature is above 70F. I have been driving the car for the last 4+ weeks and made some small adjustments in the tune.
This means I have driven the car about 2750 miles this year, a lot of which has been trying to tune is for consistency in the tune and drivability like stock. I am averaging about 20.5mpg and running up to 150/160kpa boost (8-10psi).

I did advance some timing in the boost region (Thanks to Nosis for sharing his tune) which helped improve performance and has made the car fun to drive although it doesn't loose traction when going straight due to the way boost arrives. Makes for a fun setup and definitely faster than the old M5... I might look into a boost controller solenoid to reduce the spool time some more by holding the wastegate shut, it seems my board might have the provision for it, so I just need to verify it has the output signal I expect.

I adjusted my EGO control to PID instead of Simple and noticed it was quicker and better at holding my target AFR in normal driving. It seems that there is some error built into the fueling equations where sometimes at idle the computer wants to add/remove fuel, but otherwise with VEAL running, the map I have is good for the load range otherwise, regardless of temperature. I also set the control interval for the idle valve at 100ms which helped almost eliminate my hot idle oscillation although there is a little bit of oscillation during warmup.

I also found that CLT based table is best for idle valve initial values, rather than MAT based-- this results in a more consistent tune.

I do get some strange startup behavior at about 40F and below where it takes a few cranks to keep the car running by itself. Otherwise though, I have been able to hop in the car and drive it. Smoothing out the advance in the low load range reduced some bucking that was occurring at light throttle.

Last week, I noticed boost was building way higher than expected and acceleration was lazy. I hit 178kpa (13.5psi) which is just below my boost cut limit, although I didn't fully rev it up, we were close. It felt slow since the pressure was bleeding out and the wastegate was partially open. That limit is also at 90% duty cycle of my injectors, so a good ceiling it turns out for my current setup. It turned out the wastegate line and blow off valves had popped off and boost was leaking as the wastegate wasn't opening fully (spring pressure only, no pressure assist).

I hope to share some more photos and details soon here.

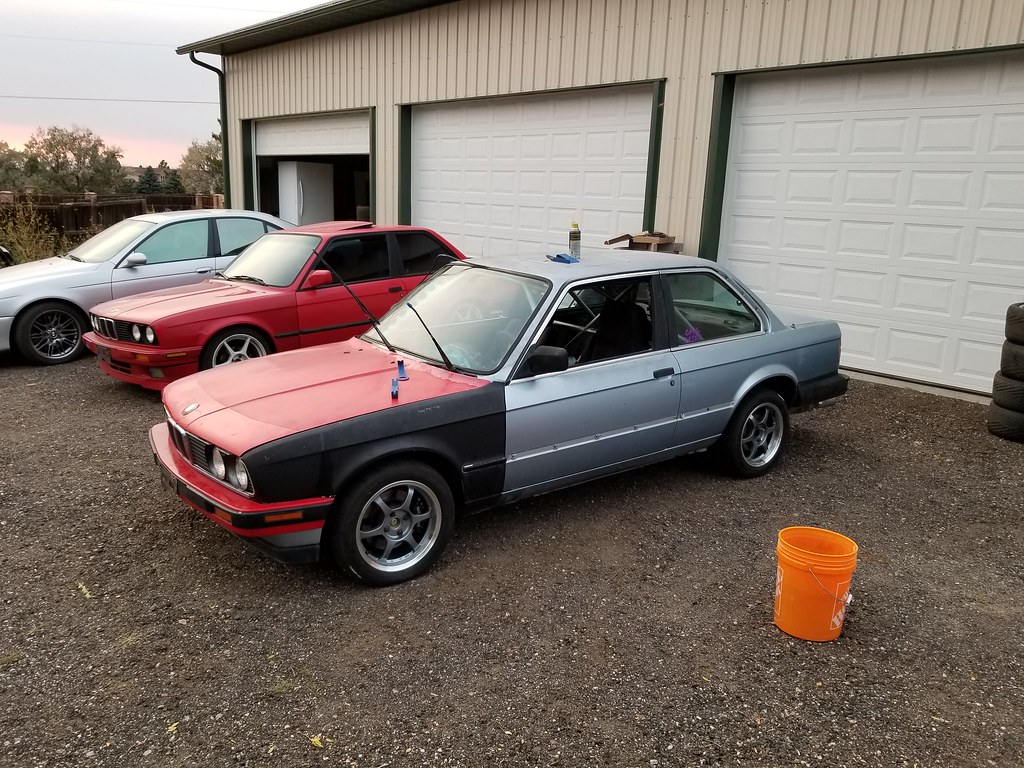
In the mean time, here is the 318i project I have been working on here and there with my brothers. I designed and had the center console 3d printed. Hoping to do something similar for the cluster surround.

Image

Image

Re: 535is Turbo (ex 633 Callaway)- 2020 Update

Posted: Nov 05, 2020 12:11 PM
by tschultz
Just to follow up, here are some recent settings from my tune, good with B34 and 91octane:

current MAT correction, about as close as I am going to get for consistency based on temp:
Image

Current barometric correction by altitude. Not intuitive but these setting work for me... good about 85-60kpa:
Image

Current throttle accel enrichments:
Image

The improved ego closed loop control settings that have been working 30F-85F:
Image

Closed loop idle settings. Sometimes has a small hunt warm and still have more of a hunt when warming up:
Image


Driving last week with the wastegate not fully opening and the boost leak--see how slowly boost builds. Hit max duty cycle of my injectors at 170+kpa. My target has been 150-160kpa for max boost.
Good to know my spark advance was good.
Image

Fixed, that acceleration and steady boost is more like it! Mixtures right at 12:1AFR. Duty cycle at about 80%
Image


Here ire the corresponding ignition table, advanced slightly in boost from 2018. Reduced advance near low rpm low load to eliminate most of the slight bucking that was occurring.
Image

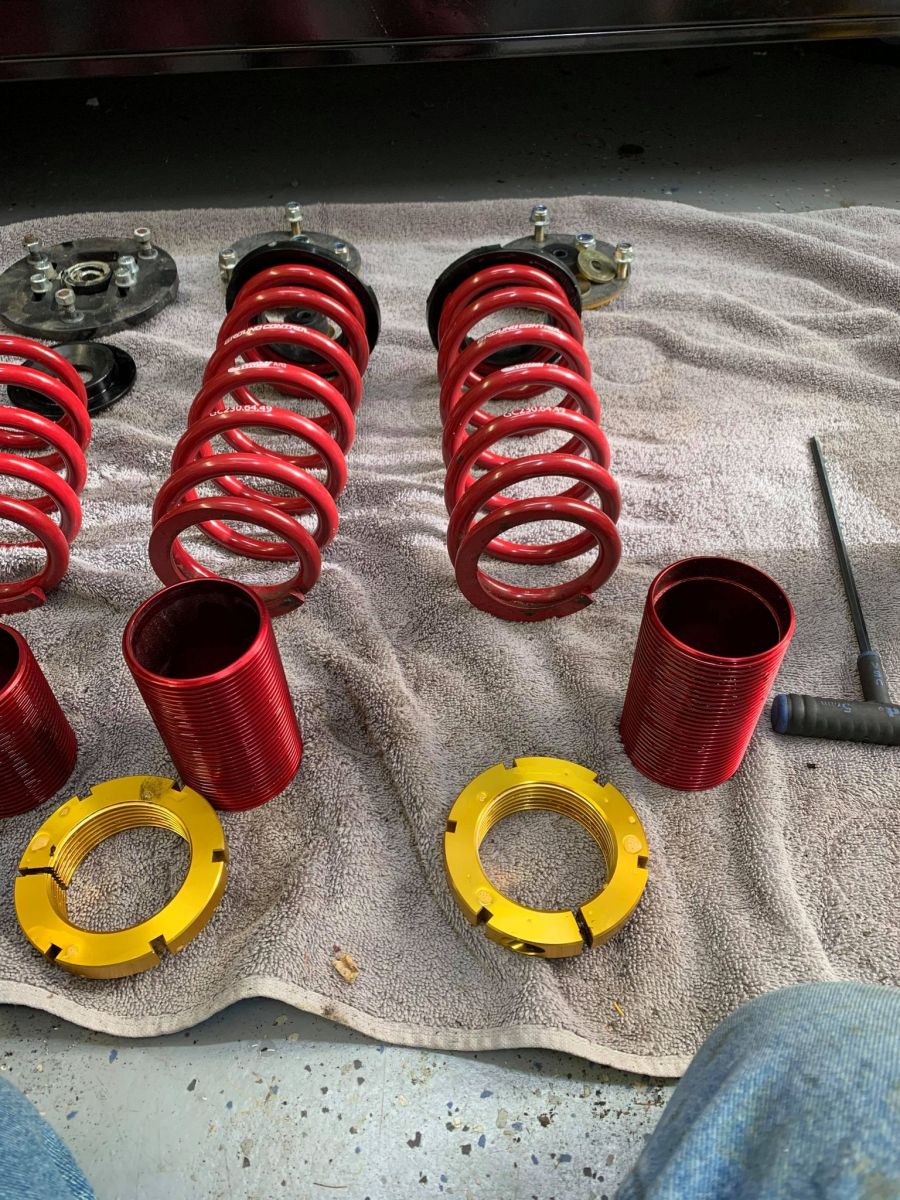
Also I found some slip on Coilovers from Ireland engineering for a good price. I decided to see if they were worth the risk in getting a stiffer rear spring and possibly changing to camber plates that will allow me to dial in a bit more negative from camber and maybe some caster and height adjustment. This was me mocking them up with some spares I have on the shelf just for comparison purposes and mounting. 280# front springs, 440# rear, both fixed rate springs.
Image

Here's how the PO had them on his car:
Image

A great thread here talking about handling: viewtopic.php?f=3&t=11423

I have found that I have a bit too much understeer, but going up close to stock ride height has helped reduce understeer. That is to say, I want to keep some rake and keep the camber in the rear close to 0 so that I don't add too much grip and cause even more understeer.

If I do go lower, I will be looking to keep the correct geometries. My 25/18 bars are good and I may play around with their settings a bit more.

Re: 535is Turbo (ex 633 Callaway)- 2020 Update

Posted: Dec 09, 2020 3:02 PM
by tschultz
Another update on the 535is.

Recently I have been working on the reliability of the 535is and still haven't figured out the cold start issue. It stalls after starting up when temperatures are below 50F. Touching the throttle makes it stall. But when warm it works great. Still working on that.

In the mean time, I did some research and found that the springs I bought would give me a similar bias as the Dinan setup. So I went about replacing the rears and using the height adjustable sleeves to get the height I wanted. This means I have standard Eibach Pro springs up front (~220#'s) with Bilsteins and the fixed camber plates. Then in the rear, I have 2.5" race springs (fixed rate instead of progressive) at 280#'s.

Image

Front camber is about -2.2 degrees on both sides and I have almost 0 toe.

I wanted to dial out the understeer, so going to fixed rate and increasing the rear rate from what I had was to help me. Keeping the height at the rear also means that I have limited camber in the rear to hopefully limit the rear grip and promote front grip and the front turning in better. My rear shocks are Bilstein's that are supposedly Dinan valved. I have used them for basically 10 years and they help the rear of the e28 from feeling soft like typical Bilsteins. I liked that this spring rate should be pretty well matched to the shocks for Dinan rear 280# springs.
I also turned my front sway bar (25mm) to full soft for the same reasoning as it seemed like the E28 defaults to total understeer in tighter turns.
My rear bar (18mm) is set to soft as well, but I contemplated setting it to hard if I still want more rear end action.

Height is the same as this past summer, I measured and set the bilstein to second from the top circlip.
Image


Here's my recent MAT/BARO settings.

Image

Ignition advance. I backed off some advance for smoothness near low load/low rpm. That got rid of most of the jerkiness.

Image

I run through a couple round-abouts on a regular basis where I can easily assess how the car handles. The spring change certainly helped the rear want to slide earlier, so the next step was the sway bar change. That again helped and make the car feel easier to change directions.

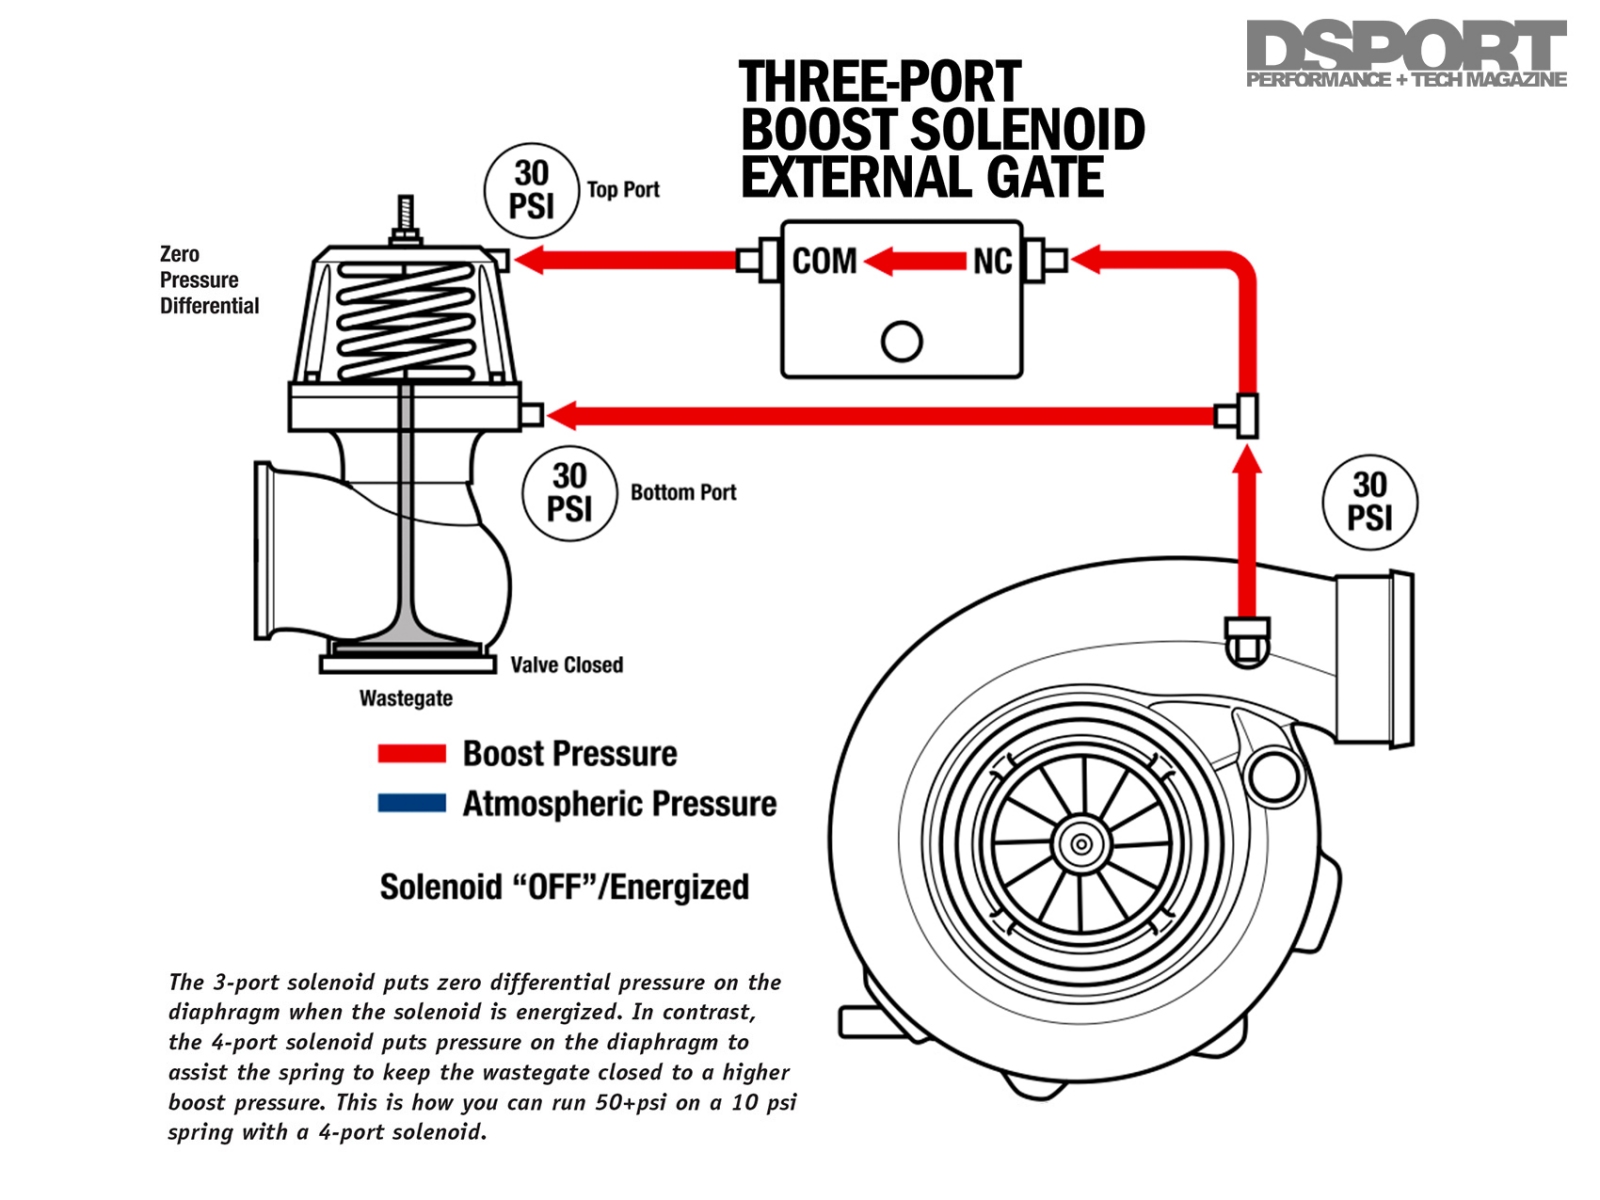
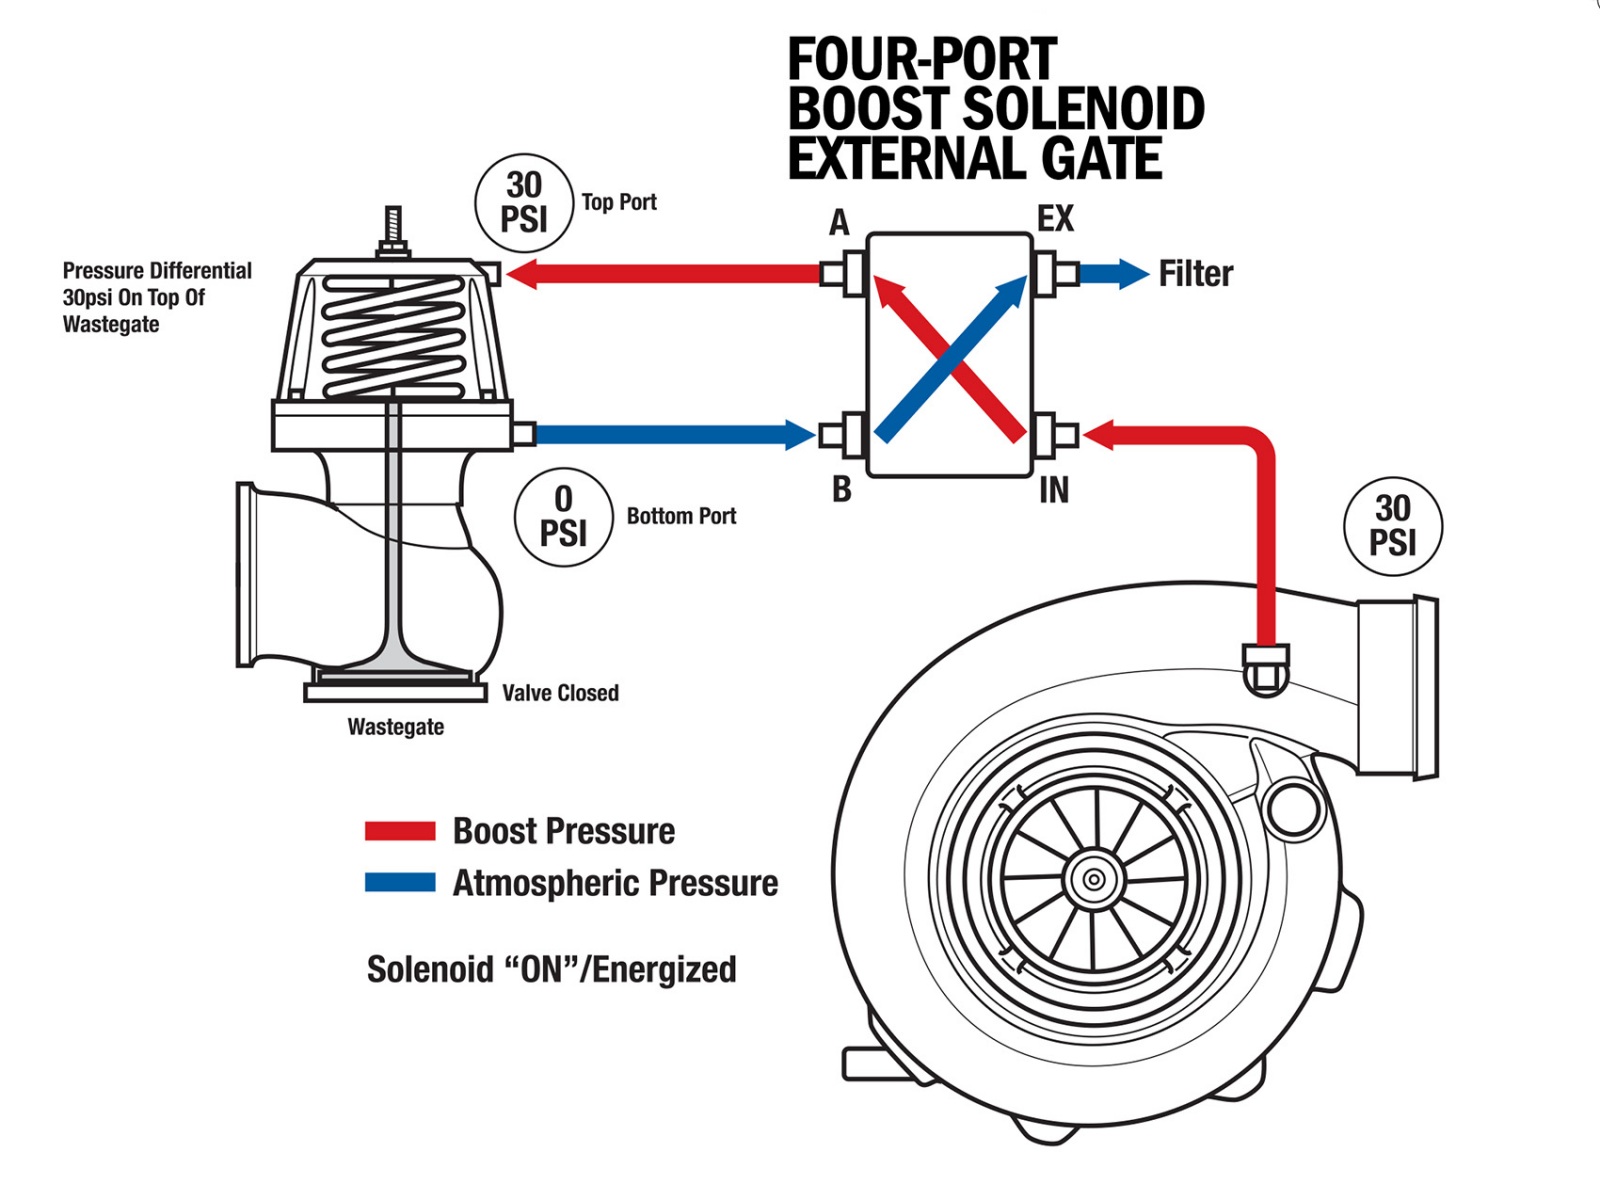
I just purchased a boost controller after thinking about the output of my megasquirt unit. I confirmed it was wired up with grounding signal on the IAC2 circuit. I did some research and decided upon a 4 port solenoid valve that I can run as 3 port or 4 port MAC 46A-AA1-JDBA-1BA.

Image

Image

The main advantage of the 4 port is that you can send boost to the top of the wastegate with no signal to the bottom to literally hold it shut. This allows high boost control up to 4x the wastegate spring but I decided to use it like a 3 port because I didn't want to have the touchy duty cycle where 1% duty could change boost by 2-3%. May play with those setting later since now I have the option.

Image

The controller simply starts with an initial value table like idle valve and then sends a signal when active. The signal is a pulse that is a % of the window of time, so 100% duty is open fully for the full unit of time. 50% is half. Then, the frequency settings change how long/short the unit of time is. So in test mode you can audibly hear the change in speed of opening/closing when going from 19Hz to 15Hz-- it gets faster.

Here are some datalogs once I got it hooked up and was testing it's function. I found that 20-30% duty gave me about 5-10psi boost-- I was using my tunerstudio dash to view it.
This was my fist log of 155kpa after I knew the solenoid was working at 135kpa. It is easy to see that the 80% duty cycle was exceeded while boost was ramping up, trying as aggressive as possible to reach max boost.

Image

Fuel mixture was a little rich and I was approaching 85% duty cycle (the limit) of my injectors. Timing was smooth after I applied a smoothing factor on my ignition table, which is visible in the log. Notice how boost jumps above to 169kpa and slowly levels back down to the target of 155kpa. This was too aggressive PID settings and I found some detail on tuning the PID:
1- Playing with the P term will influence the moment when the boost duty will start to increase when the boost is increasing. Big P number make the boost duty coming up sooner when the MAP is increasing and vice-versa.
2- Increasing P will reduce initial overshoot and vice-versa.
3- Increasing I will slightly increase initial overshoot. If the target isn't reached initially, a bigger I term will make the boost climbing to the target faster. Too much a I term will make the boost oscillating after the initial overshoot.
4- The D term will reduce the oscillating effect of a large I number. Too much D term lead to huge oscillations in the boost duty. It takes some large D number to reduce the initial overshoot.
5- I've varied the Control Interval from 30ms to 10ms without seeing any changes in boost control performance. Smaller Control Interval will lead to higher oscillation of the boost duty.
6- You can limit the maximal boost duty by setting the Open Duty at a number lower than 100%. It is useful if you do not reach the target initially because the boost is climbing faster. But this is not a good solution because it prevent the PID code to do his job if a smaller boost target is wanted later.
7- You want some sort of initial overshoot to have a good control. If the target isn't reached initially, the I term will try to get the boost to the target, but it will take some time.
8- Initial overshoot will be bigger in higher gear (4th, 5th) for a given PID setting compared to a 3rd gear run because the boost is climbing much more slowly and the P term is supposed to react to (current_error - last_error). When boost is climbing slowly, (current_error - last_error) isn't a big number so the P term do not have the same impact as in 3rd gear. The inverse is also true : you will get less overshoot when boost is climbing faster (like in 2nd gear).
I backed off the I and D settings and saw this result, boost too conservative in ramping up, but solenoid duty a nice level setting. Boost reached 10 and was slowly rising to 154kpa, but never eaching the target in 3+ seconds. Notice the gearshift and general good control of the fuel mixture. I simply need to dial back the fuel a little bit and be at 12:1 after, not 11.7:1
Image

Here is a single pull merging onto the highway about 45-85mph. This section of the map was slightle too lean at 12.4:1
Image


I am still dialing it in, but yesterday with boost reaching 8psi(145kpa) and slowly opening to the target of 10, I got this virtual dyno plot. My engine's blowby means I think I am losing some power, but overall I will retry this plot once I get boost settings dialed.

Image


In the mean time, I just installed brake pads and did a fluid flush (ATE TYP 200)-- EBC redstuff street/track pads. They are ceramic and low dust which means they should be a nice fit for my dual duty (but street focused) use. Don't forget I have the E32/E34 upgraded brakes which allows use of E36 M3 pads.

Image

Next up, aiming for a track day with the current setup. I am contemplating changing the radiator or running as is since temps should be below 60F.
I also have an oil catch can coming to try to collect any blowby instead of oiling my intercooler as it has been.

More updates and some photos/video to come!

Re: 535is Turbo (ex 633 Callaway)- 2020 Update

Posted: Dec 09, 2020 5:07 PM
by foolish
I love the gradual improvements and am learning a lot from your experience. What will you do when it's "perfectly" sorted?

Re: 535is Turbo (ex 633 Callaway)- 2020 Update

Posted: Dec 10, 2020 4:57 PM
by marc79euro645
interesting setup! what turbo are you using again?
I have an mbc(cranked all the way shut) on a top diaphram, single hose setup. That way I get all the boost my little kkk27 can produce. I've been tempted to try a bigger turbo. I just don't know if I'm ready to upgrade everything else, that will probably fail, when I put more power in it.
I was lookin at your spark map. Mine is more aggressive, looks like you have room to move up if you wanted.
good luck

Re: 535is Turbo (ex 633 Callaway)- 2020 Update

Posted: Dec 11, 2020 3:48 AM
by Tiit
Thanks for detailed update.

Re: 535is Turbo (ex 633 Callaway)- 2020 Update

Posted: Dec 14, 2020 11:39 AM
by tschultz
foolish wrote: Dec 09, 2020 5:07 PM I love the gradual improvements and am learning a lot from your experience. What will you do when it's "perfectly" sorted?
I know I have made slow progress overall but:

The goal for this car has always been a dual duty vehicle--being a hop in and go driver for mountain runs or trips. The four doors and truck space of the E28 make it a nicely sized vehicle without being too big. It handles well overall, but I have been focused on making it perform better without spending $$$ for anything and everything. The second piece of it all is being able to drive it at the local road course and have a blast improving my driving skill and outpacing the run of the mill E36's and more modern cars. I felt more comfortable messing with and pushing the limits of the turbo M30 than the E28 M5 I had. It has been fun to gradually improve and tweak-- the process of thinking about it, executing it myself and seeing the result has been more fun than simply paying somebody to put parts on and go.

It's been a balance of my other life/family goals and car goals which is probably why I don't make quicker progress. I have a lot of ideas of course! Not sure I have decided which pathway to go, but I have thought about the following:

-Add KnocksenseMS input for safety margin
-Bring to Dyno expert for tuning and ignition advance fine tuning
-Remove dents
-Repaint
-Install euro bumpers and headlights
-Flip throttle body
-Install B35 or similar engine upgrades (head work? pistons?)
-Consider wasted spark and distributor removal
-Larger injectors and upping the boost with confidence in the ignition timing and my tuning

Otherwise is to drive it. I have put over 5000 miles on the 535is and over 8000 on the turbo 633 since I really started this turbo project in early 2015.


Marc, I have TCD's comp turbo: 60/P Trim with the garret 60 wheel which is about 65#/min for flow. I am hardly pushing what this thing can do as it is rated for up to 20+psi boost on the M30. Do you care to share your spark map? I am running 91 octane of that is different than you...

Re: 535is Turbo (ex 633 Callaway)- 2020 Update

Posted: Dec 14, 2020 6:49 PM
by marc79euro645
I'll be glad to share . I just have to figure out how to post pics. I'll work on it.

Re: 535is Turbo (ex 633 Callaway)- 2020 Update

Posted: Dec 15, 2020 6:19 PM
by marc79euro645
NOTE;

Re: 535is Turbo (ex 633 Callaway)- 2023 Update

Posted: May 03, 2023 9:55 PM
by tschultz
Long overdue update.

I have Burt still though haven't been driving him as much lately. I was collecting parts and then got extra busy welcoming my second child last year. Two boys keeps me busy, that's for sure, so my time was limited as far as car projects and simply maintaining the fleet was about all I was able to work on.
A lot of spare time went towards the M42 E30 for 24 hours of lemons in 2021. We raced in september but had re4liability problems and could not complete the full 24.

Donated the front airdam from the 633 for the car
Image

painting it ourselves
Image

Image

Some work last yer in 2022 got the car runnign reliably finally back in November for us to hit a race or two this year in 2023
Image

But for the e28, I was slowly collecting parts and deciding about some improvements on the car. I got some pistons and a B35 cylinder head and decided to start a B35 engine build up. Main reason for this is for better response and a new engine with rings/bearings.
Image

Image

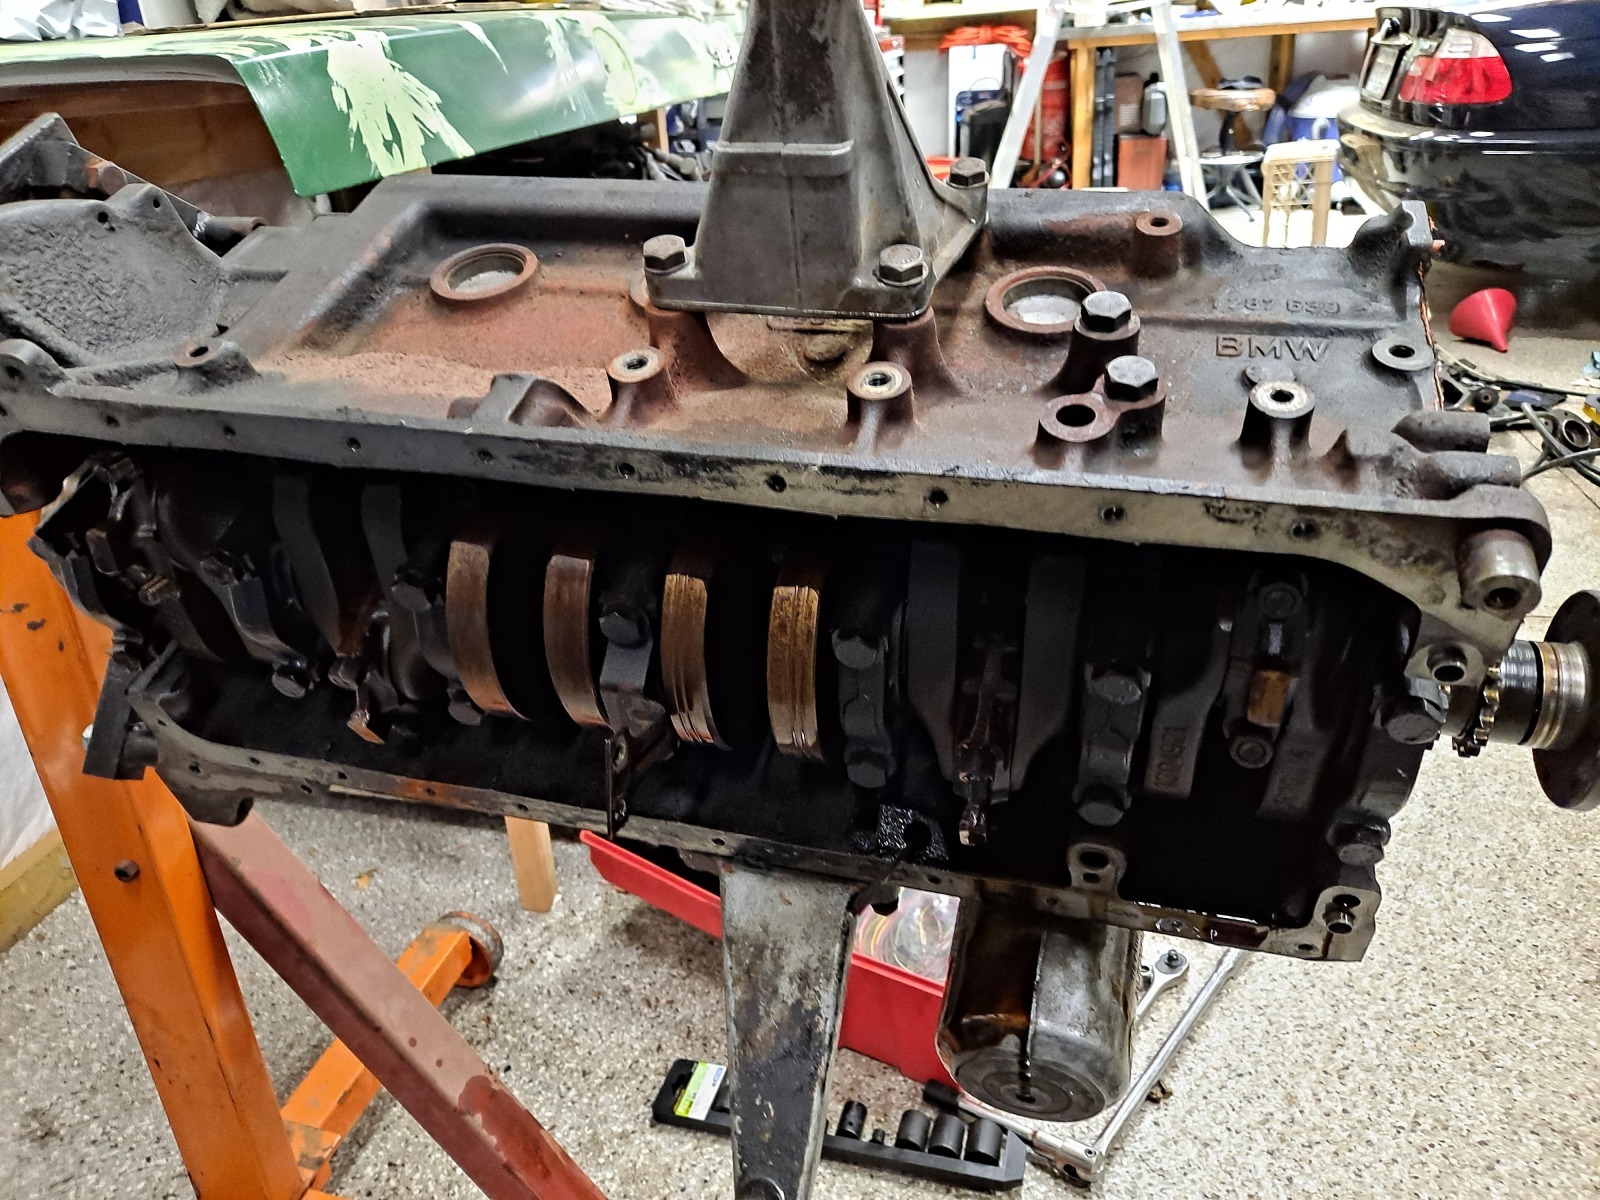
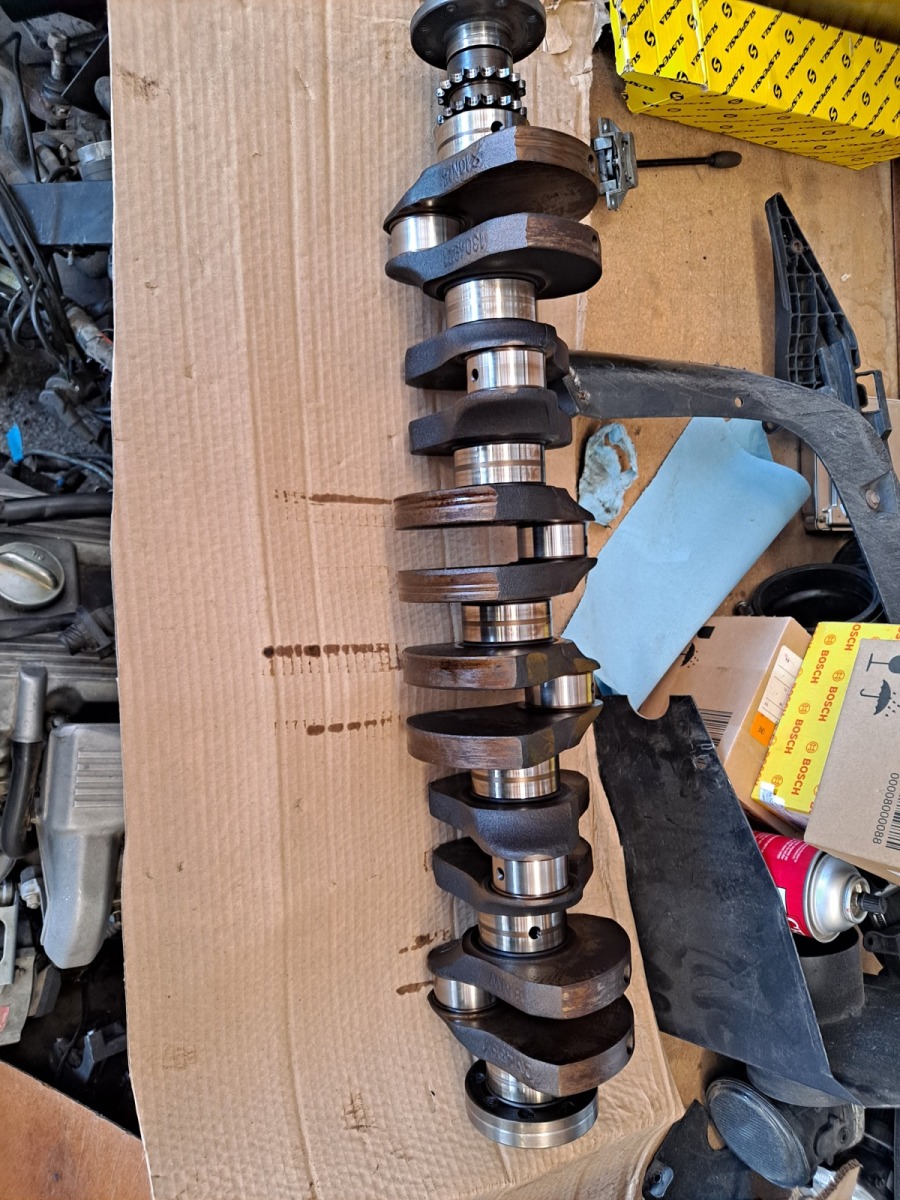
crank measured within original spec!
Image

Image

Image

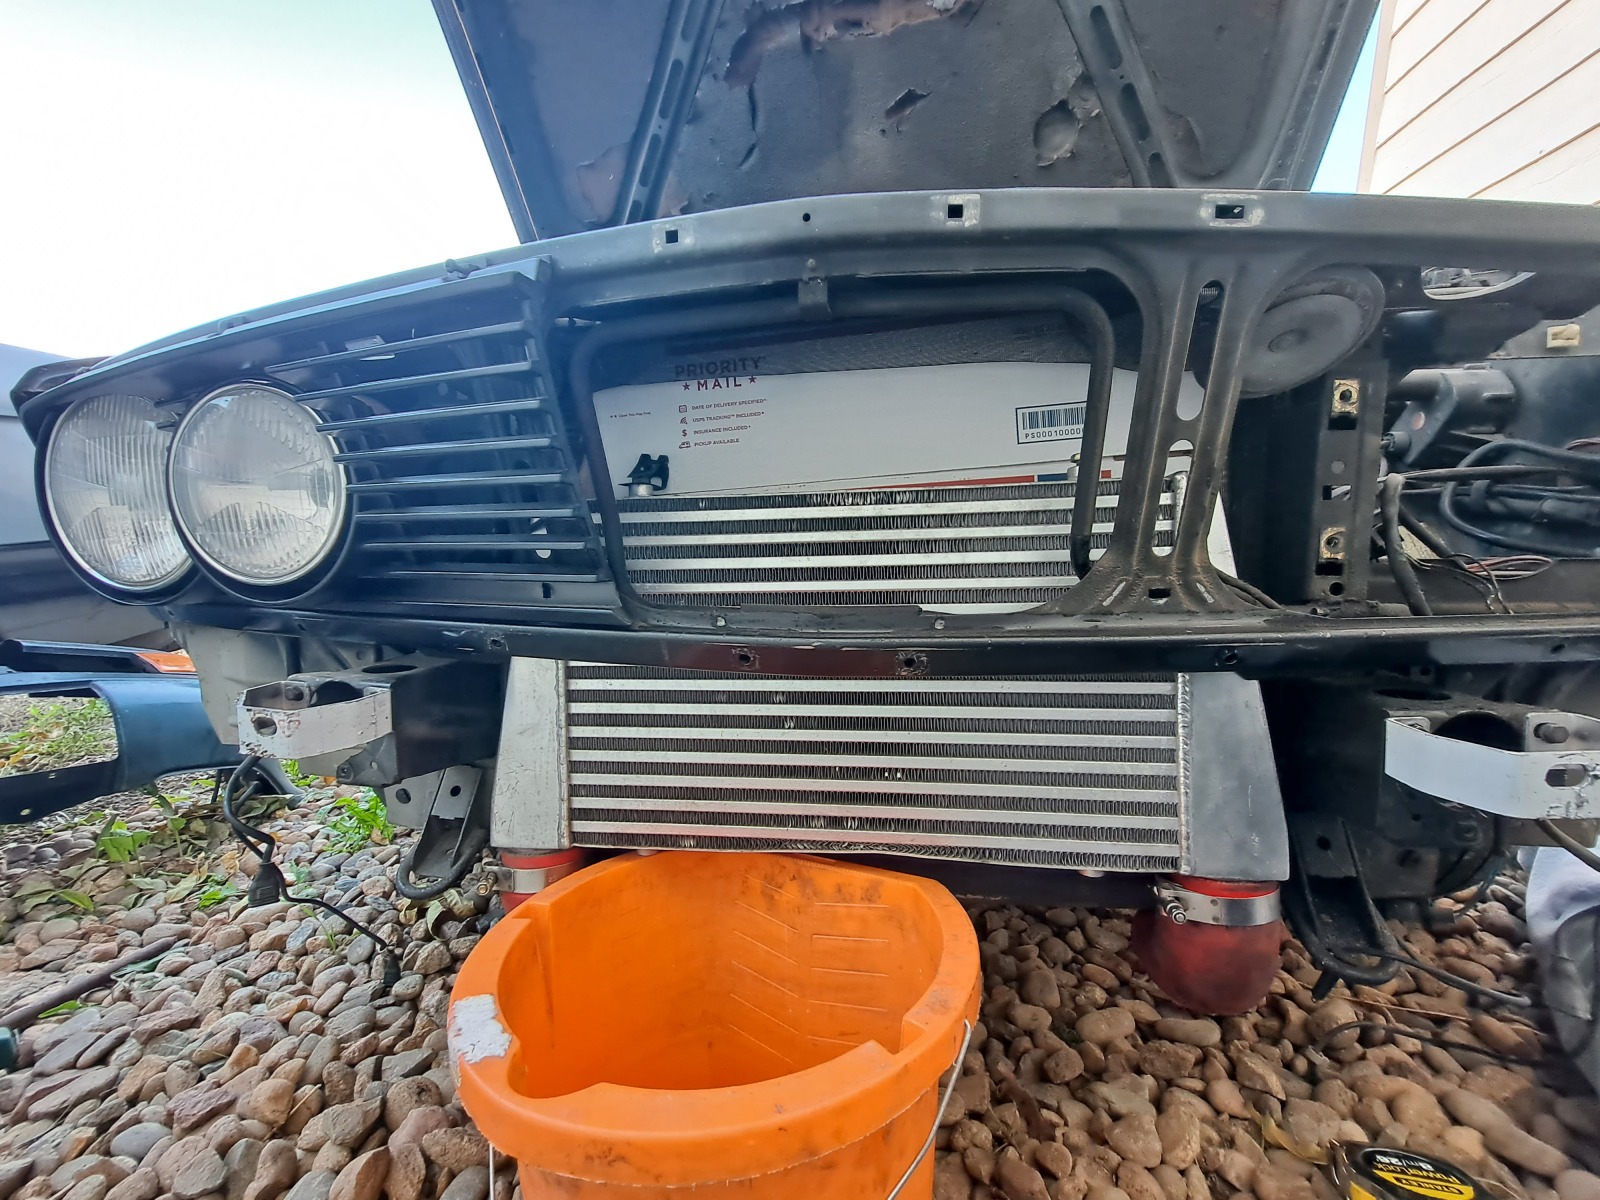
Looked at mounting my intercooler a bit more solid. Here is the mock up
Image

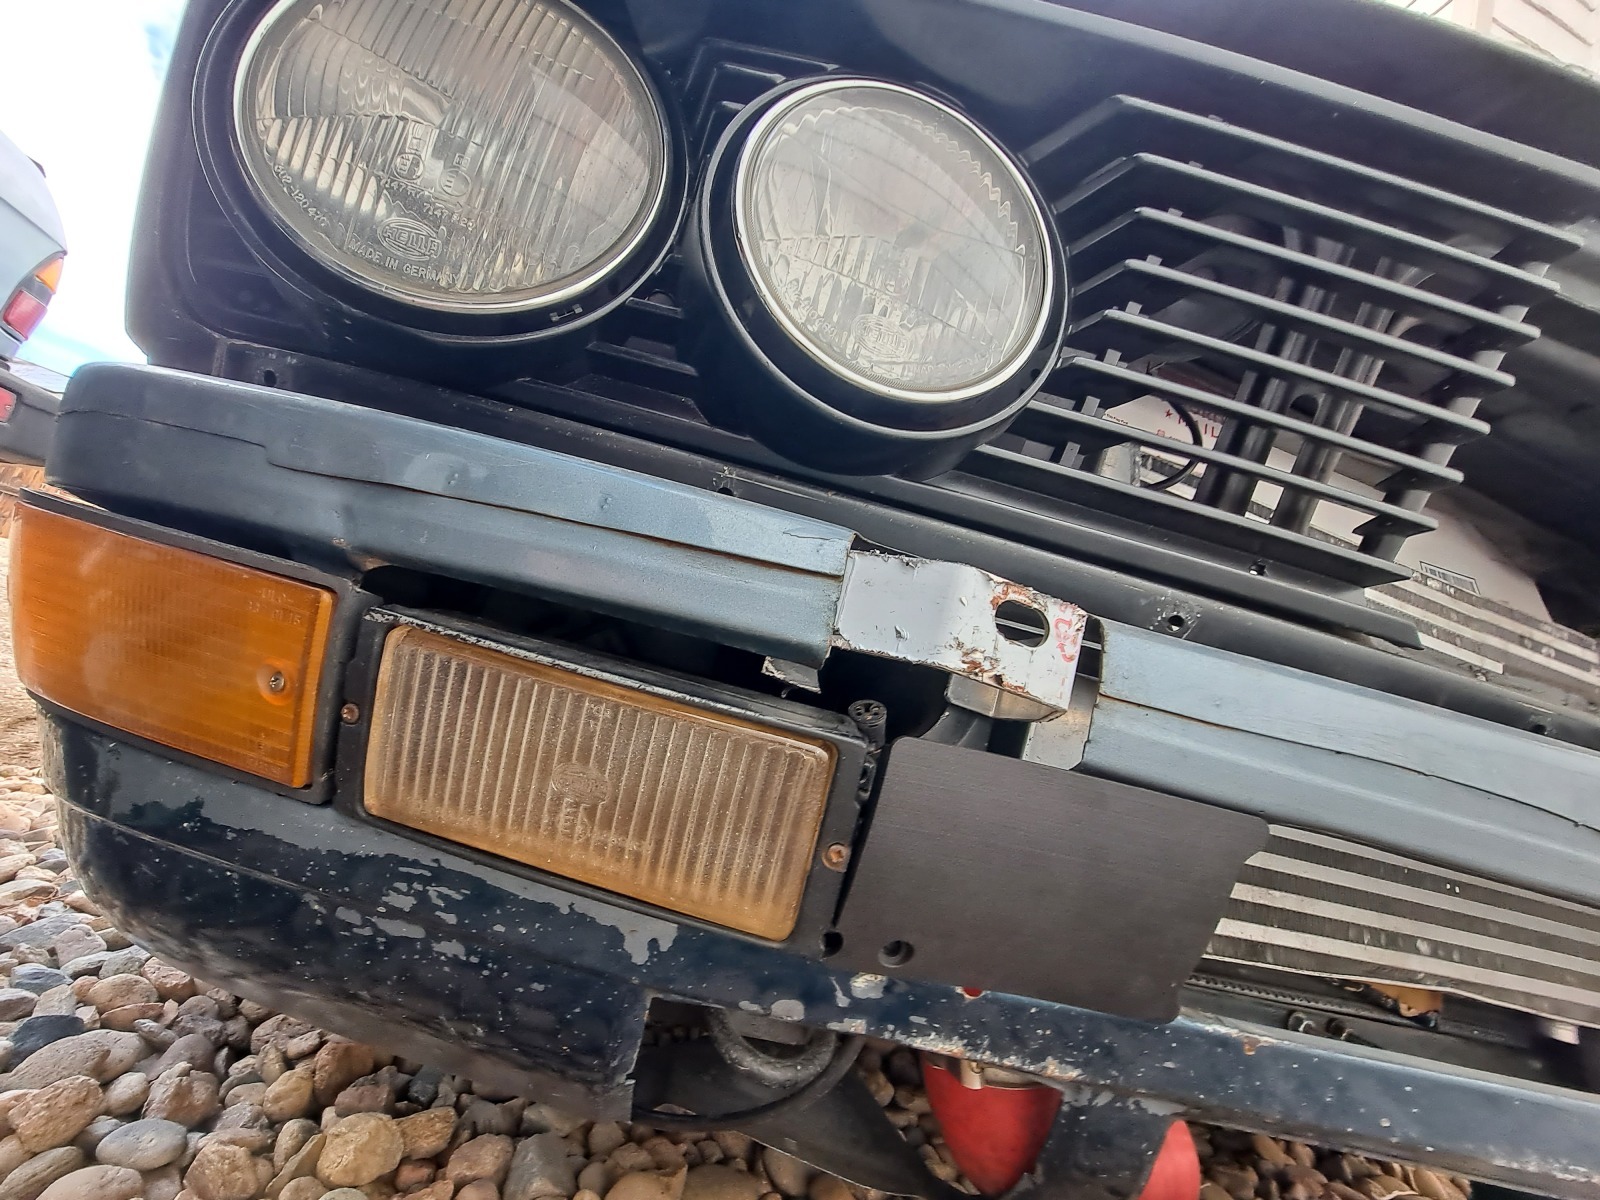
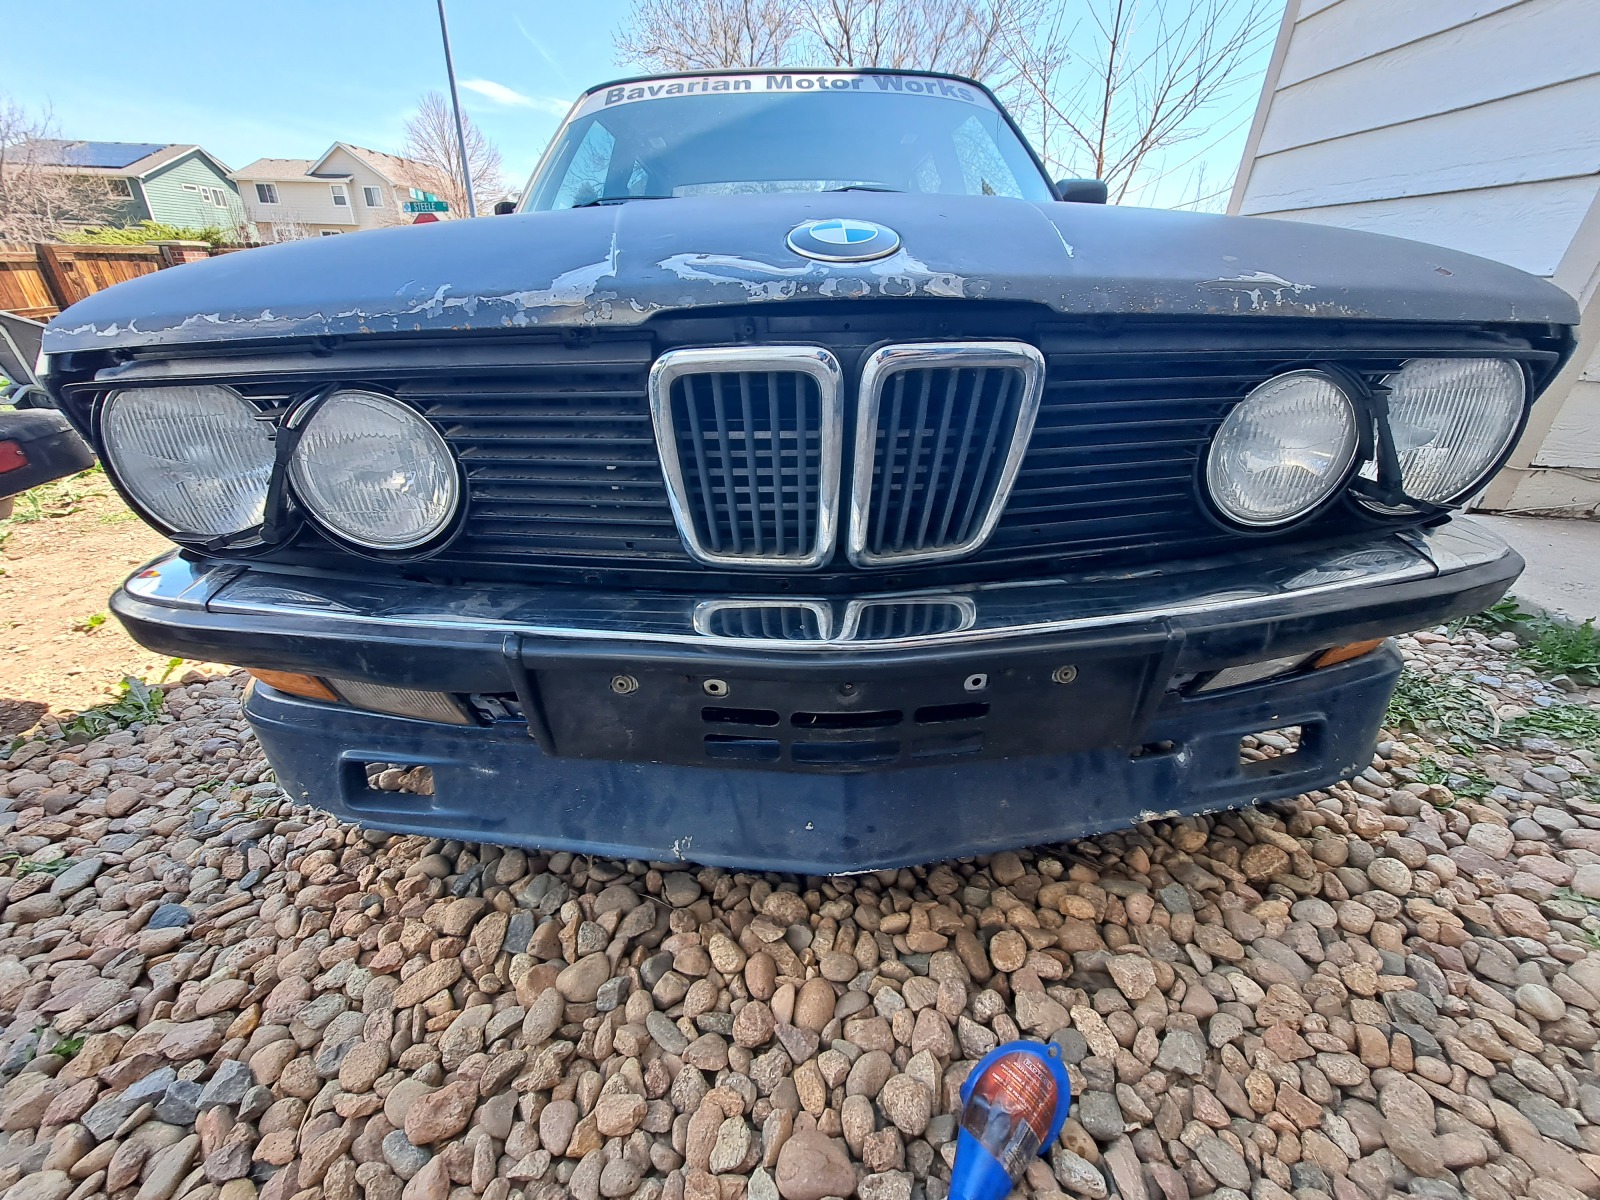
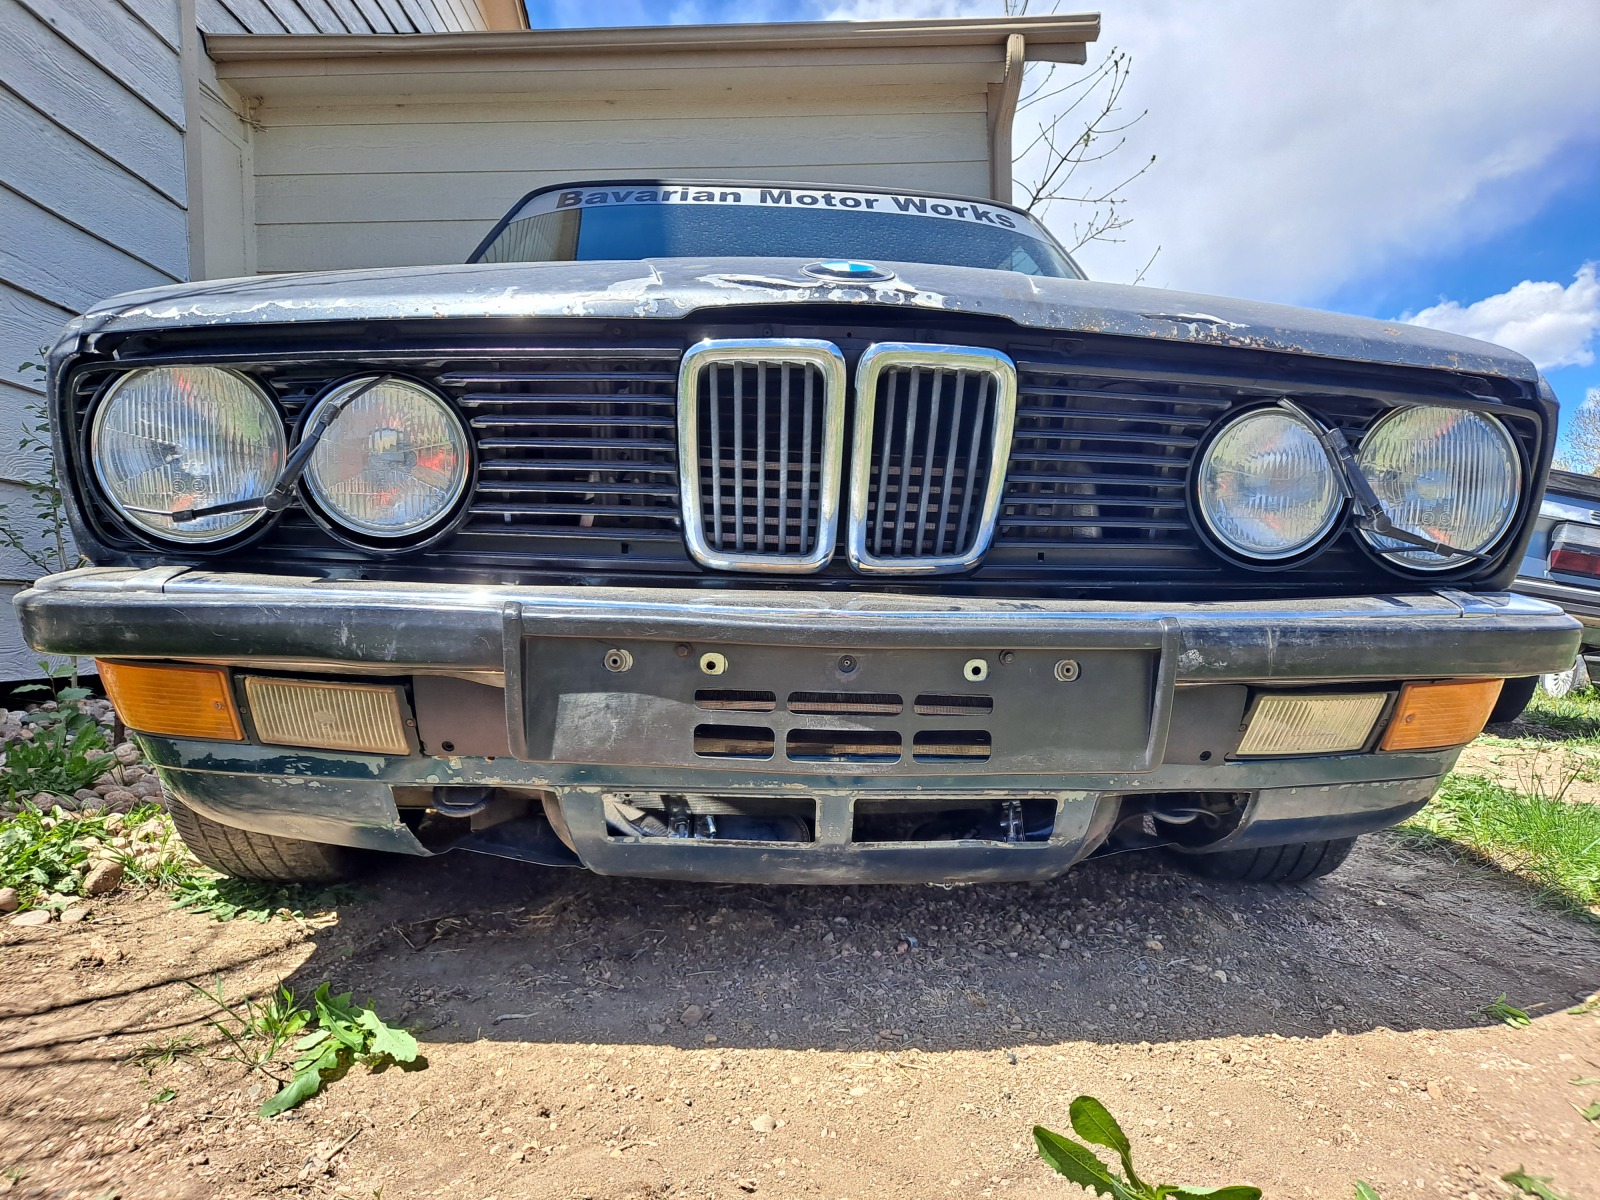
Playing with euro valance and fog light clearance from the frame rails. Some used euro headlights!
Image

Got some new piping to mate the intercooler all underneath the euro valance, euro bumpers and front airdam. Also got the replica euro headlight wipers and I think they look pretty good for replicas!
Image

Image

Piping routed
Image

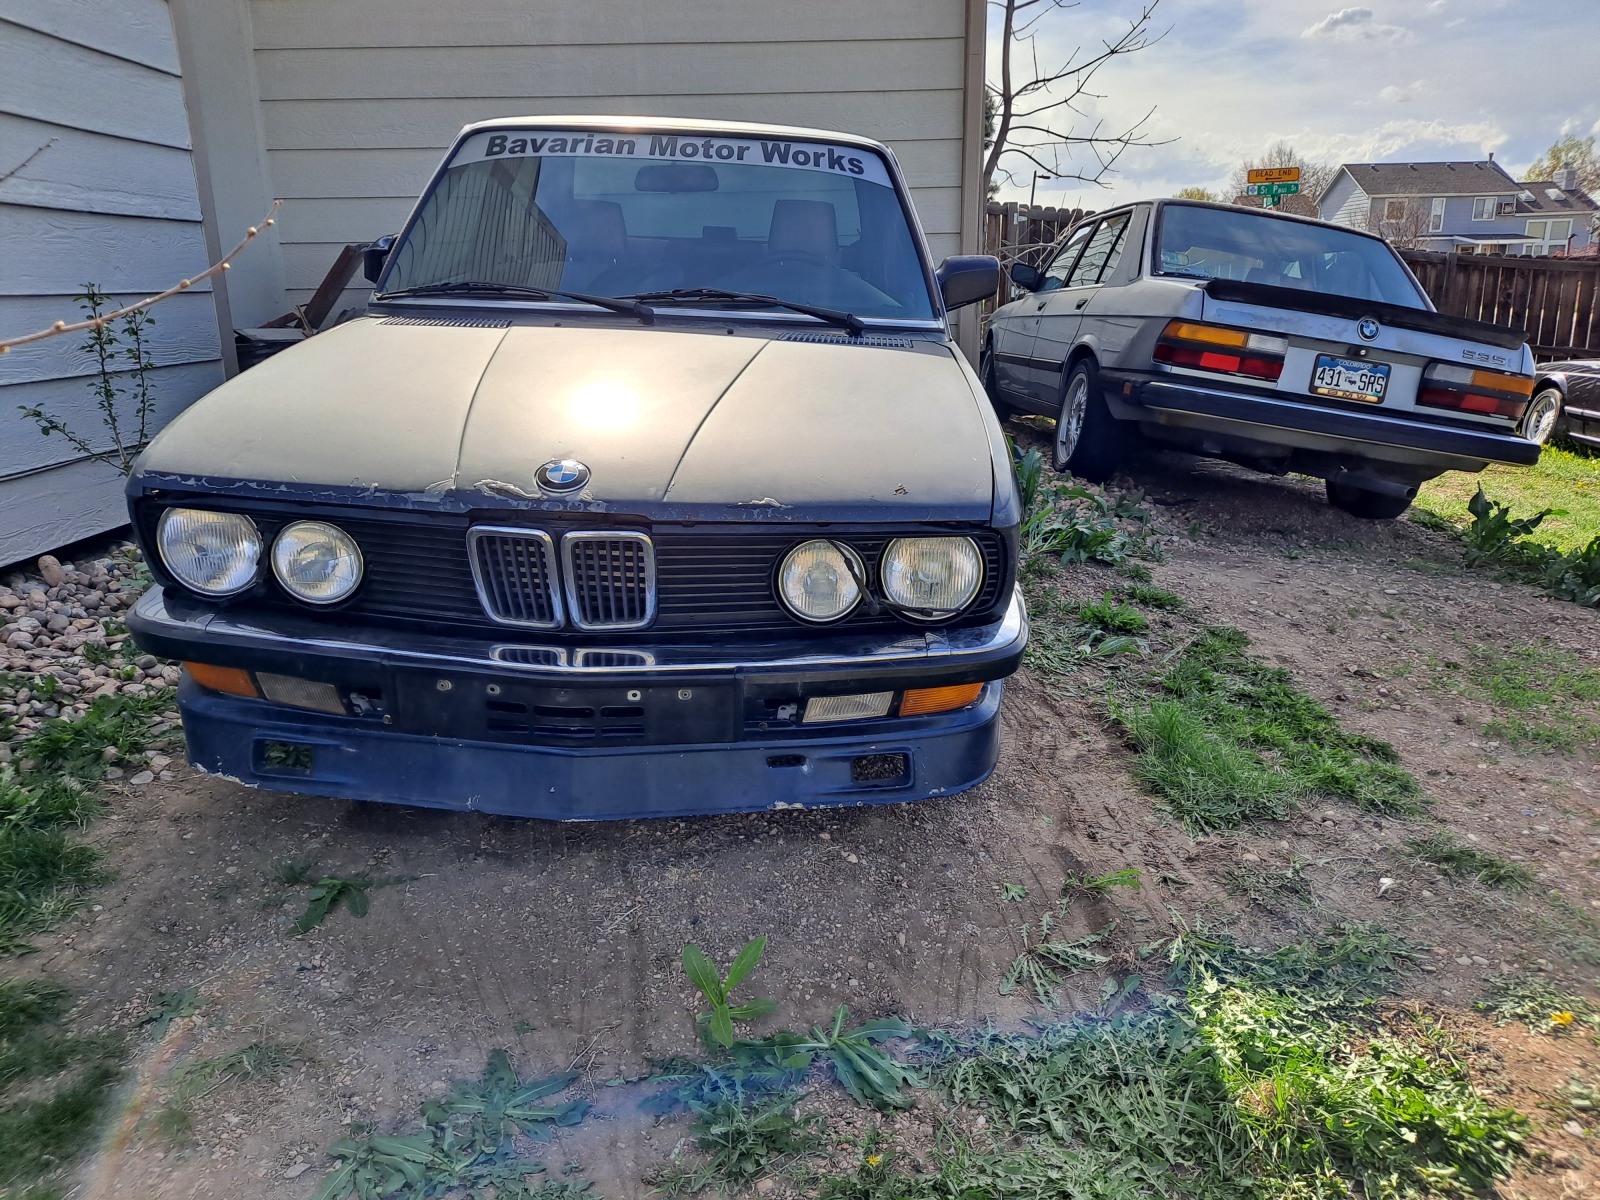
Next to my '85 which has been parked for a little while also
Image

Re: 535is Turbo (ex 633 Callaway)- 2023 Update

Posted: May 04, 2023 11:36 PM
by turbodan
Can you slide that intercooler up a bit if you trim the sheet metal under the grilles? I think it's worth it to maximize clearance and keep the plumbing tight to the bodywork.

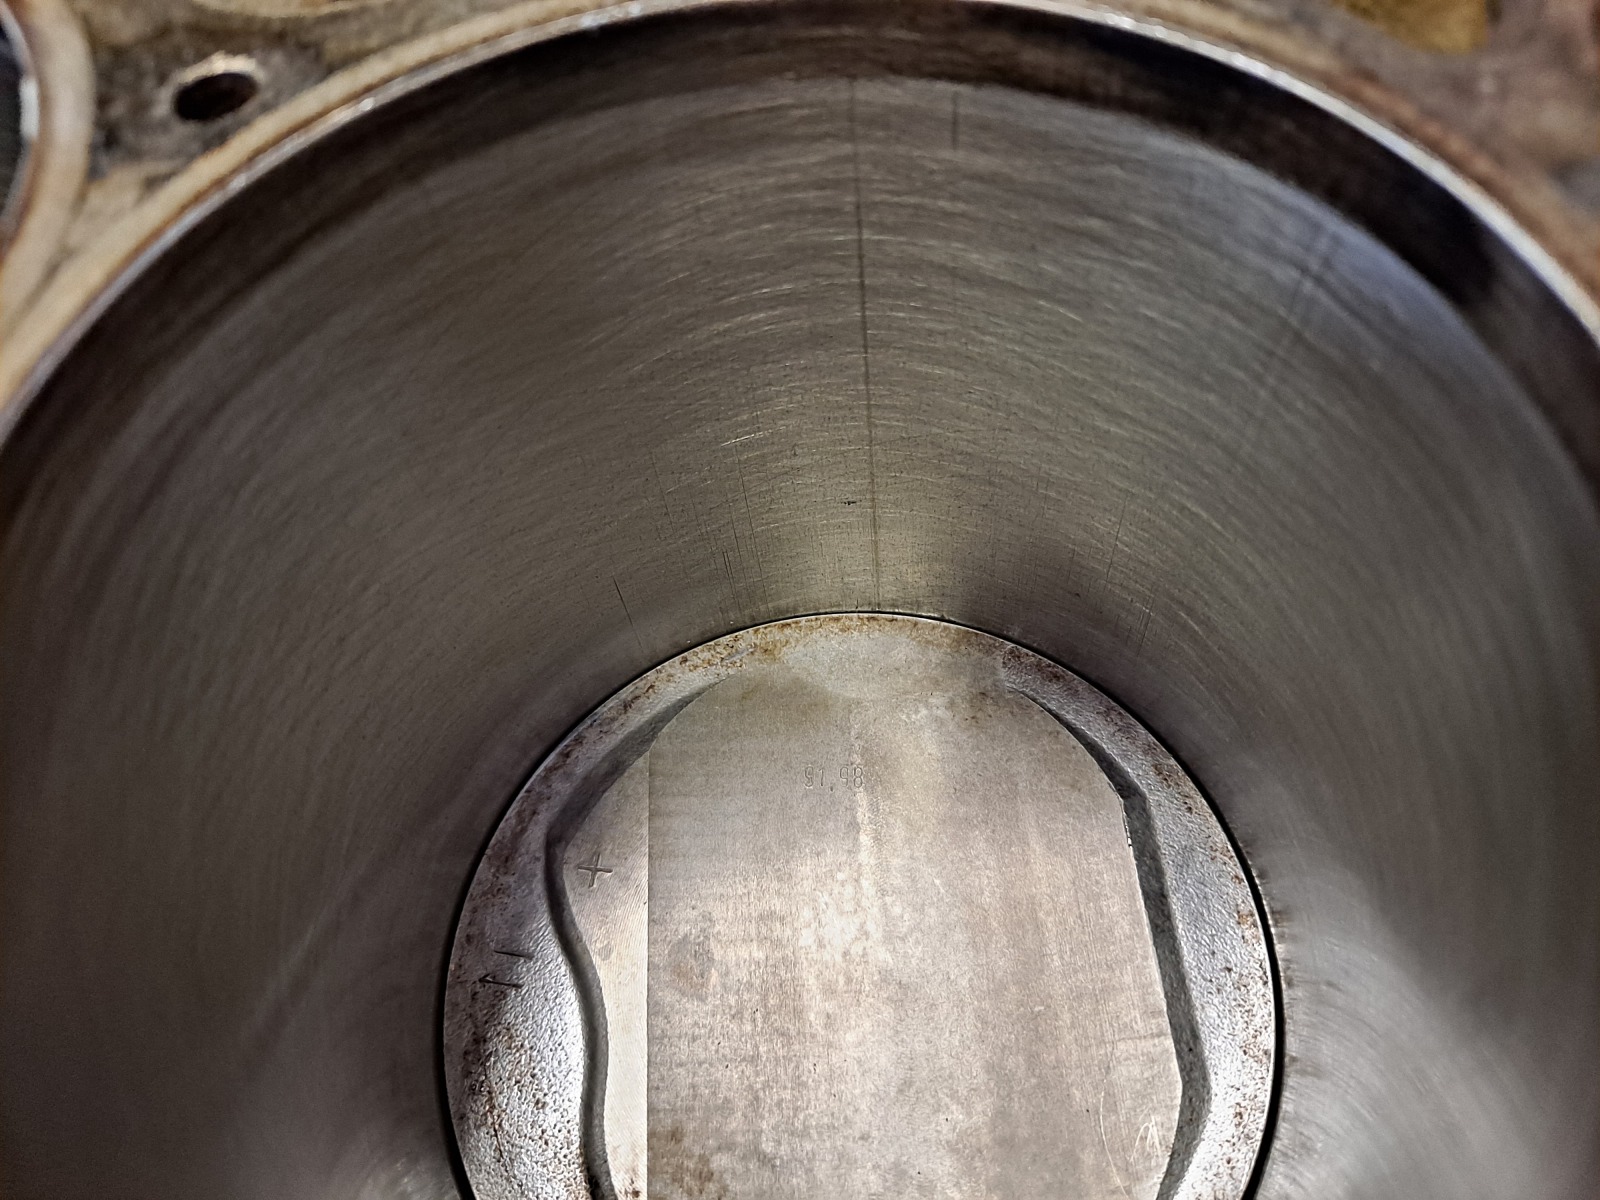
I love the durability of these engines. After 35+ years all they need at most are rings and bearings. Cylinder walls are mint, crank journals look new.

Re: 535is Turbo (ex 633 Callaway)- 2023 Update

Posted: May 08, 2023 10:09 AM
by tschultz
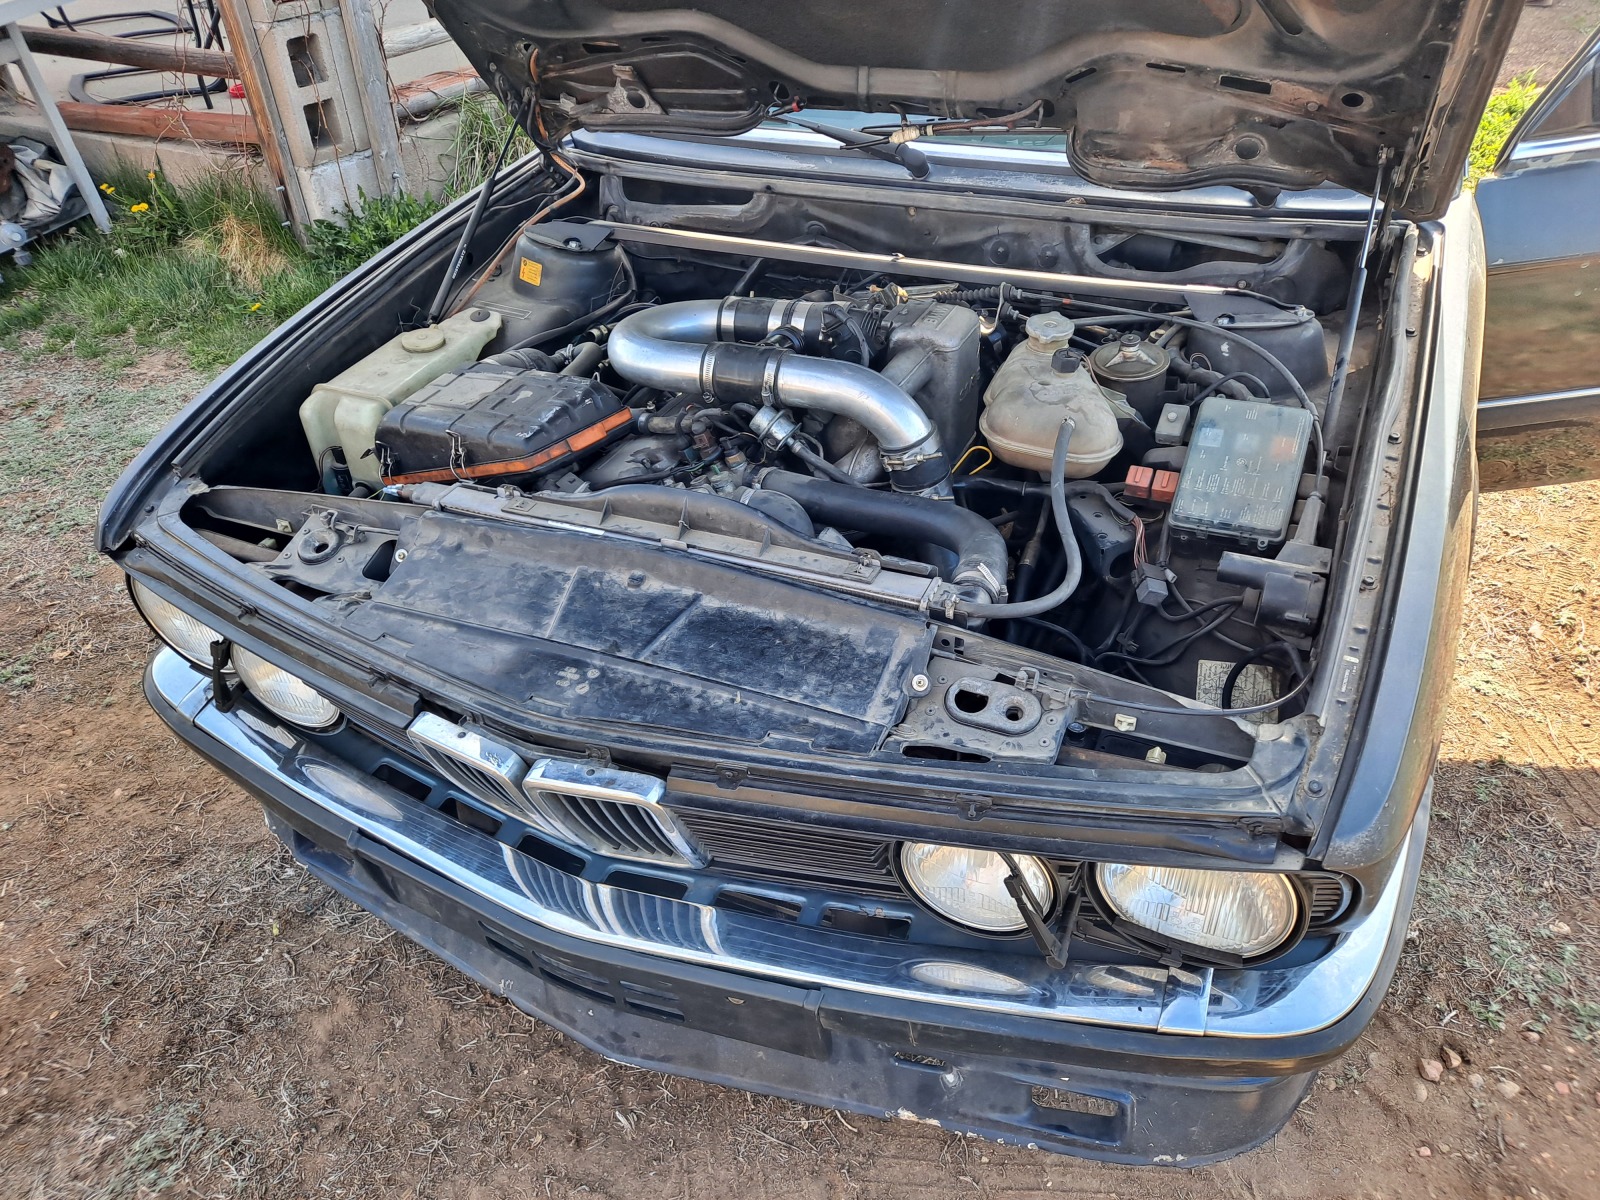
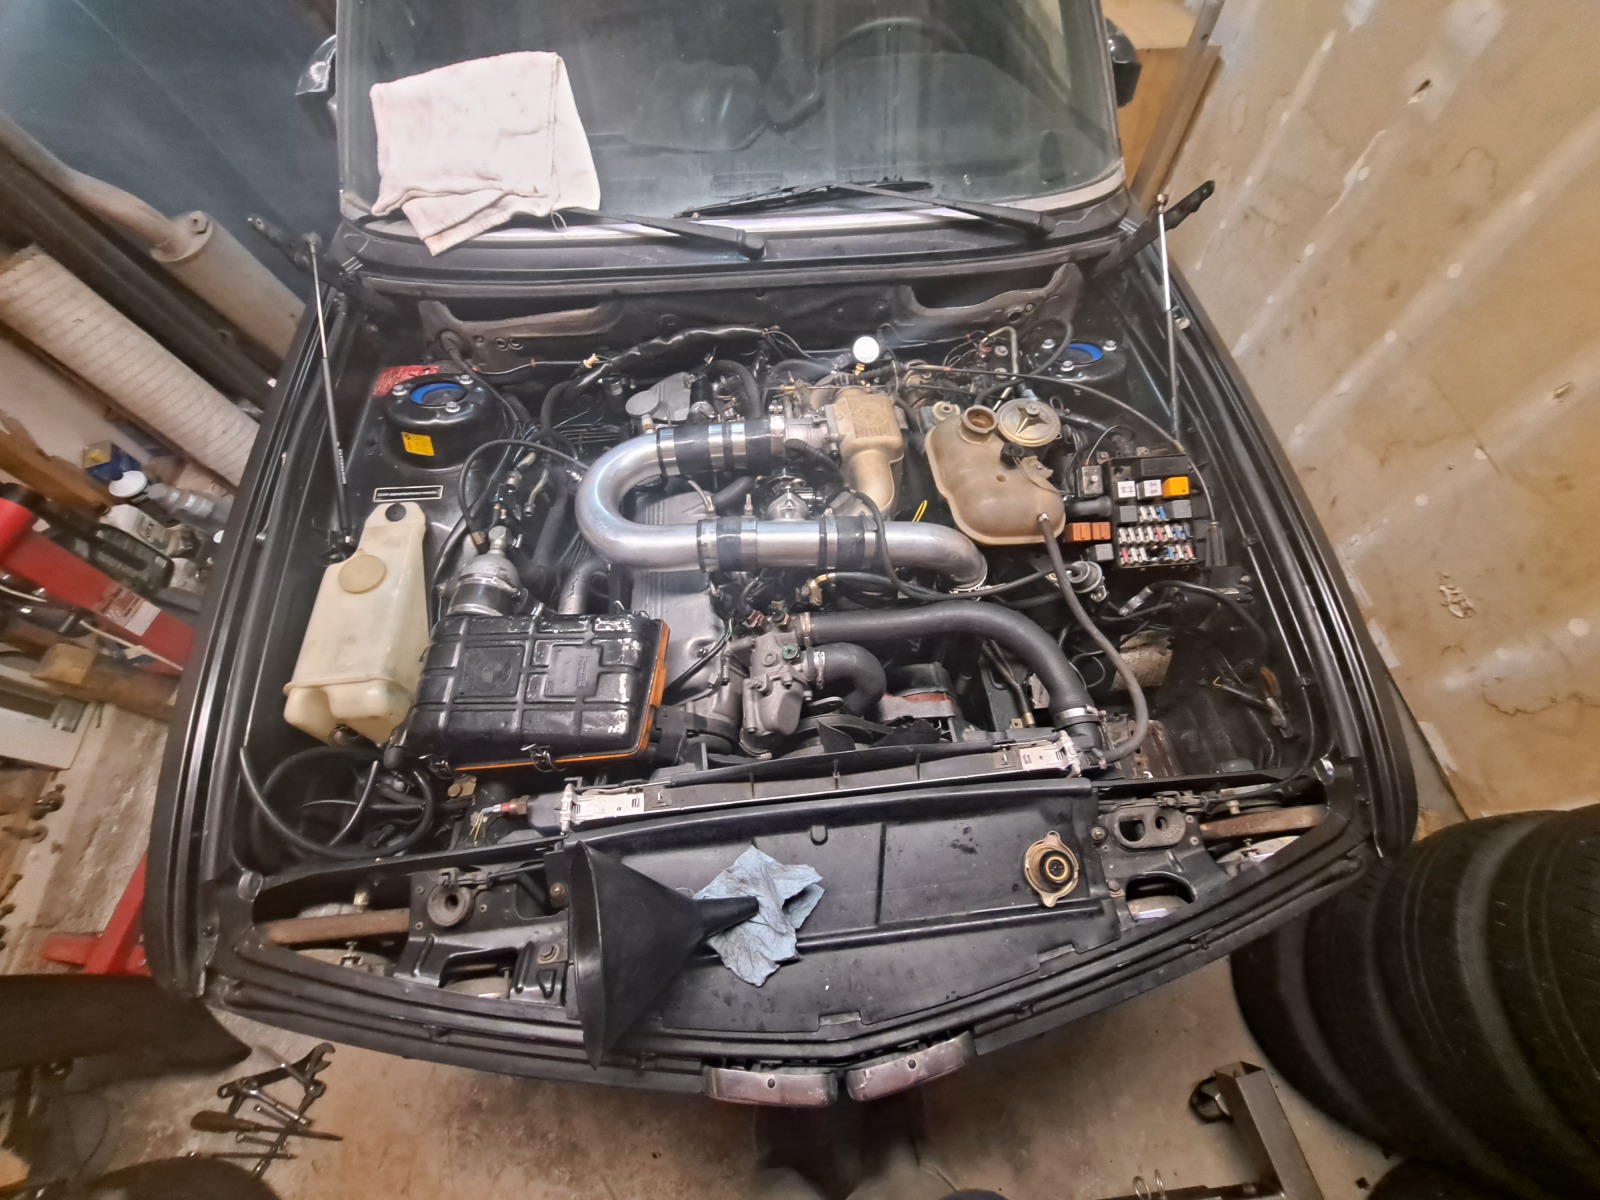
Not sure why the engine bay photo didn't work, but here it is again. Sorry for the dirty, car hasn't been washed in over 2 years.
Image

In moving the intercooler, I am limited by the pipe routing under the front end as well as the sheetmetal in the nose. Both prevent it from going up. So if I were to ever upgrade, I think I'd try to get a similar unit that was just a bit taller.

Image

You can see my 2.5" piping which is going underneath the front end but hangs about the same height as the oil pan. I couldn't really fit it the way you did (above the tow hooks) because I have euro fog lights in that area. I wanted the euro look so I was willing to go with this solution. You can also see my euro valance covers in that photo. I had them made and am selling to help fund the build. I have 10 sets remaining right now.


Very true Dan, here is a better photo of the cylinder wall! I don't know true mileage for this block as we pulled it from a 533i and then I ran it for a few thousand miles in this car before pulling it back out in 2017. It did have an oem Goetze headgasket which was a good sign! I'll have to record the vin on the block and see what it originally came in.

Cylinder #4 during piston install
Image

Image

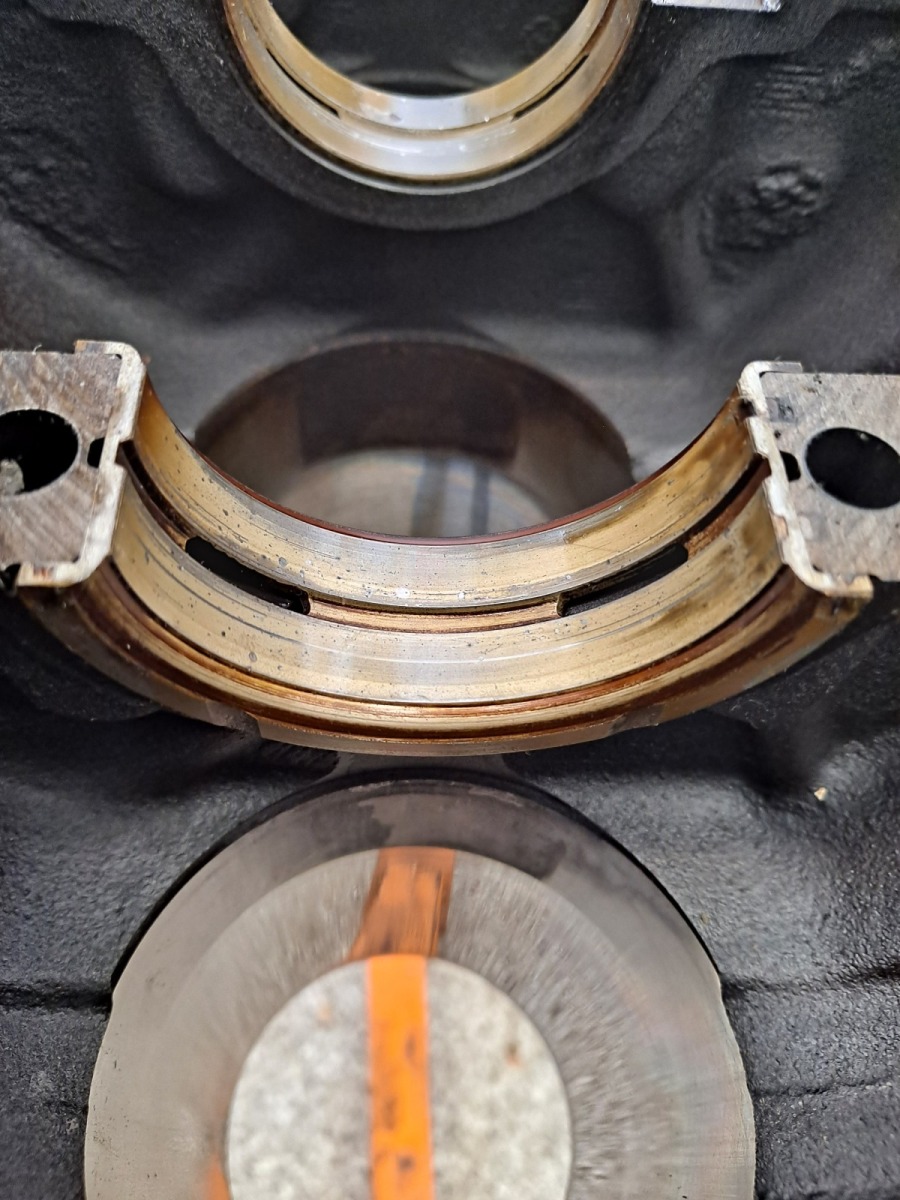
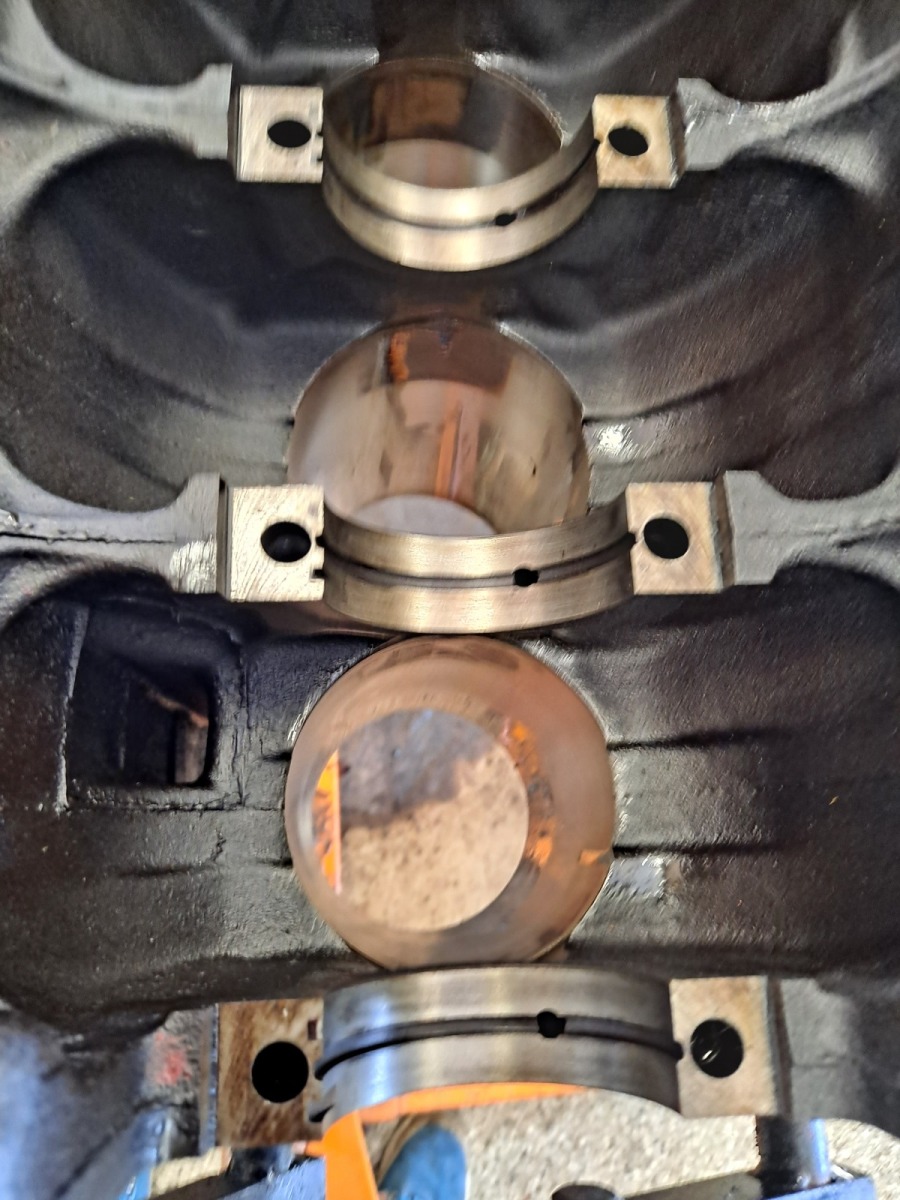
Speaking of clearances and wear, the crank came in very good, for reference an average 2.3597" and clearances for the mains (inches) ended at:

Code: Select all

Low Clear	0.0020	0.0021	0.0020	0.0021	0.0022	0.0022	0.0022
High Clear	0.0024	0.0025	0.0024	0.0025	0.0026	0.0026	0.0026

LIMIT:			0.0012-0.0028in			
For the connecting rod journals, the average was 1.8886mm with clearances (inches) as

Code: Select all

Low Clear	0.0011	0.0012	0.0012	0.0011	0.0011	0.0012
High Clear	0.0014	0.0015	0.0015	0.0014	0.0014	0.0015

LIMIT:               	0.0012-0.0028in


The majority of the wear is on the pistons with them averaging 3.6188"(91.916mm) in diameter, translating into the following wear (inches) listed as 1-6:

Code: Select all

WEAR:	0.0030	0.0033	0.0031	0.0033	0.0034	0.0034
I am thinking about using stock headgasket instead of MLS as I intend to keep boost at or below 10psi.


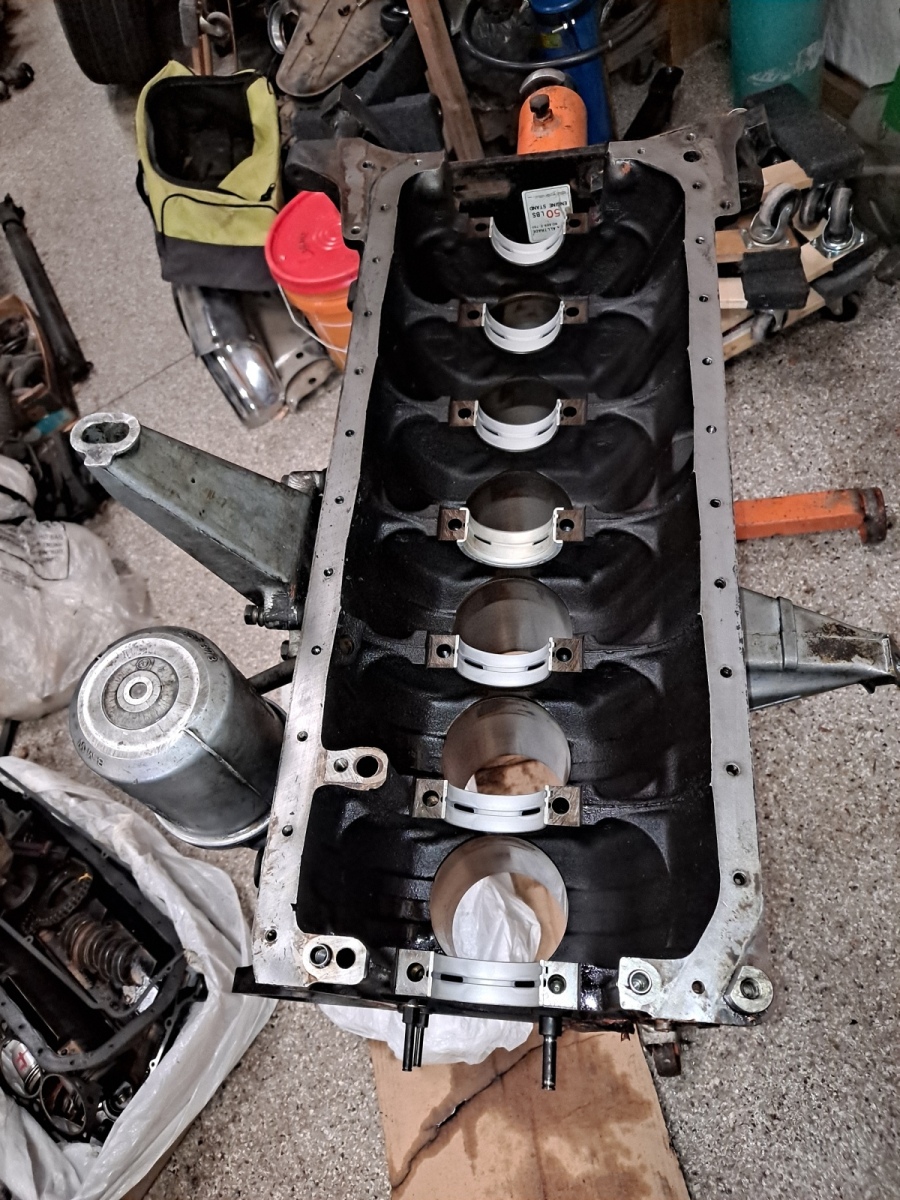
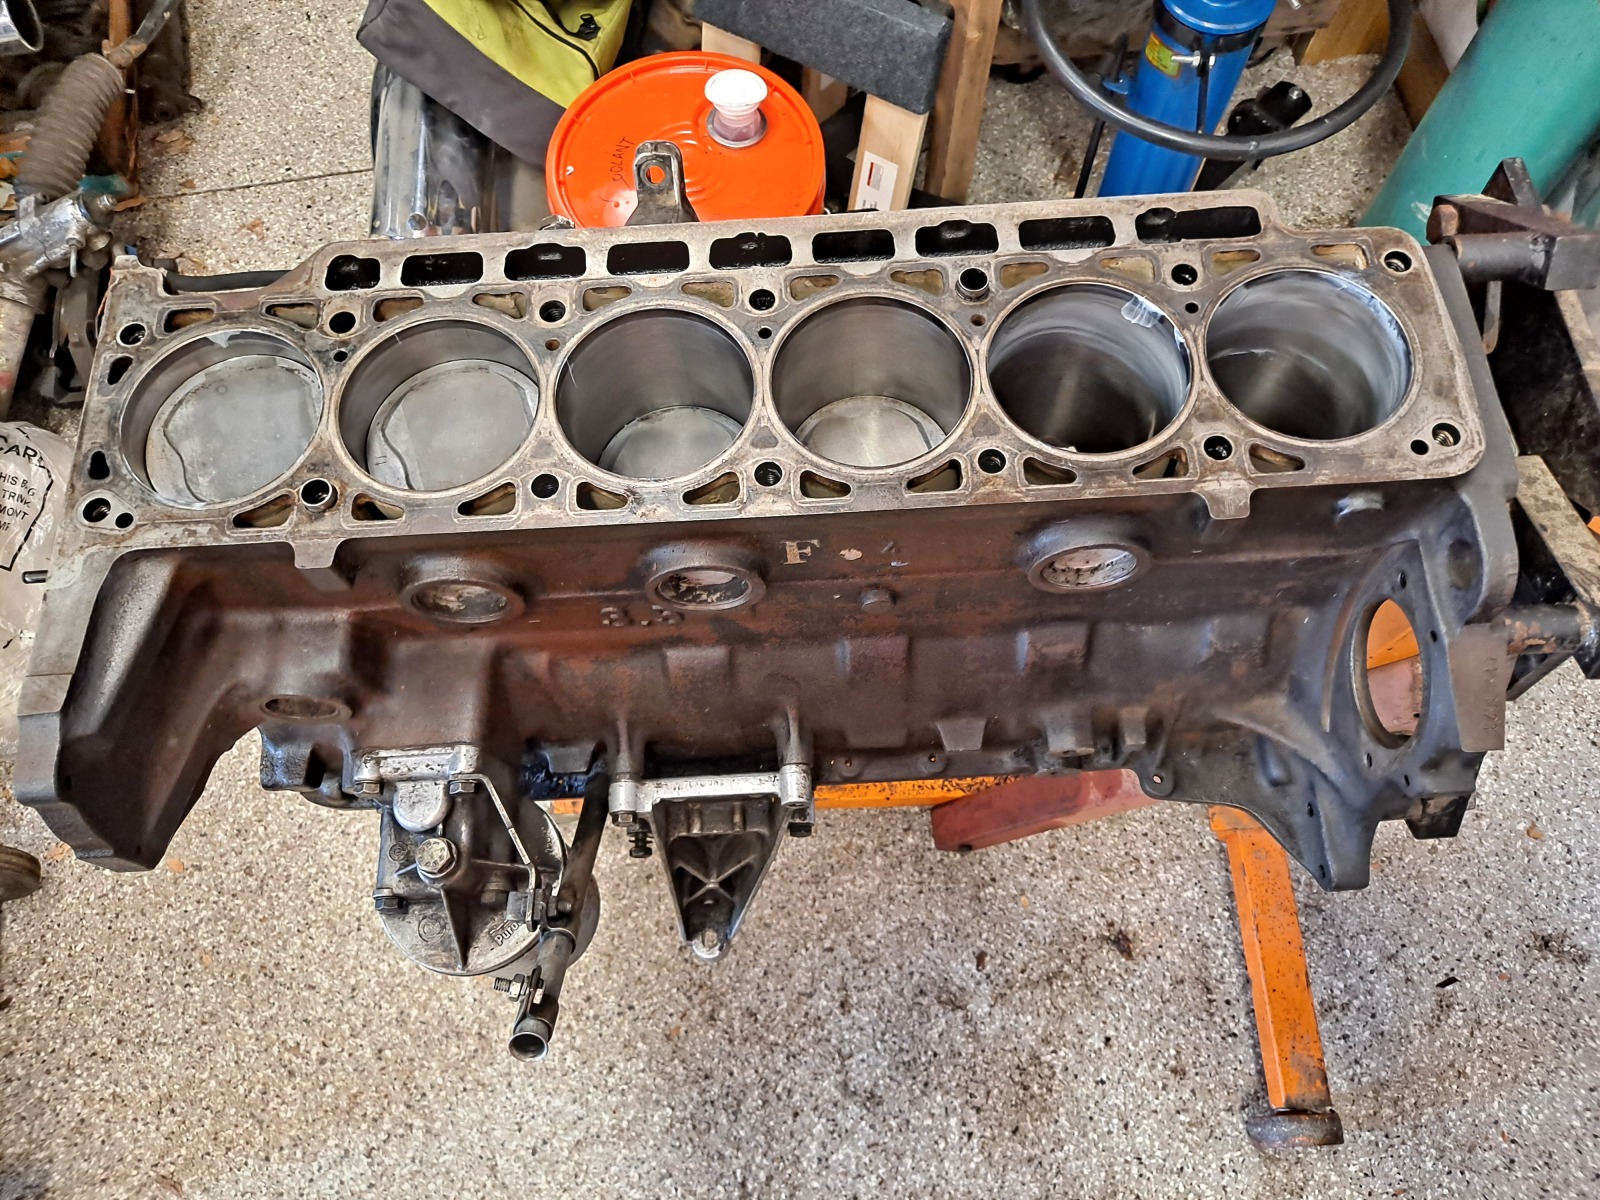
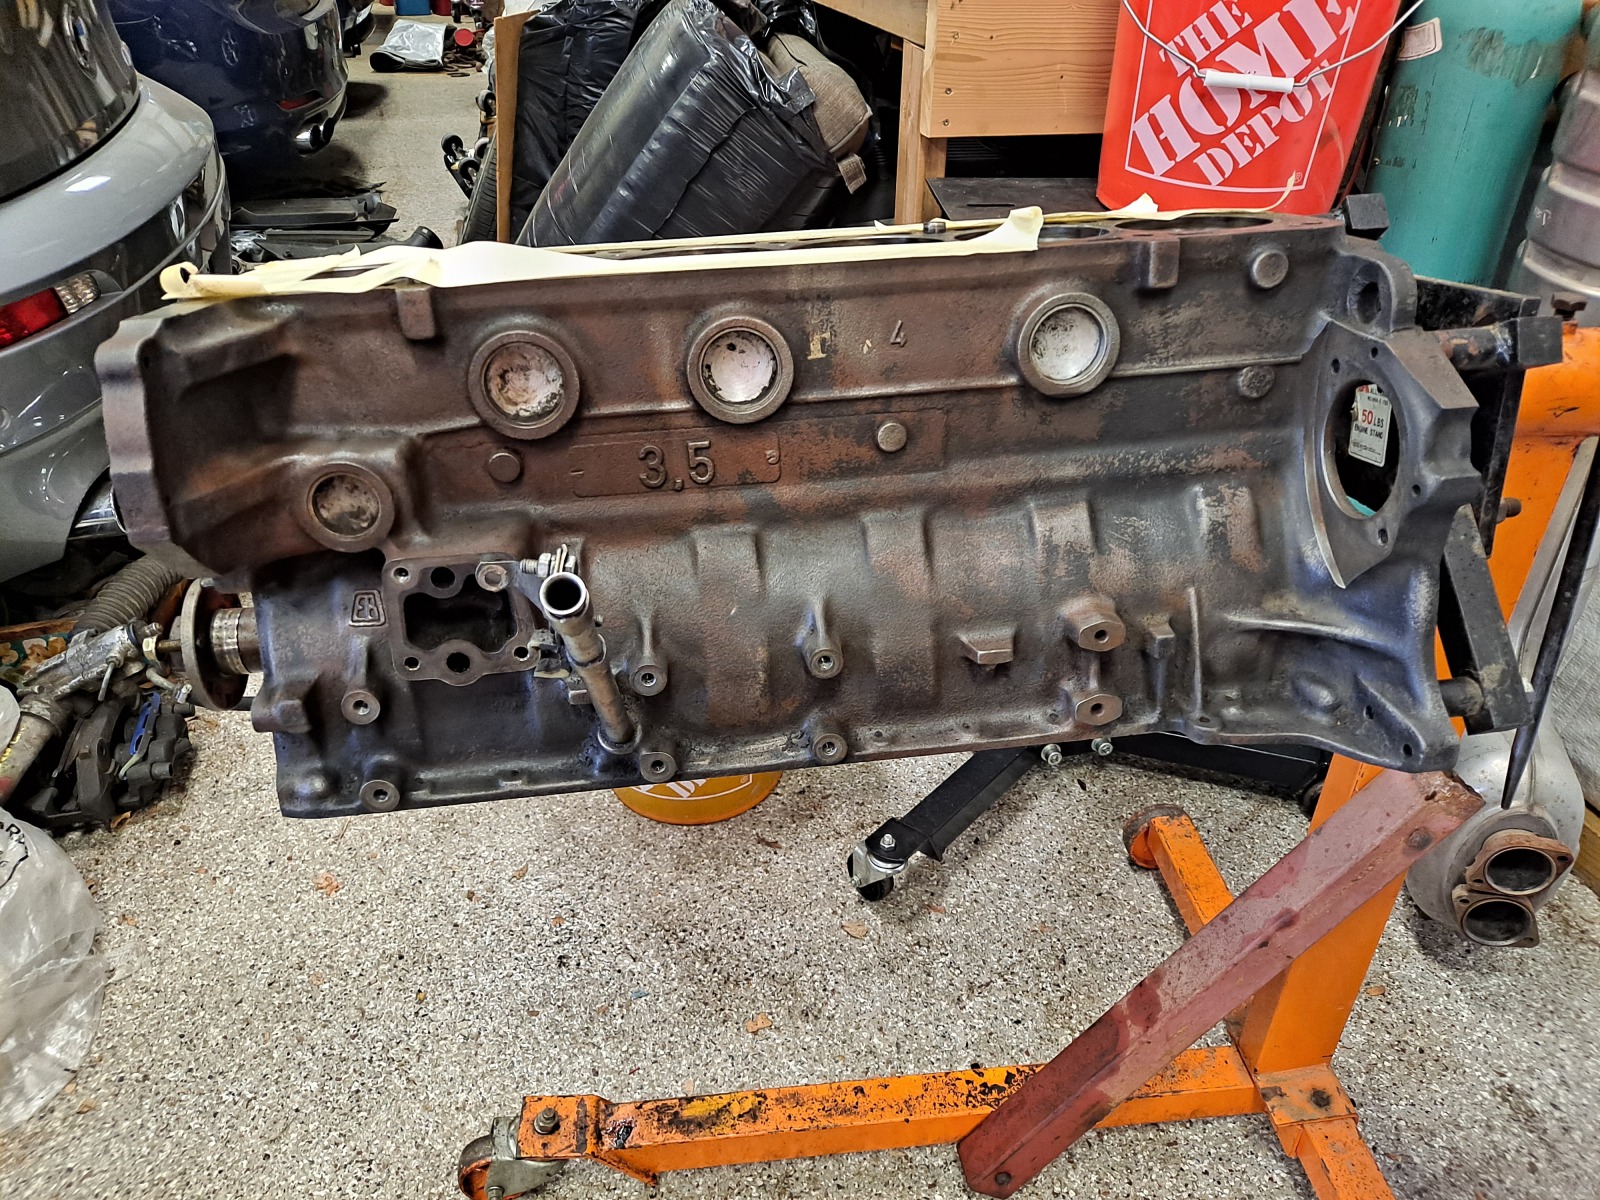
I liked the weathered look of the block after getting it cleaned up but I decided to paint it. Here it is after removing oil and wire wheeling the surface. I know L block is M90, I never noticed the F before... I will share another photo of the painted block the next time I get back to it.

Image

I have to start thinking about when I will swap the engine into the car as I need the oil pan from the one in the car.. I wasn't sure I wanted to tap a second oil pan for draining, but thinking about it, that may be quicker to swap and I can improve the oil drain pathway if I did so...

Image

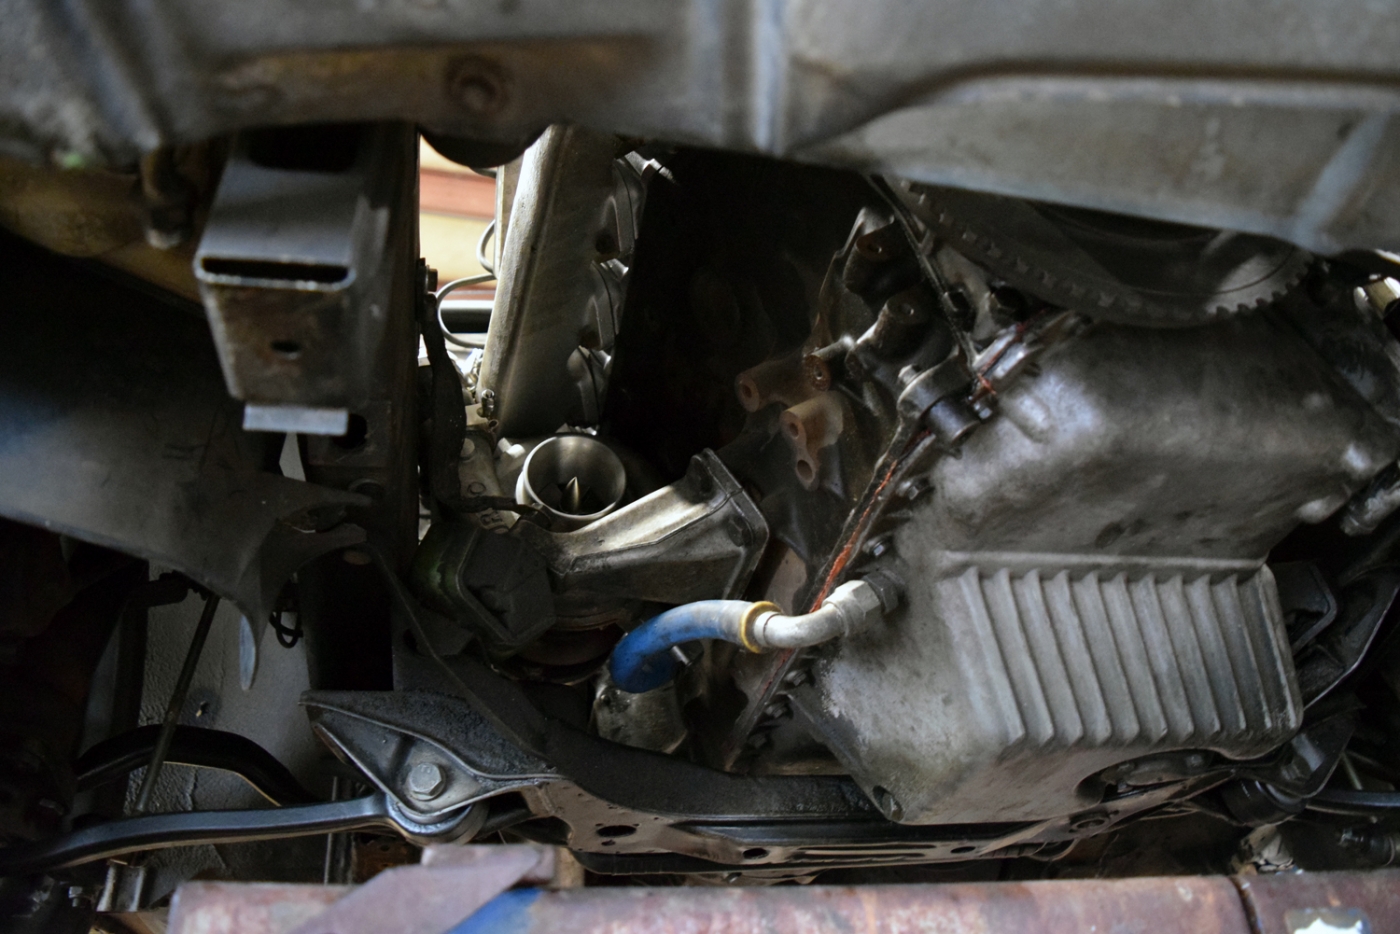
The trick with the rotomaster turbo was how to clear the subframe nicely. Of course I won't need to worry about it quite the same with my current turbo (See above).
Image

Re: 535is Turbo (ex 633 Callaway)- 2023 Update

Posted: May 08, 2023 8:28 PM
by marc79euro645
Lookin good!
I just want to say the timing map I posted above, resulted in 2 pistons with broken ring lands. I edited my post to say that as well. I really think I'd like to just remove the photo entirely. I would hate to be the cause of someone hurting their motor. My current build is using b35 pistons. I milled the tops flat and flycut for valves, which should give me 9.2:1 static. I'm starting to tune for the added compression. I just keep pulling out timing, but still getting knocksense light, so not sure where I'll end up. I'm considering a meth injection kit to help.

Re: 535is Turbo (ex 633 Callaway)- 2023 Update

Posted: May 09, 2023 3:50 PM
by tschultz
Shame to hear! It makes sense to need less timing with additional compression if you were previously 8:1. Not quite sure how you got to higher compression though unless you swapped B35 pistons and head and even still I think you should be below 9:1 (due to your machining work) unless you went with a skimmed head or thinner gasket.
Stock B35 bottom with B34 head may be getting closer to 9.8:1 from my research. B34 bottom with B35 head should be closer to 7.5:1...


I swapped on my style 9 wheels which are the same ones pictures on the gold car that I bought the lowering coilover kit from. I didn't put the covers on but I did drive the car for the first time in over a year.

I'm pretty excited how it is looking even though the paint is rough.

Image

Image

Image

I have a boost leak I need to track down in my short test drive. Also ABS is not coming on and the rears are locking up, so the E34 brakes are definitely too much rear biased. I will need to swap pads or something else to further improve the brake bias. A lot of people don't seem to realize this happens when you go to the bigger brake setup of E34/E32...

May be a bit quiet for a few weeks until I can make more engine progress.

Re: 535is Turbo (ex 633 Callaway)- 2023 Update

Posted: Nov 15, 2023 11:09 AM
by tschultz
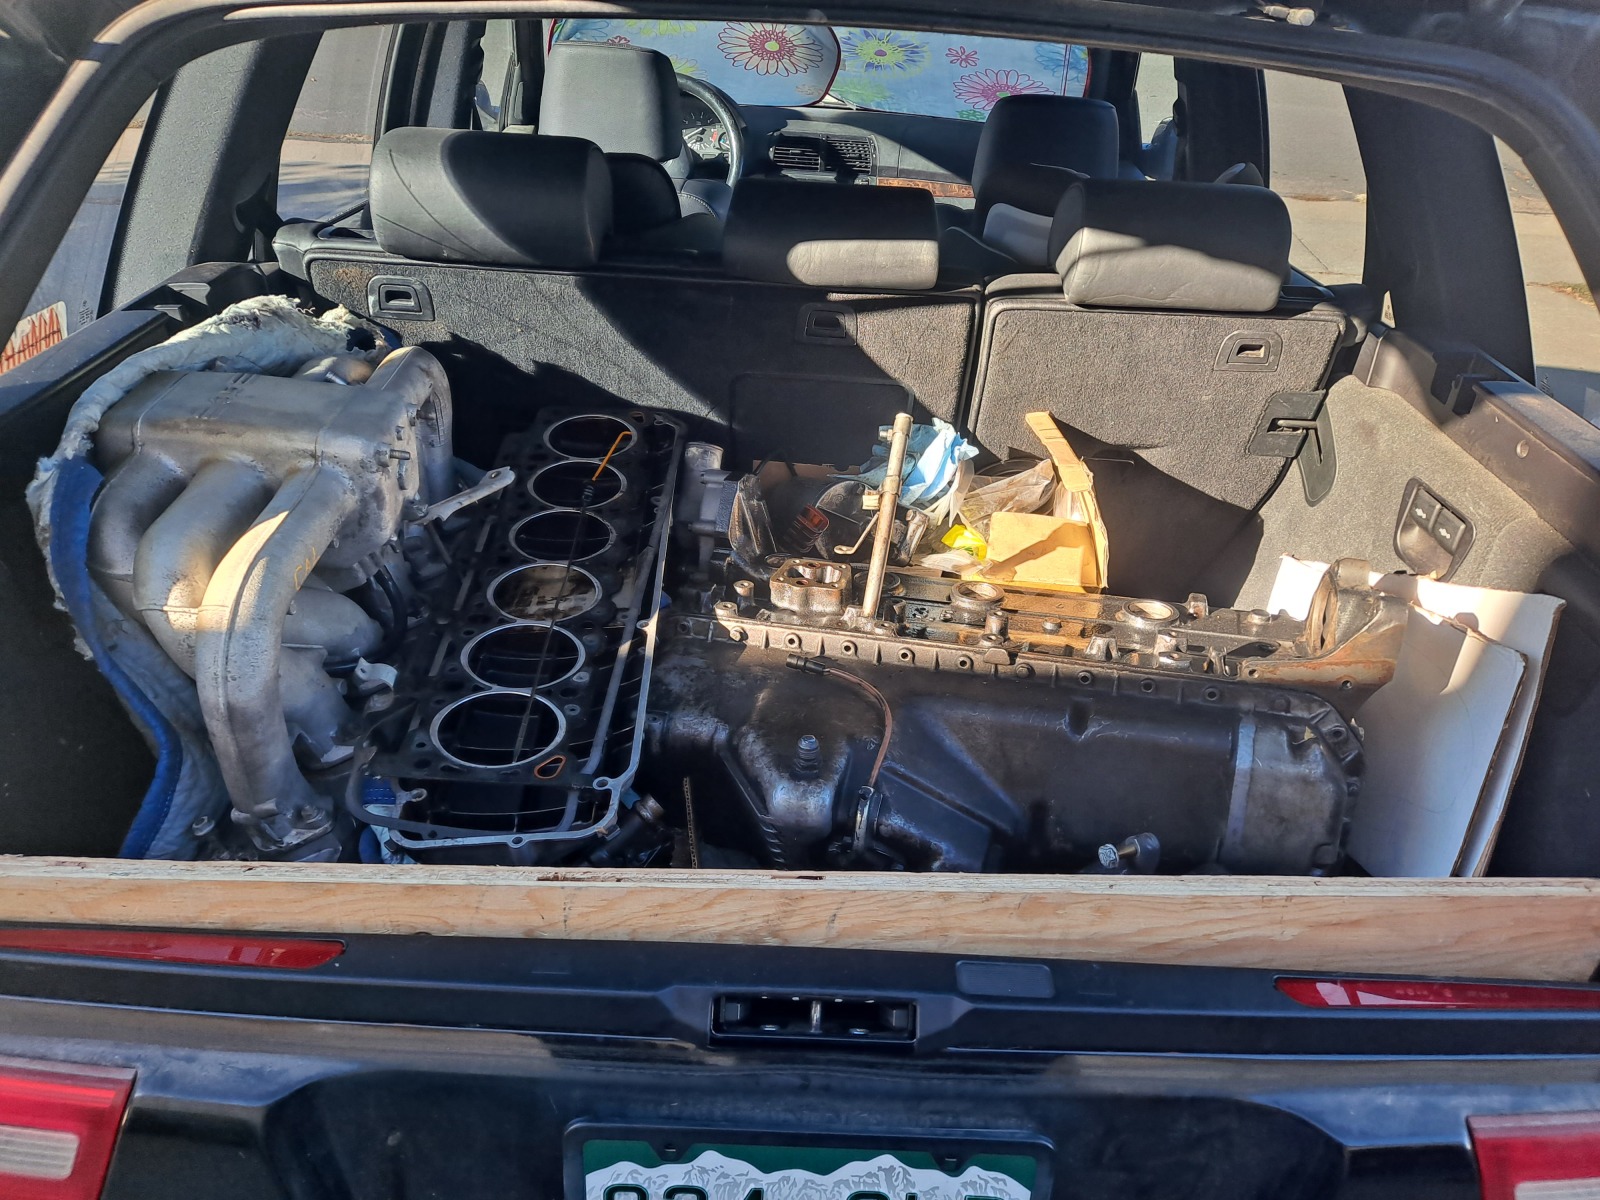
I wasn't able to make progress with the engine at my brother's place because of commitments with family/children, so I decided I should try to get the engine to my house. So we made plans and I loaded it up in our x5 to take home. This will allow me to work on it a bit in my spare time (aka at night).

Image

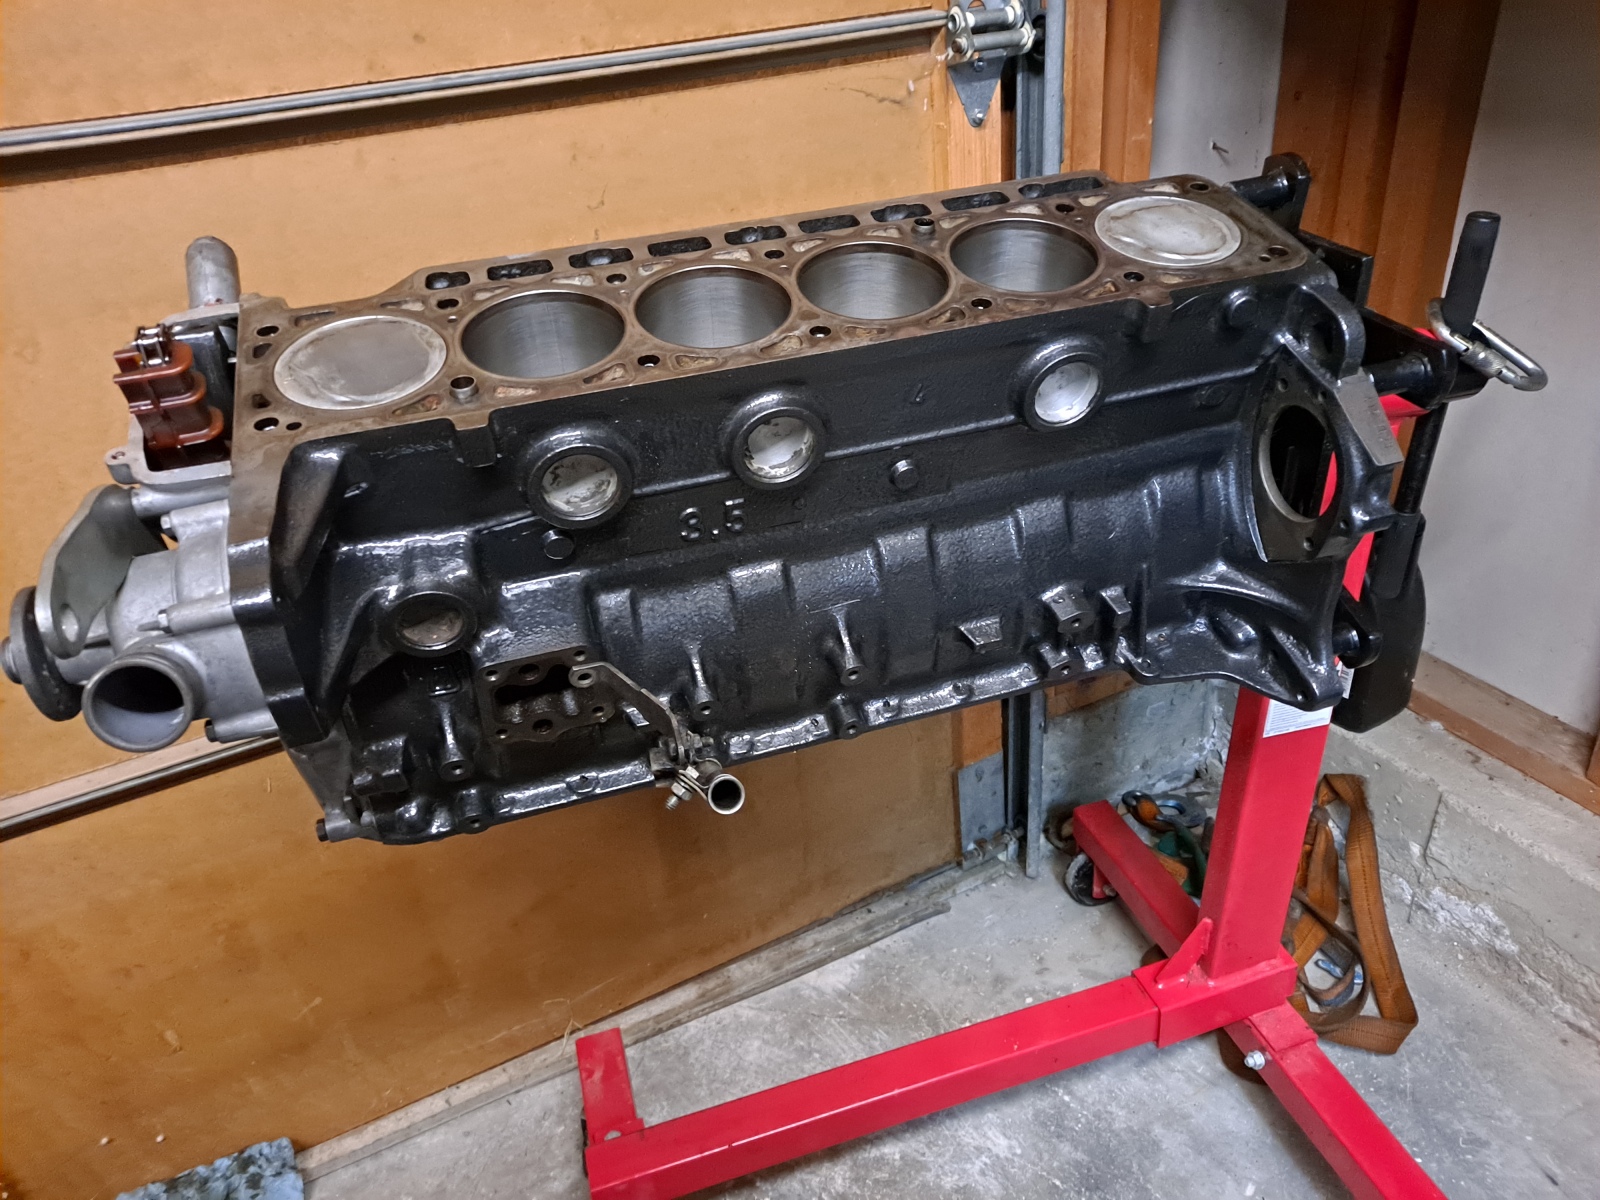
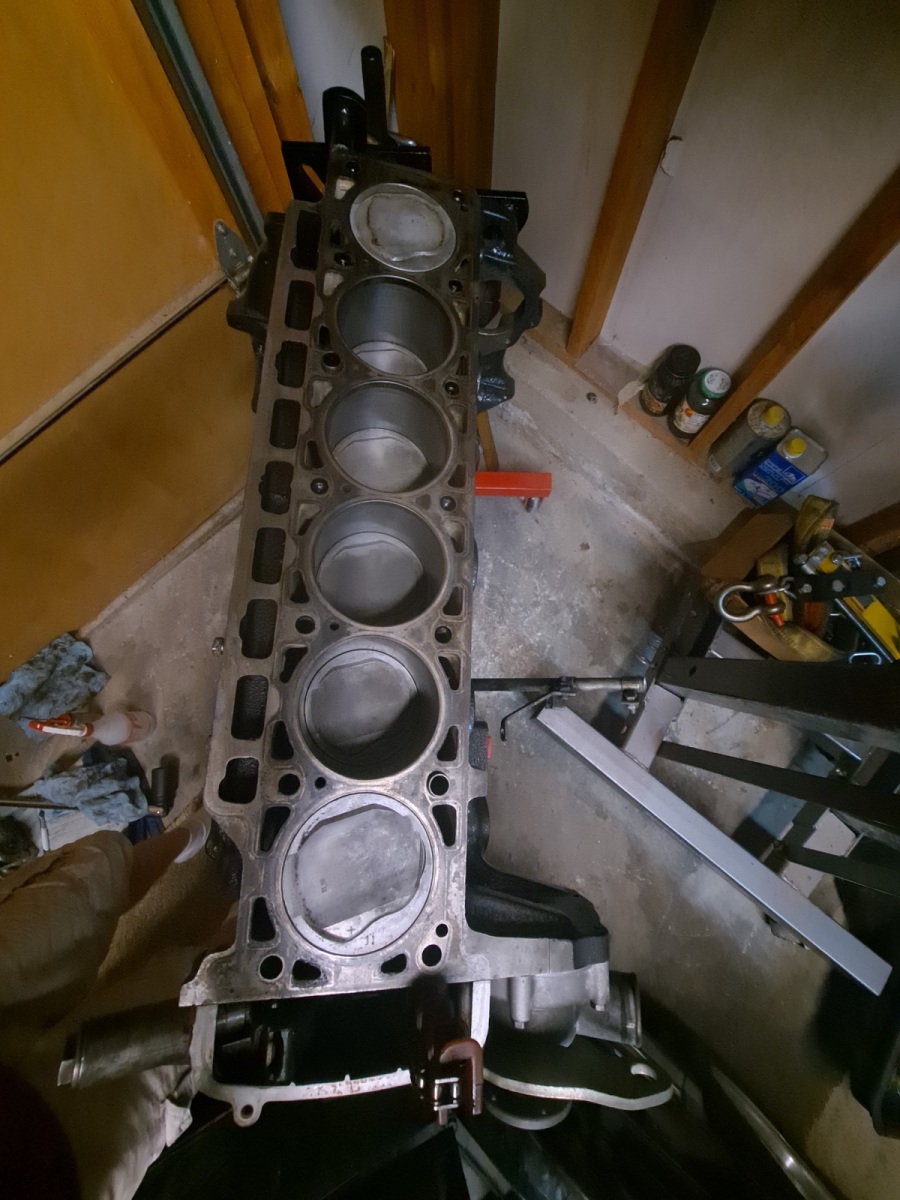
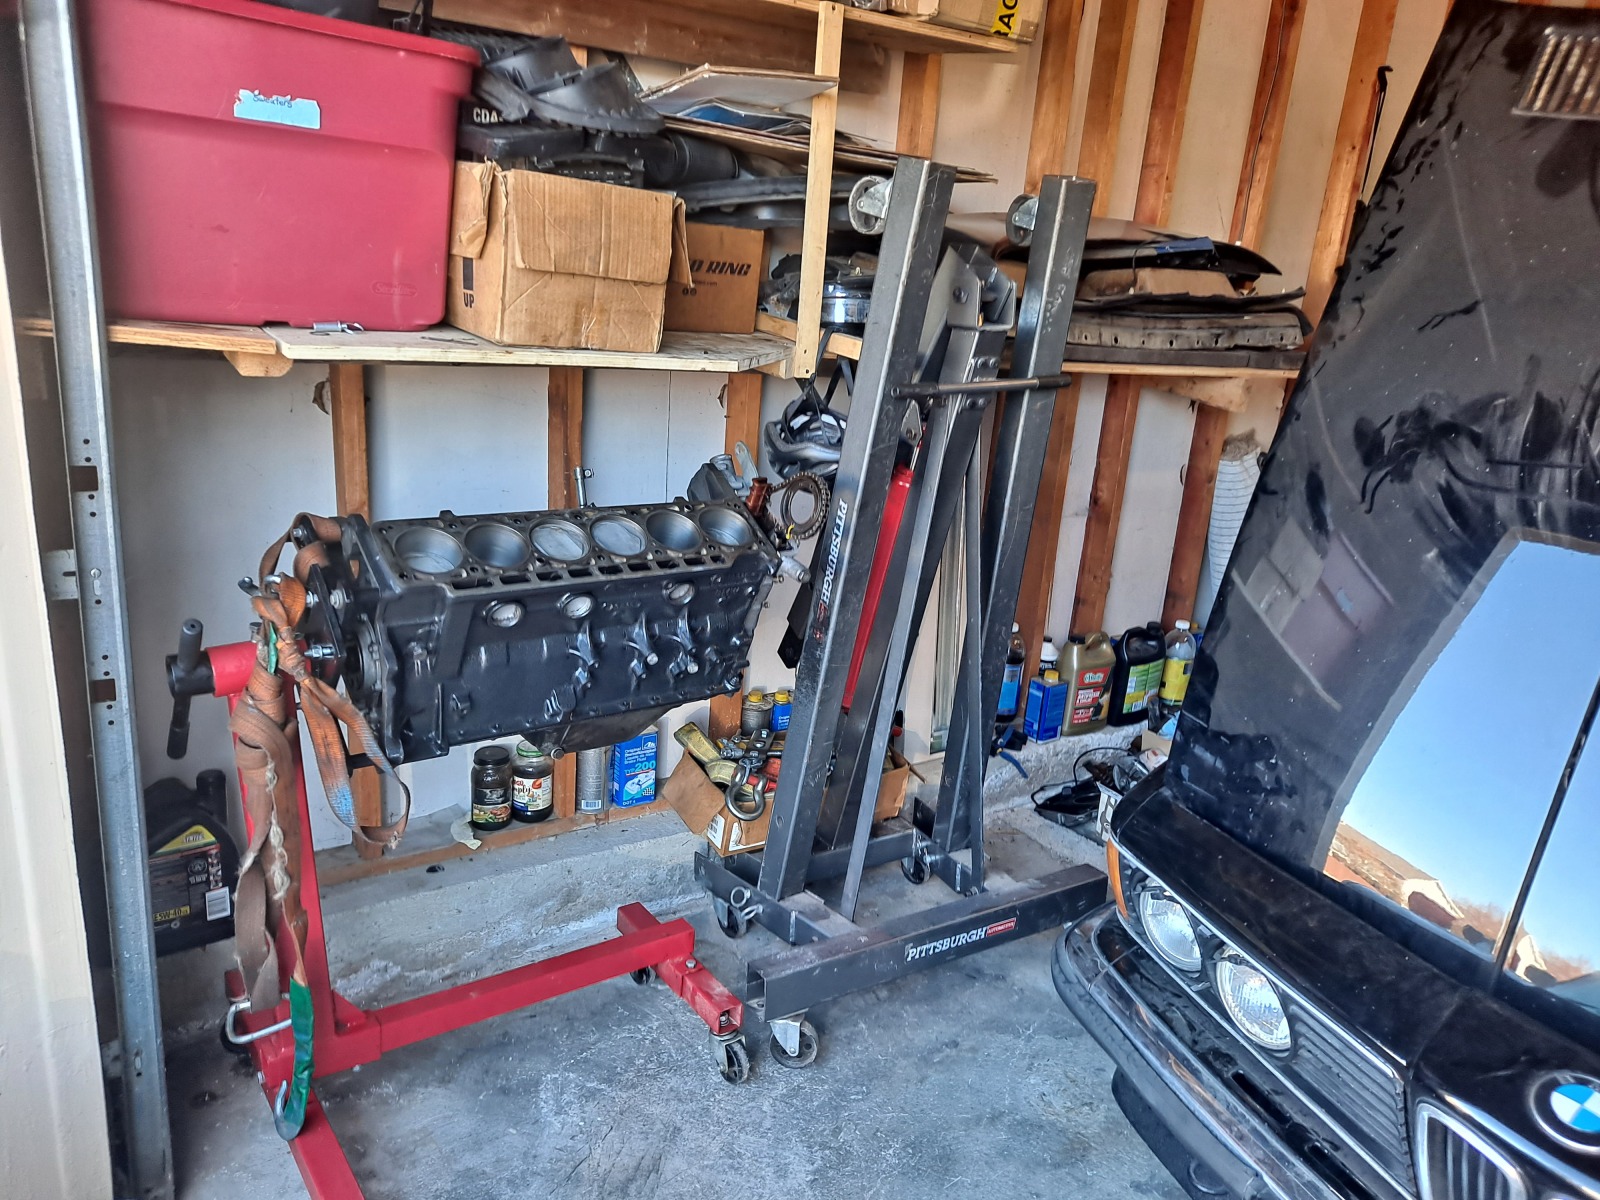
I got an engine stand last year and my other brother is letting me borrow his engine hoist. I was able to unload the shortblock by myself and get it into my garage.

Image

I believe the shortblock with crank and pistons is about 230 lbs.

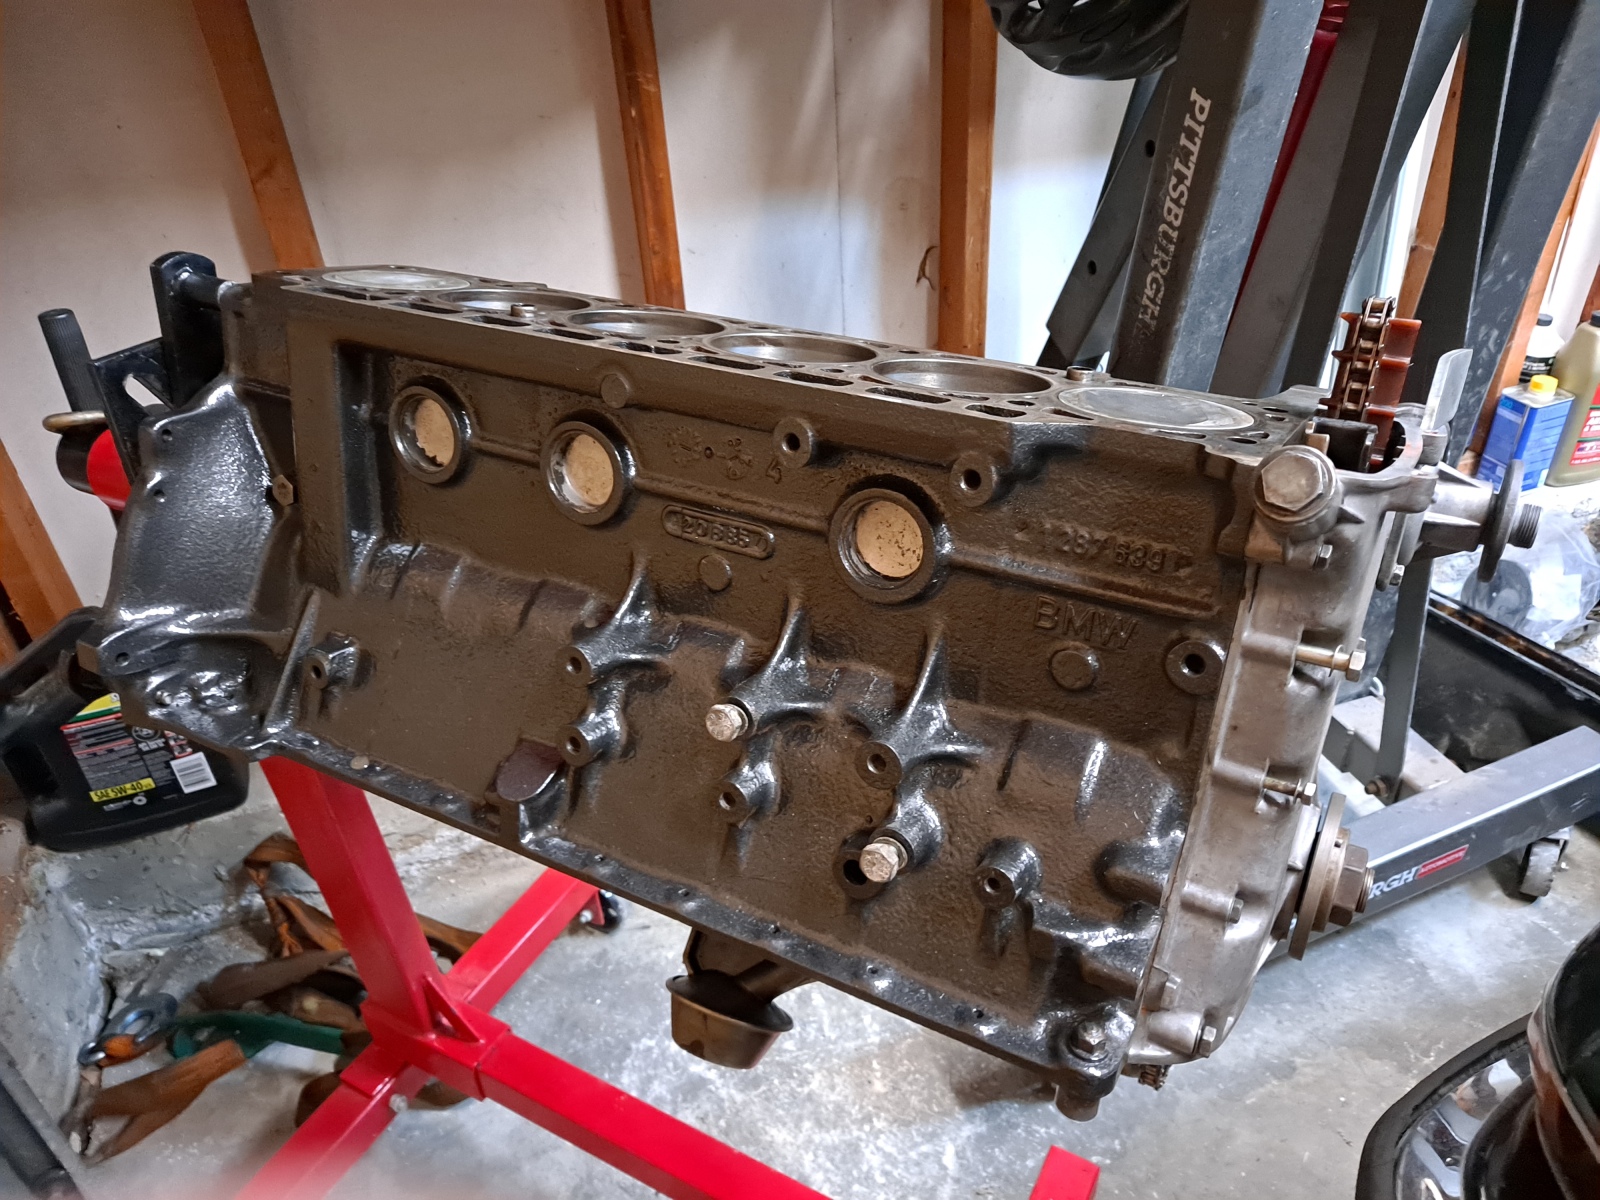
Here's the progress of it with the painted block. Pretty happy with the color and it seems pretty durable. I am ok with it not being flat black.
Image

It is an '85 block which will match with my G265 trans.
Image

Image

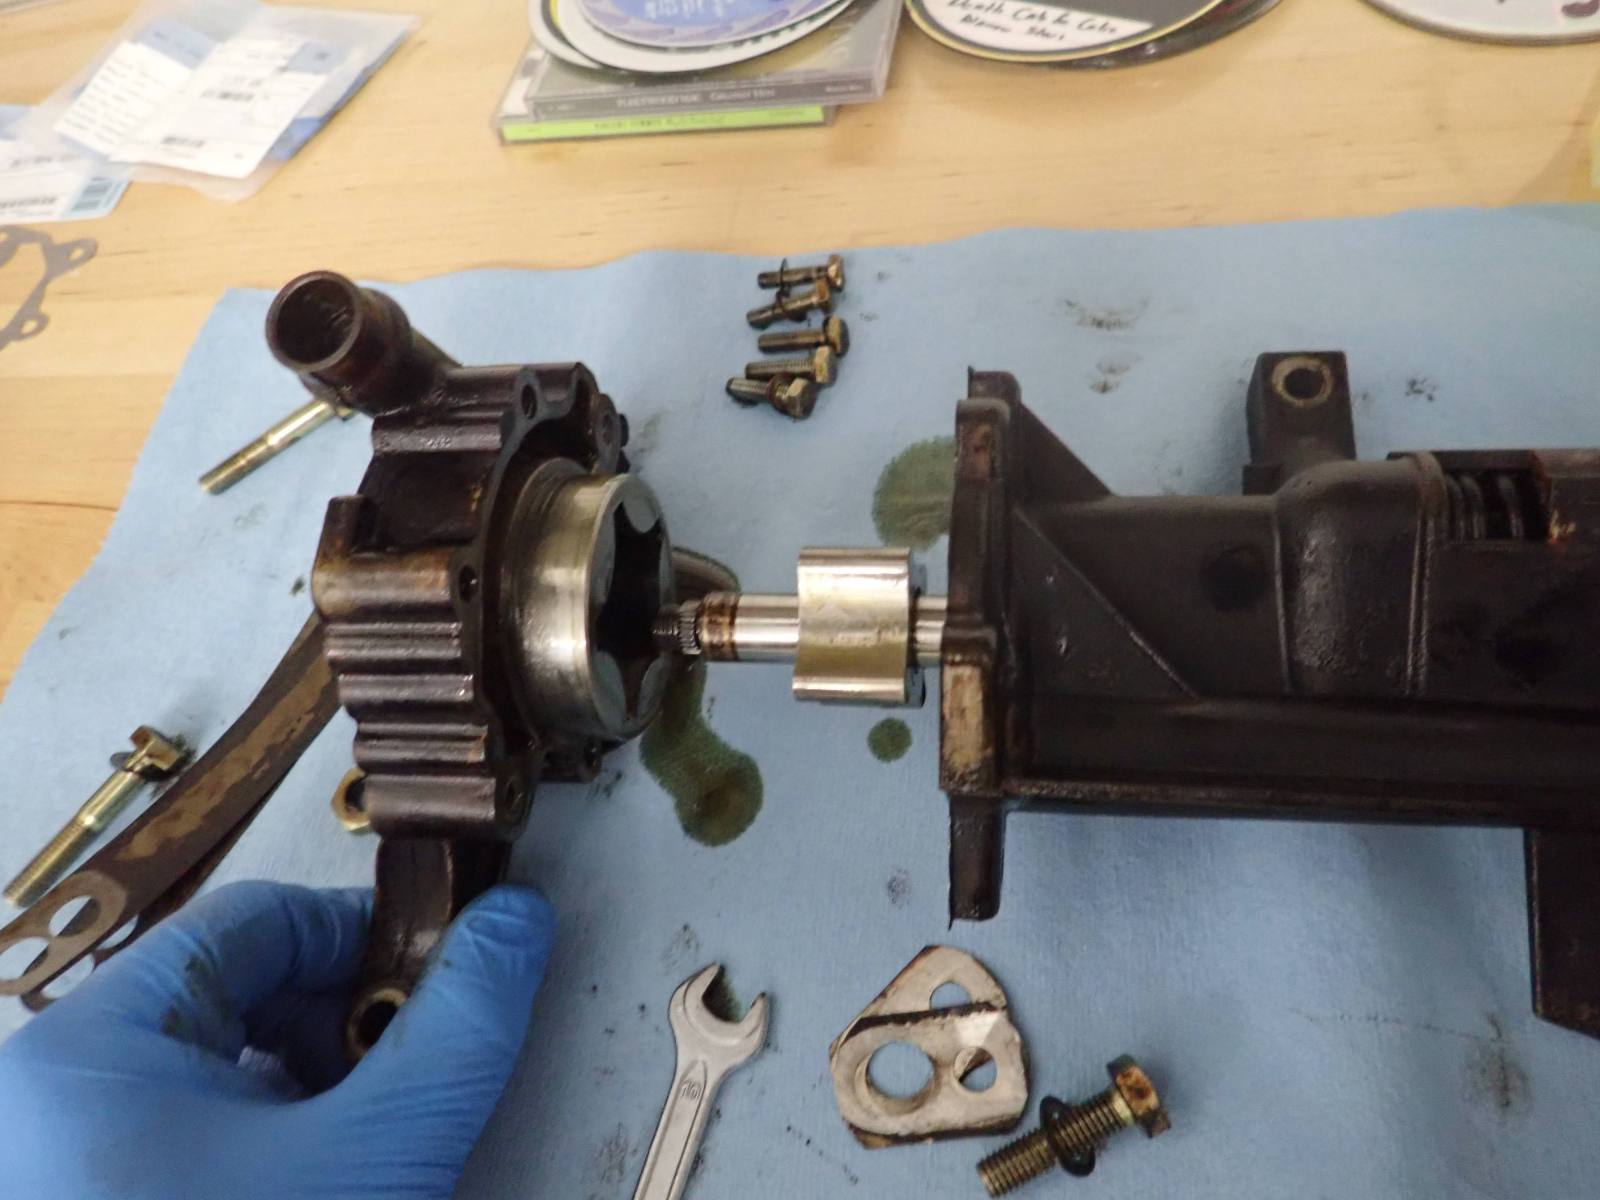
Disassembled the oil pump and swapped in one that was in a bit better shape.
Image

I found the tensioner wasn't sliding smoothly, so I removed it and sanded it and the timing cover mount with 1500 grit and it slides nicely again.

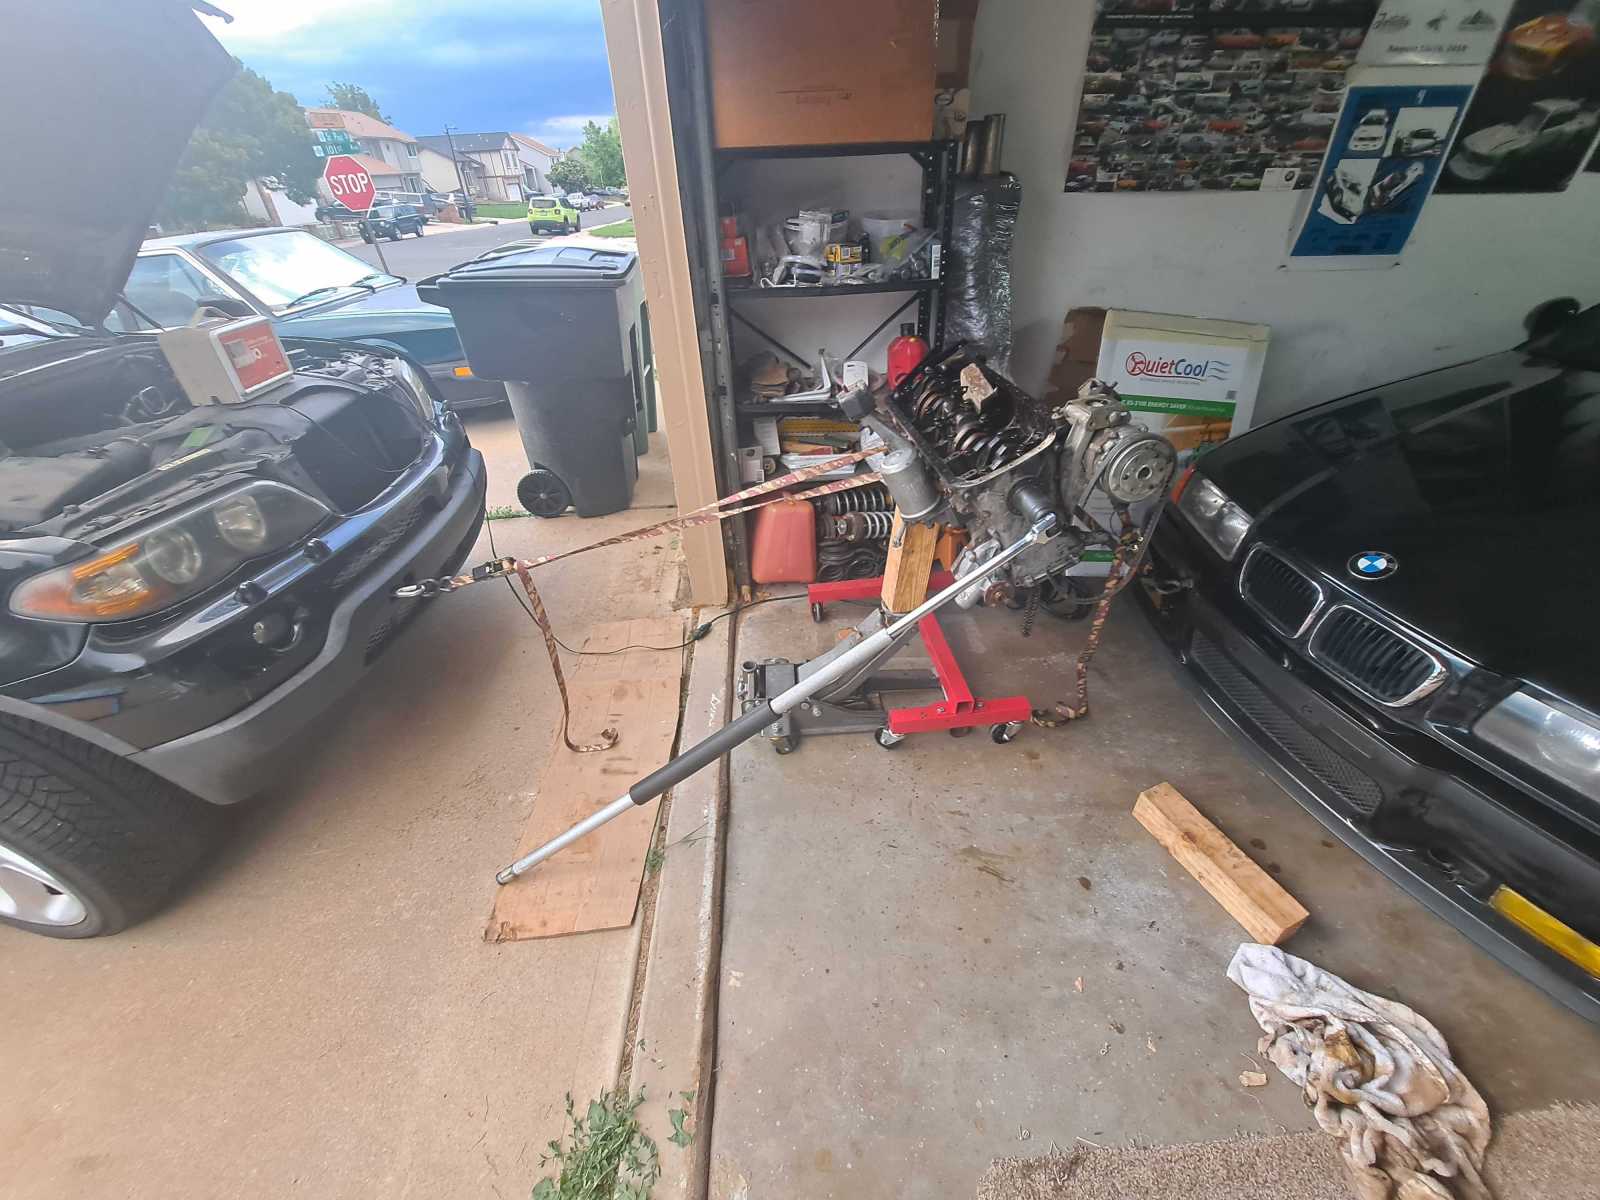
I need to tighten down the crank nut, but I will use my hack method of a block of wood on the crank and the engine stand strapped/held in position with a few tools (floor jack, cranks, straps, 3/4" drive, jack handle).
Image

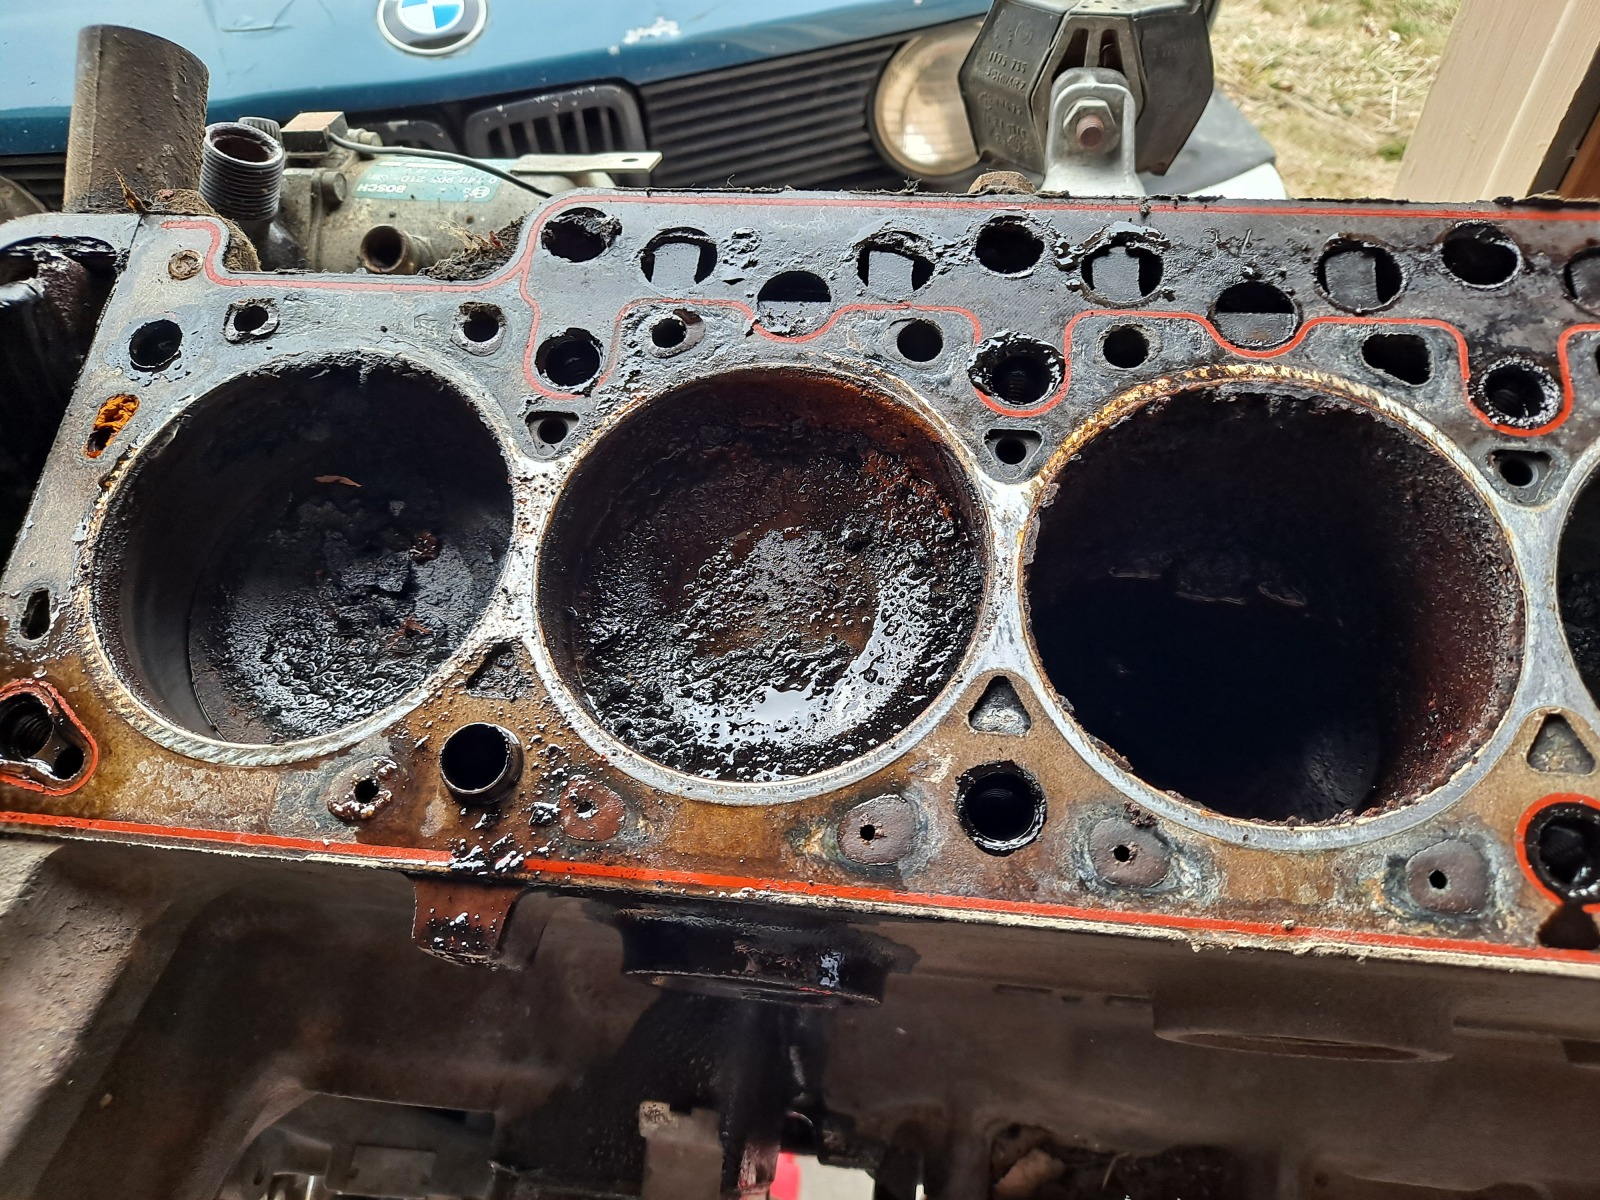
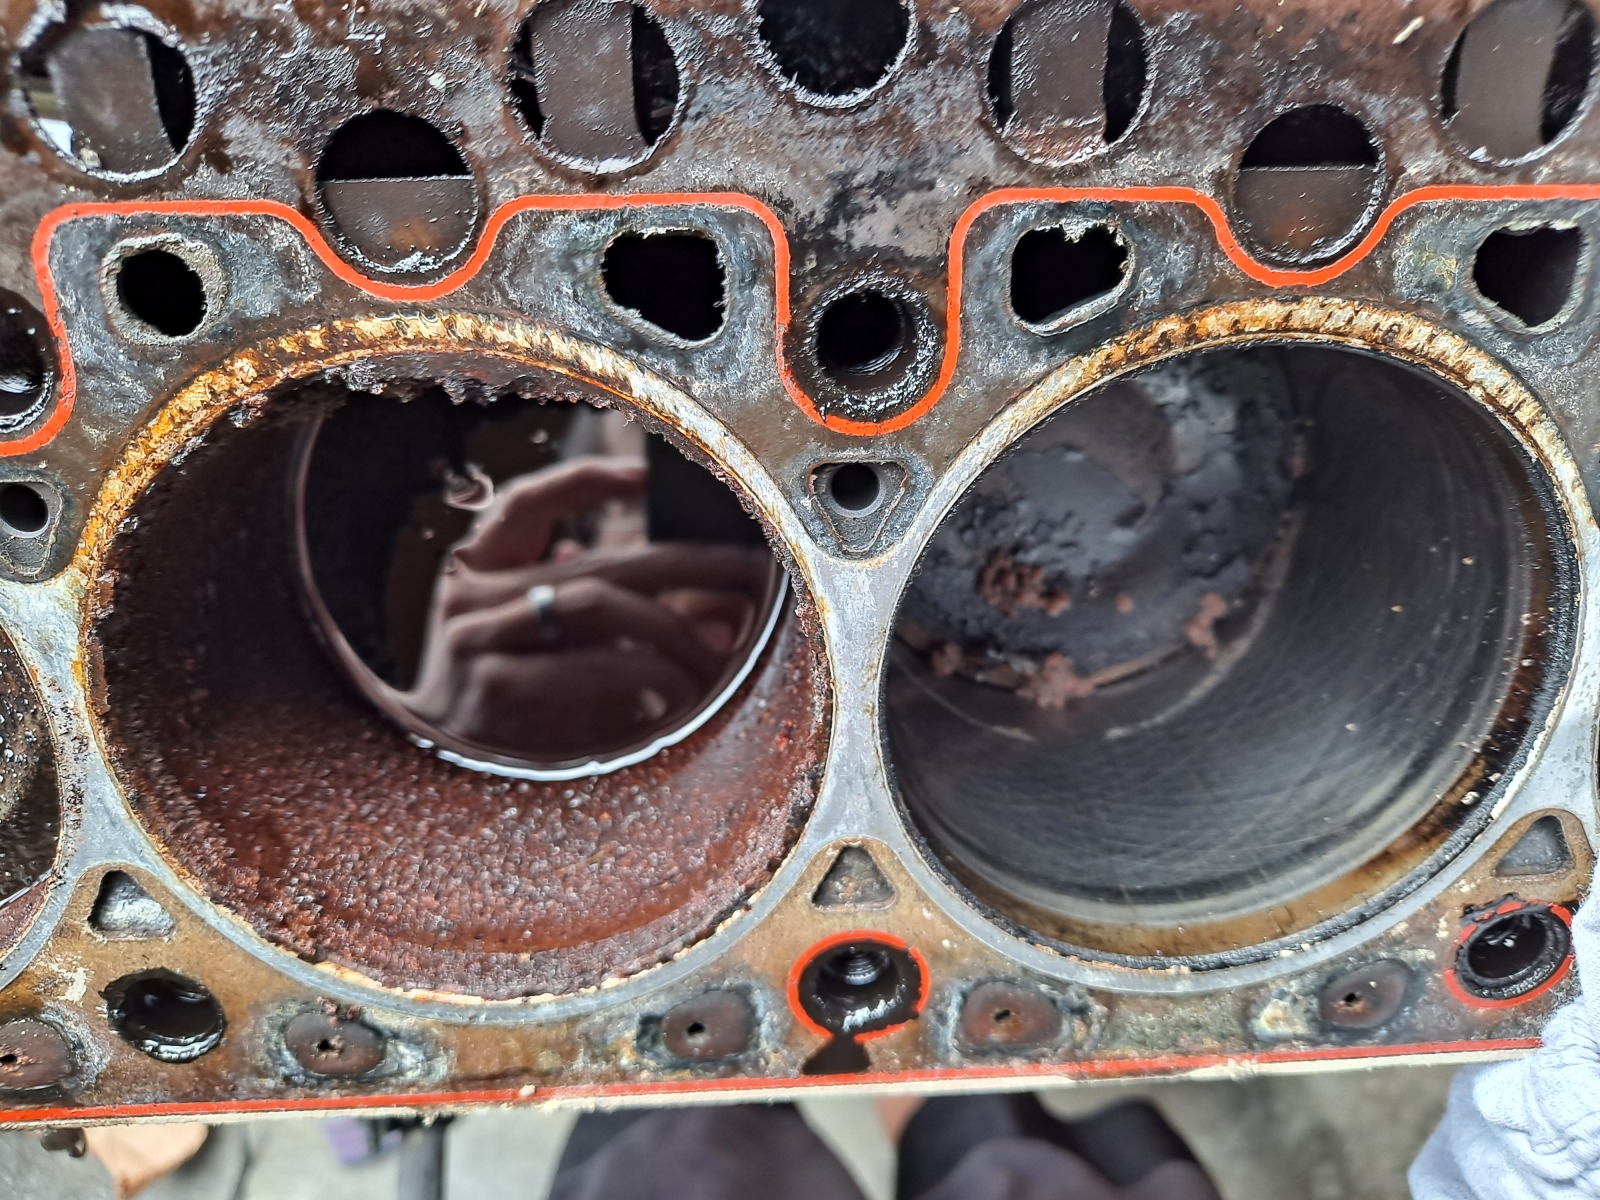
I used this method to disassemble an engine at my house with BADLY rusted pistons. I couldn't really get 2 of them out, even after atf soak for a month. At least I got a good oil pump, crank and B34 head out of it, but shame I couldn't salvage the block or all of the pistons...

Image

Image

I mounted the pulleys and balancer/toothed wheel yesterday and will plan to torque the crank nut in the next few days. I am contemplating running with 42lb injectors for a bit more headroom and the overall additional flow I should be getting with the higher compression 9:1 pistons and through the B35 head and intake I should be able to go up a bit in boost if I feel the need.

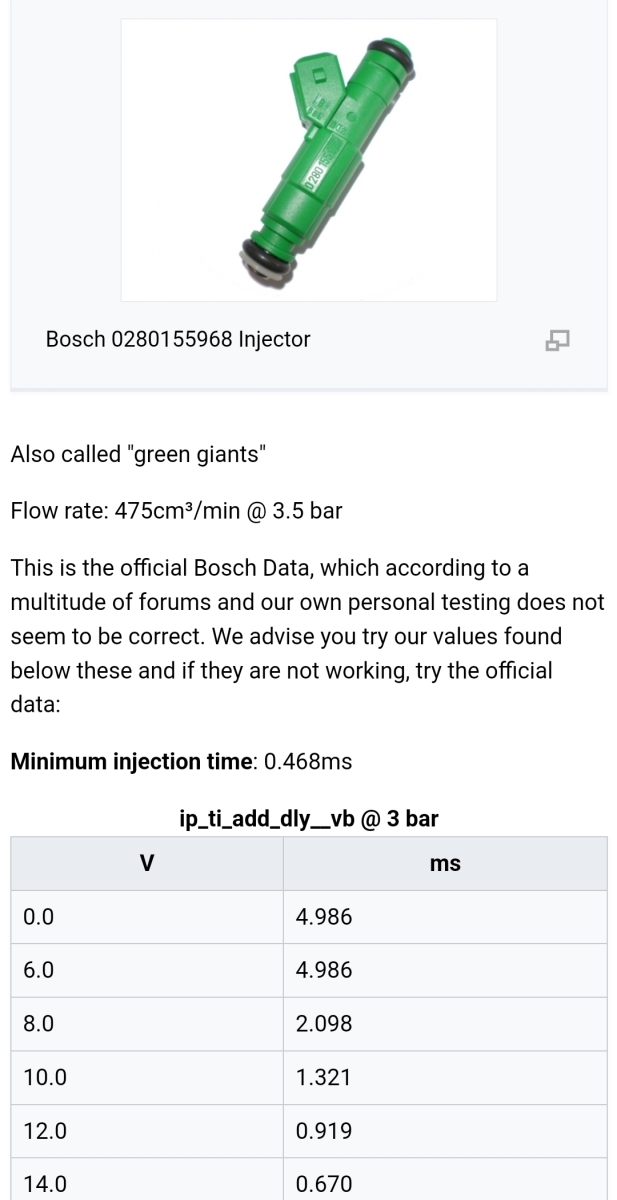
I had problems with what I thought we 42lb injectors going back a few years, but according to my research, I may not have had the deadtime set right. This setting may have made a difference with my idling problems at the time:
Image

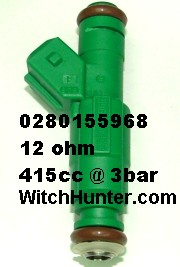
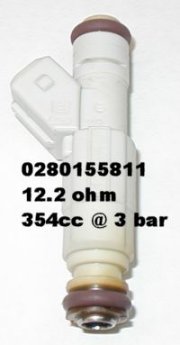
The green giant genuine bosch is pn 0280155968 and rated between 415-440cc would be 25% more flow than my current set. Posting here for reference the current white 36# injectors I have (pn 0280155811, 12.2ohm 354cc @ 3 bar)
Image Image


I am probably going to keep with stock headgasket, so I have a cometic MLS .070" up for grabs, if somebody is interested. Waited 3 months to get it in 2022 even!

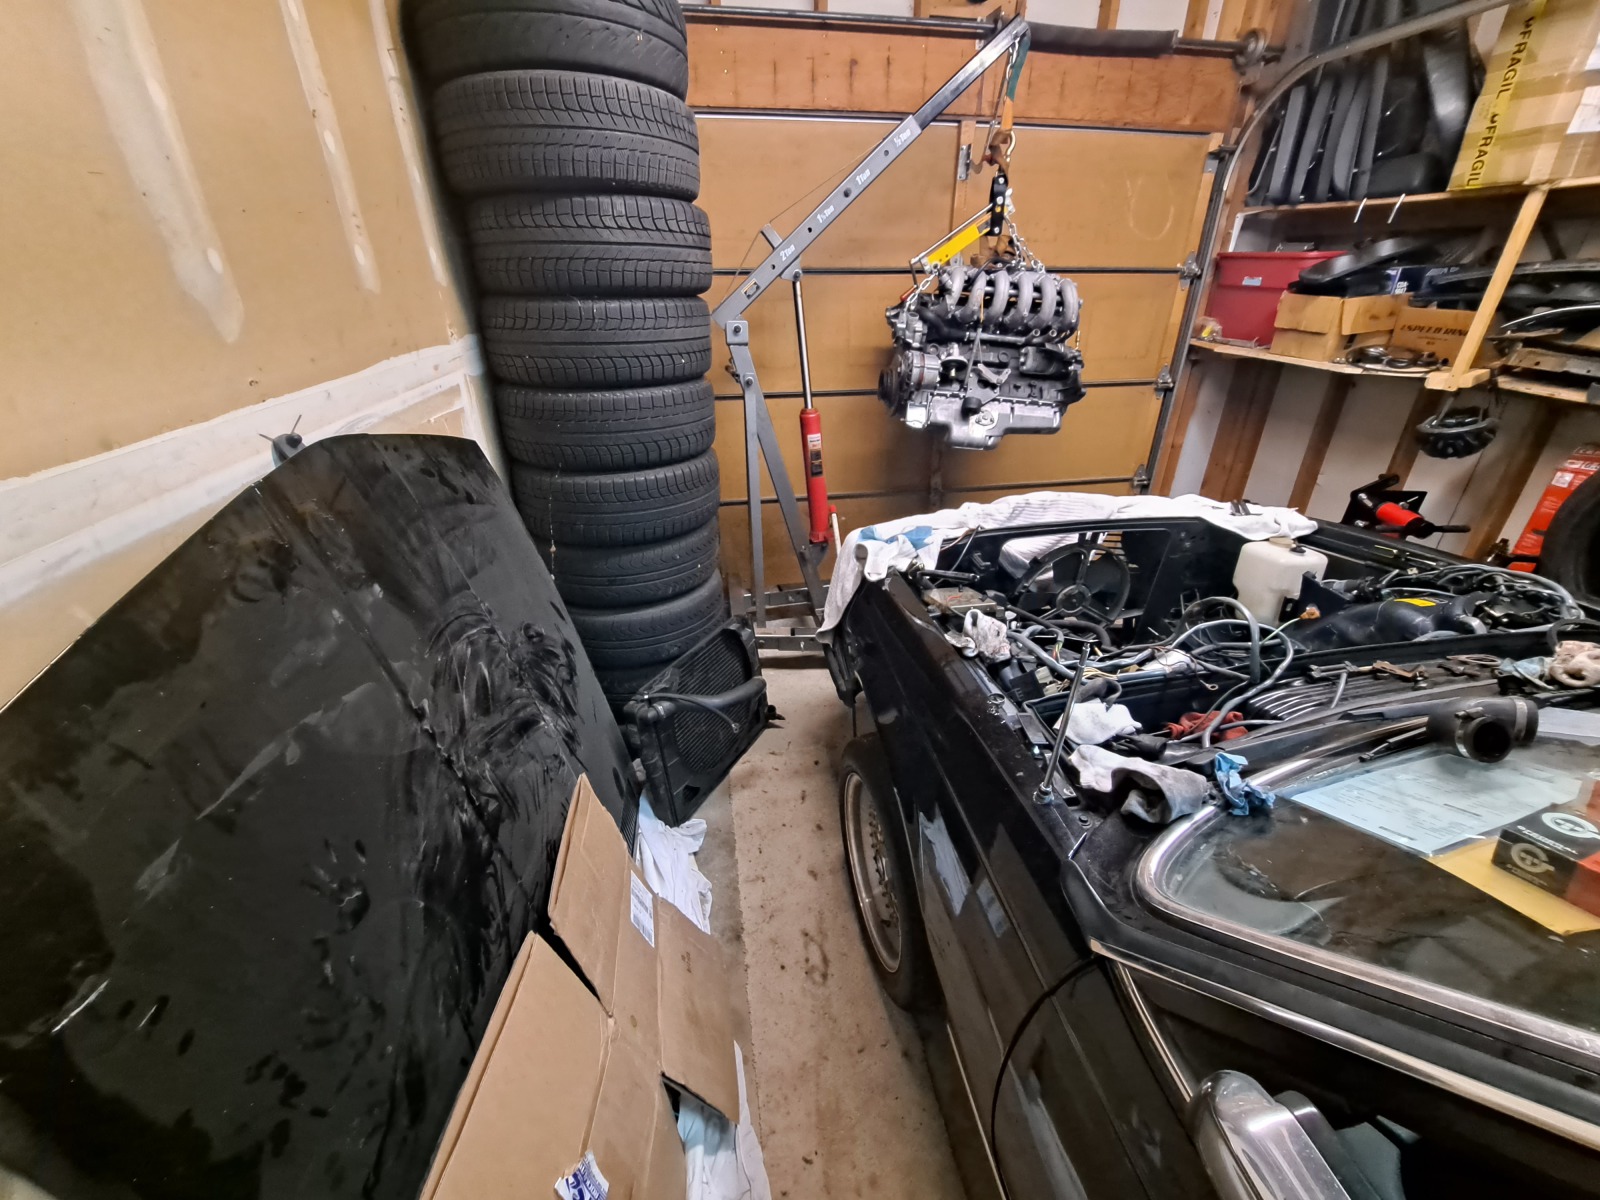
I am not sure when I will pull the engine to do the swap, but having it on a stand at my house means I would theoretically be able to remove the engine from the e28 and swap it in when I have the chance. Since it is getting colder out, it may be less fun to do in my uninsulated garage in the upcoming winter months too...

Re: 535is Turbo (ex 633 Callaway)- 2023 Update

Posted: Dec 24, 2023 1:00 AM
by Mike W.
tschultz wrote: Nov 15, 2023 11:09 AM
I believe the shortblock with crank and pistons is about 230 lbs.
Pretty close to what I got, without the front cover and timing gear. 213.

viewtopic.php?t=113389

Re: 535is Turbo (ex 633 Callaway)- 2024 Update

Posted: Jun 08, 2024 10:06 AM
by tschultz
Another overdue update. Been busy with family and young kids as I described in my last larger post. But I have been out of work the last month or so and found that I had a little bit of free time once working through a number of house and yard projects.

As far as car projects, I had to get my other fun car (euro 635CSi) up and running again after spinning a bearing. Last summer i was able to get it running again with an engine rebuild and and I got it back on the road and 'done' for now. Took it on a spring drive with some other BMW enthusiasts and now have 200 miles on the engine.
Image

Image

Image

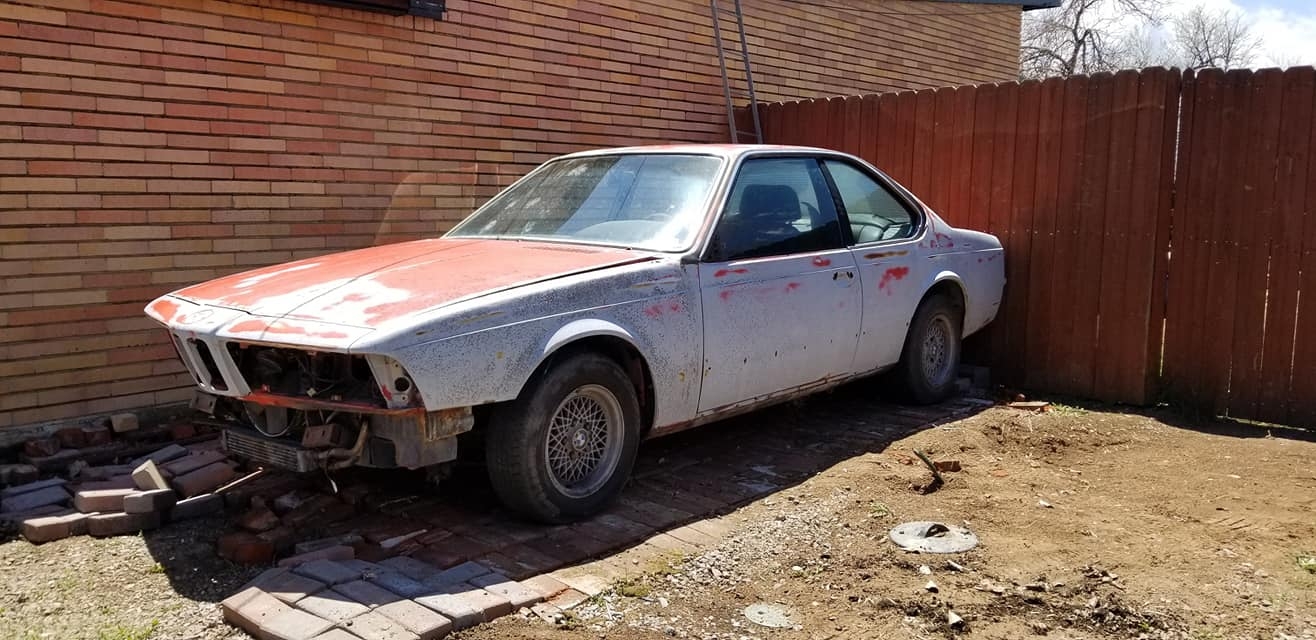
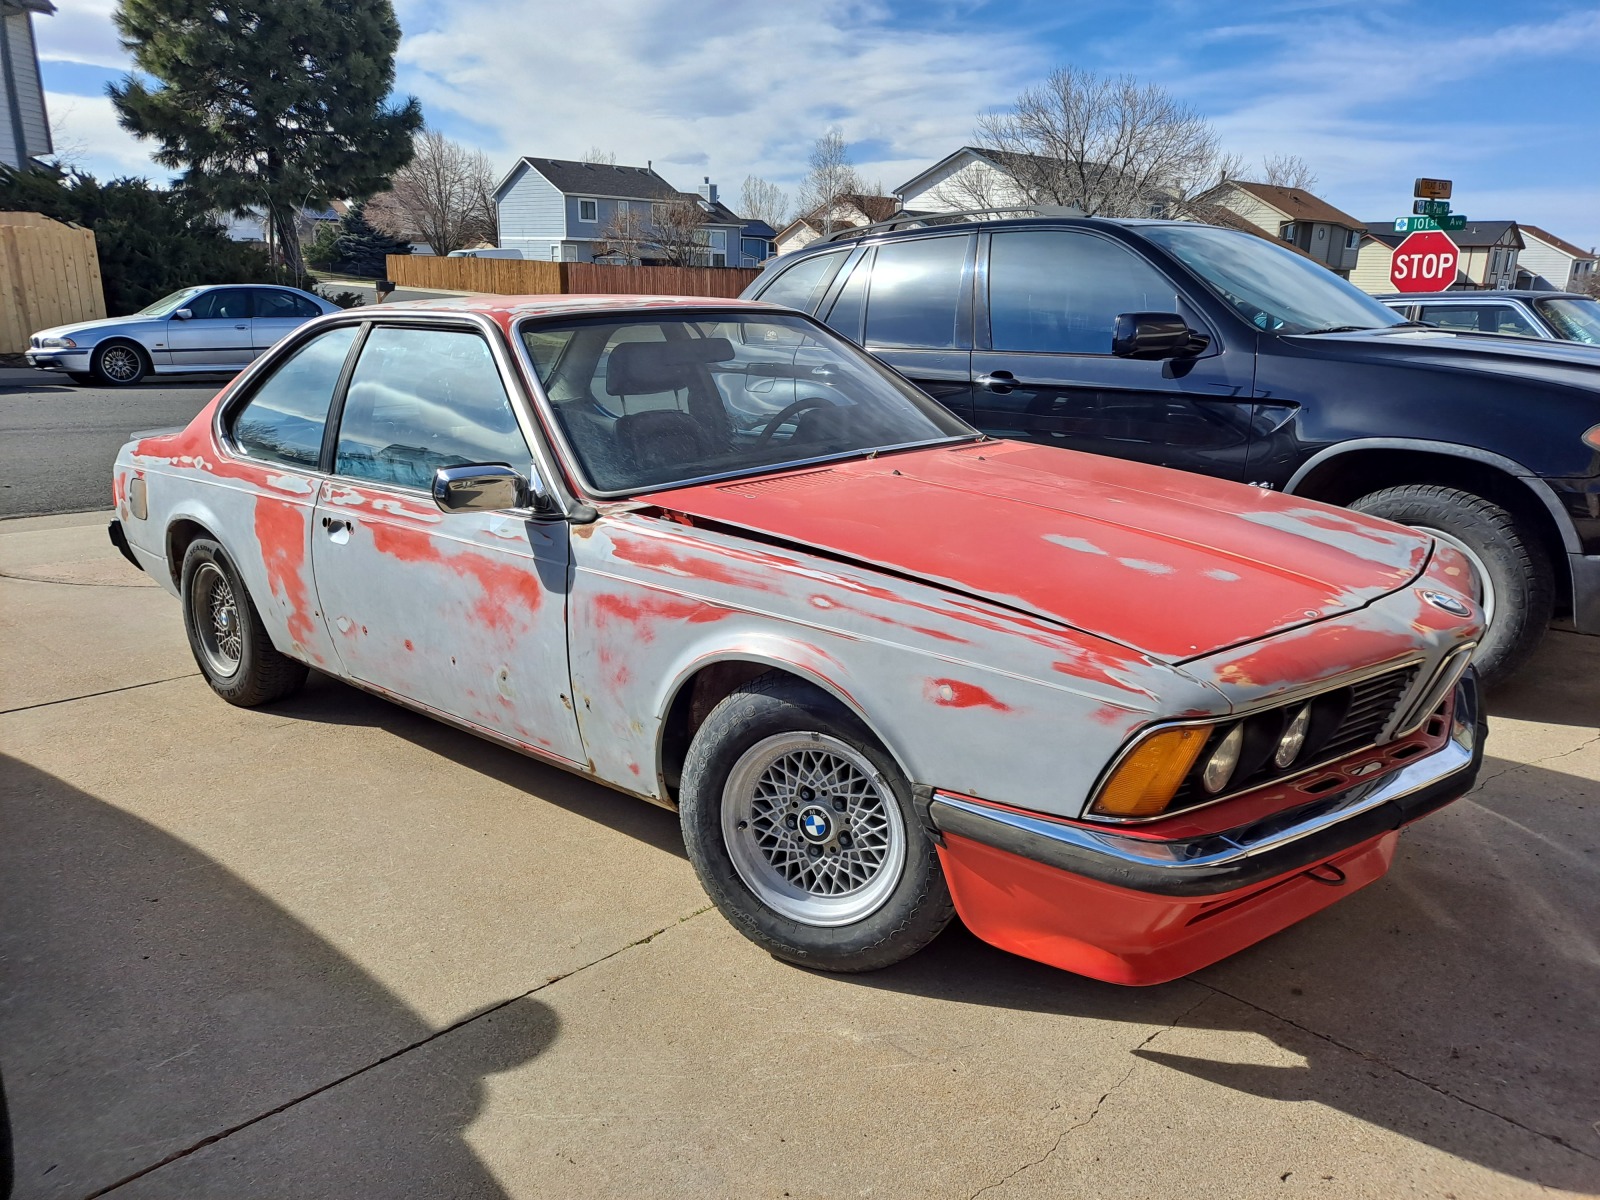
I also found another early euro 635 and bought it and have been working on getting it running and driving again. Off the road since possibly 1988 :shock:
Image

Little progress getting a bunch of things replaced and running. I will need to decide what to do with it. It is a 1979 slicktop, henna red, M90, dogleg, lesd and recaro car...

Image

But back to Burt:

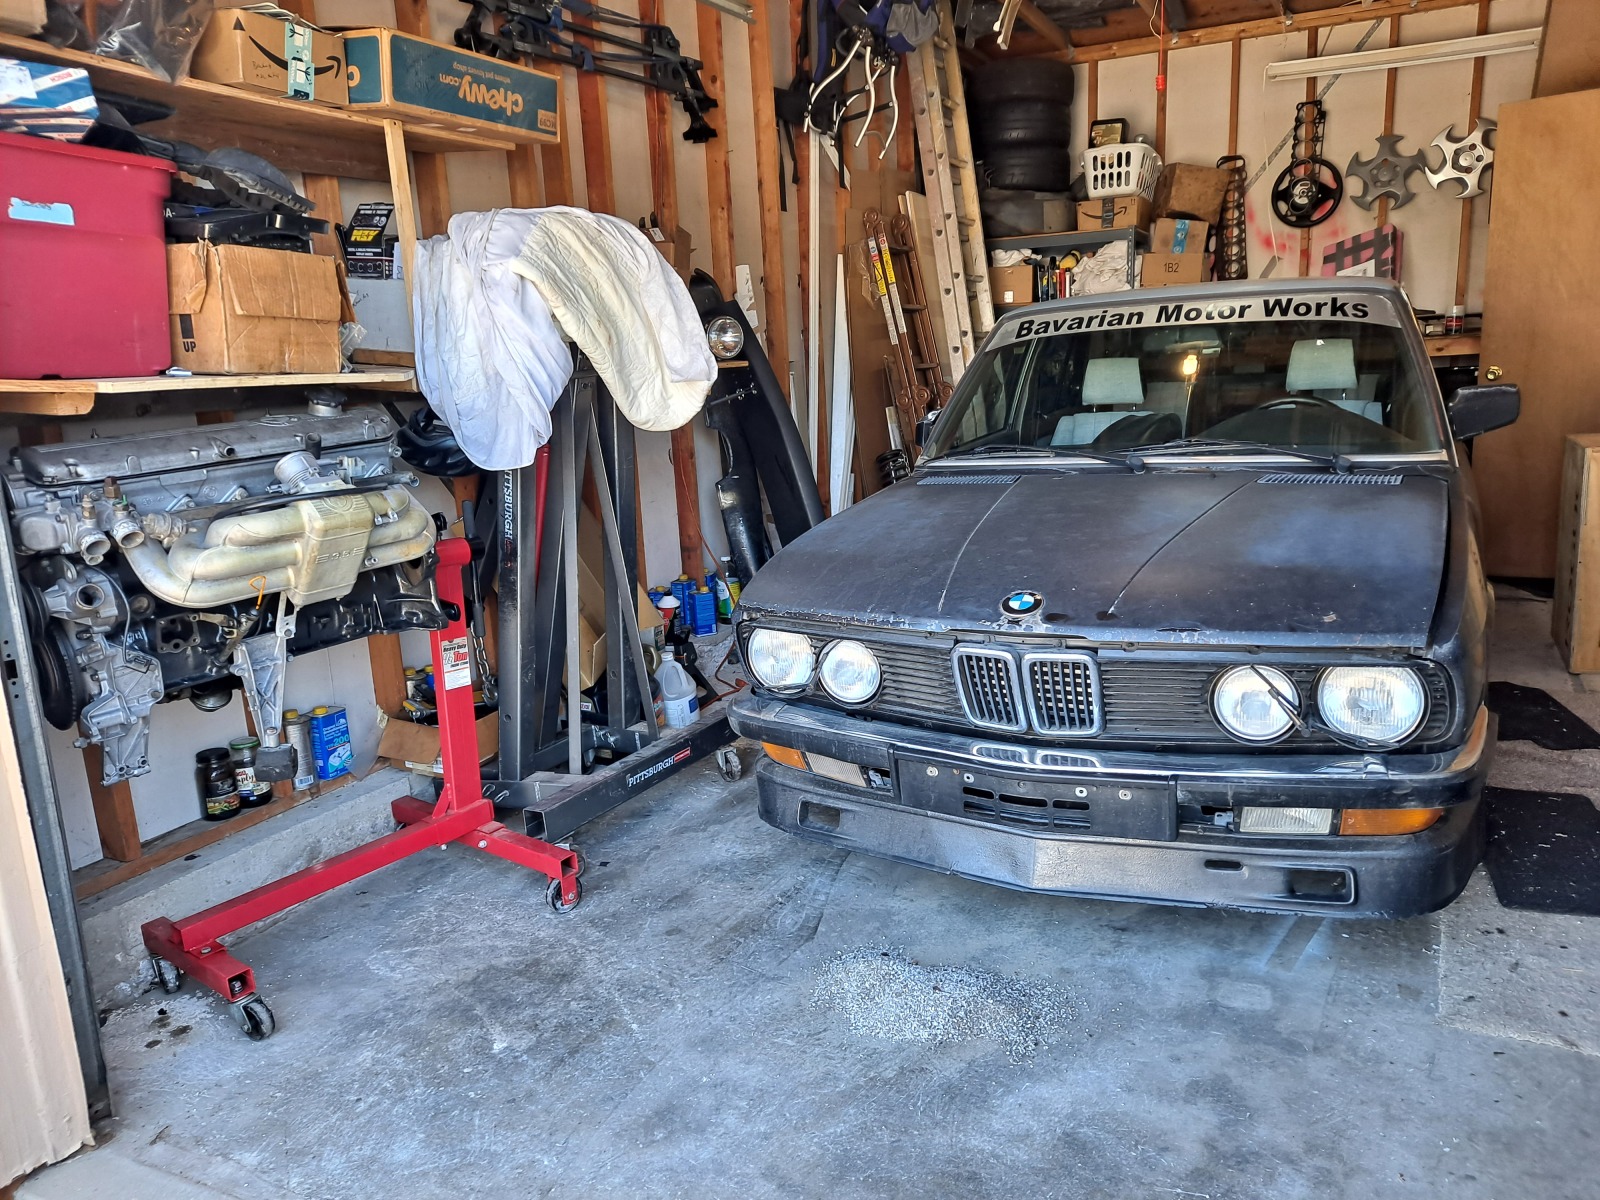
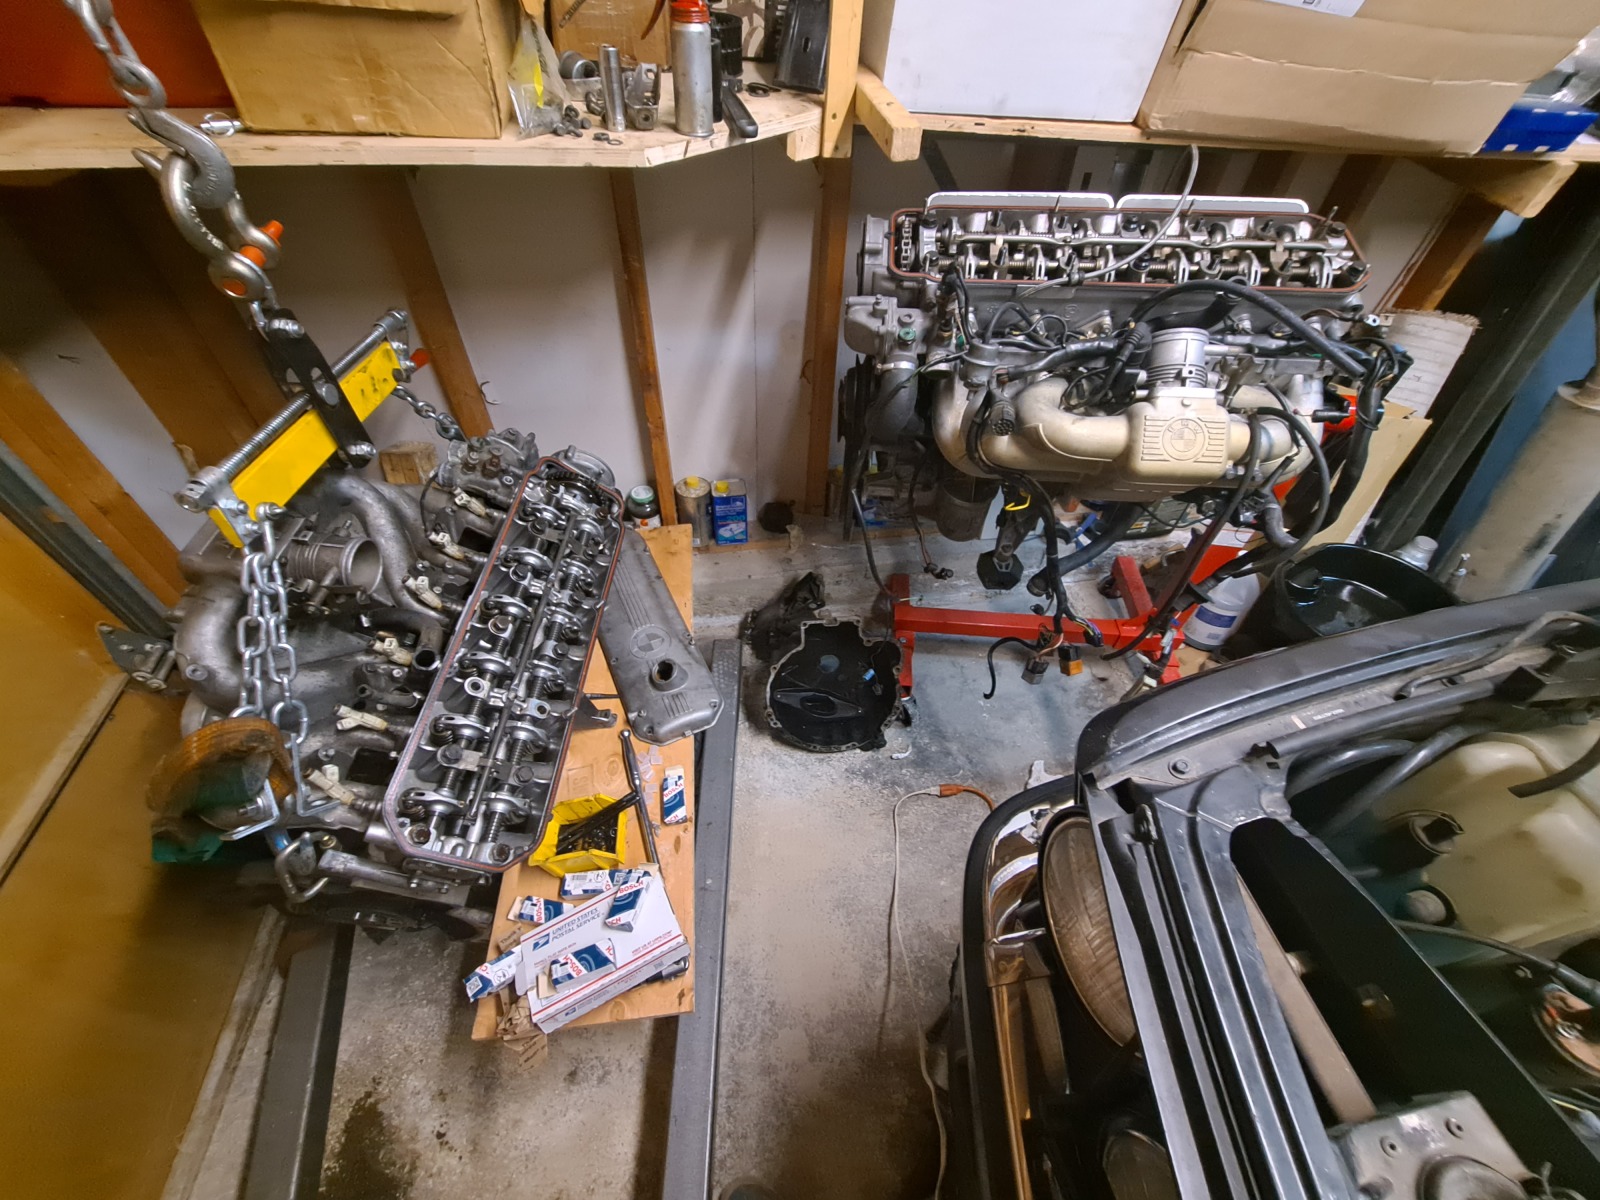
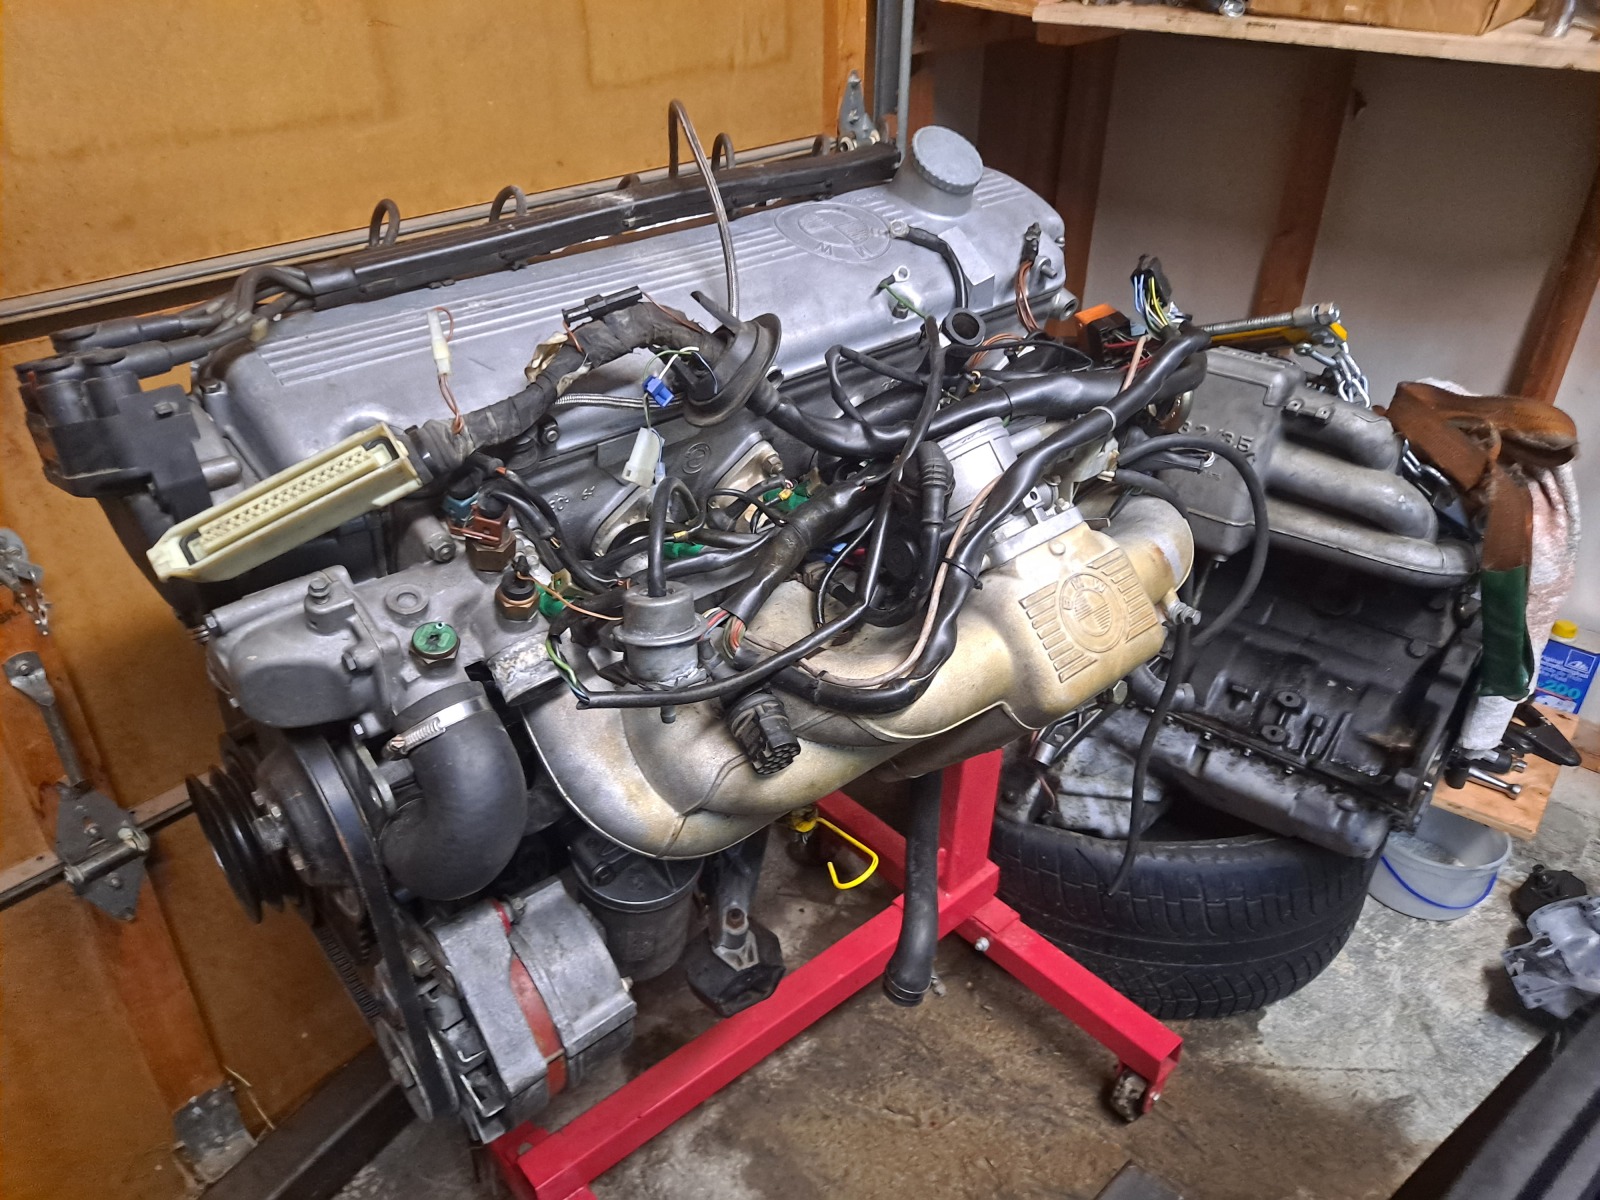
I had a chance to get to more engine progress since I had a spot in the garage with the running and driving black 635CSi. You can see the engine that has been sitting there since last fall. Recall it is an 85 block with B35 pistons and head.

Image

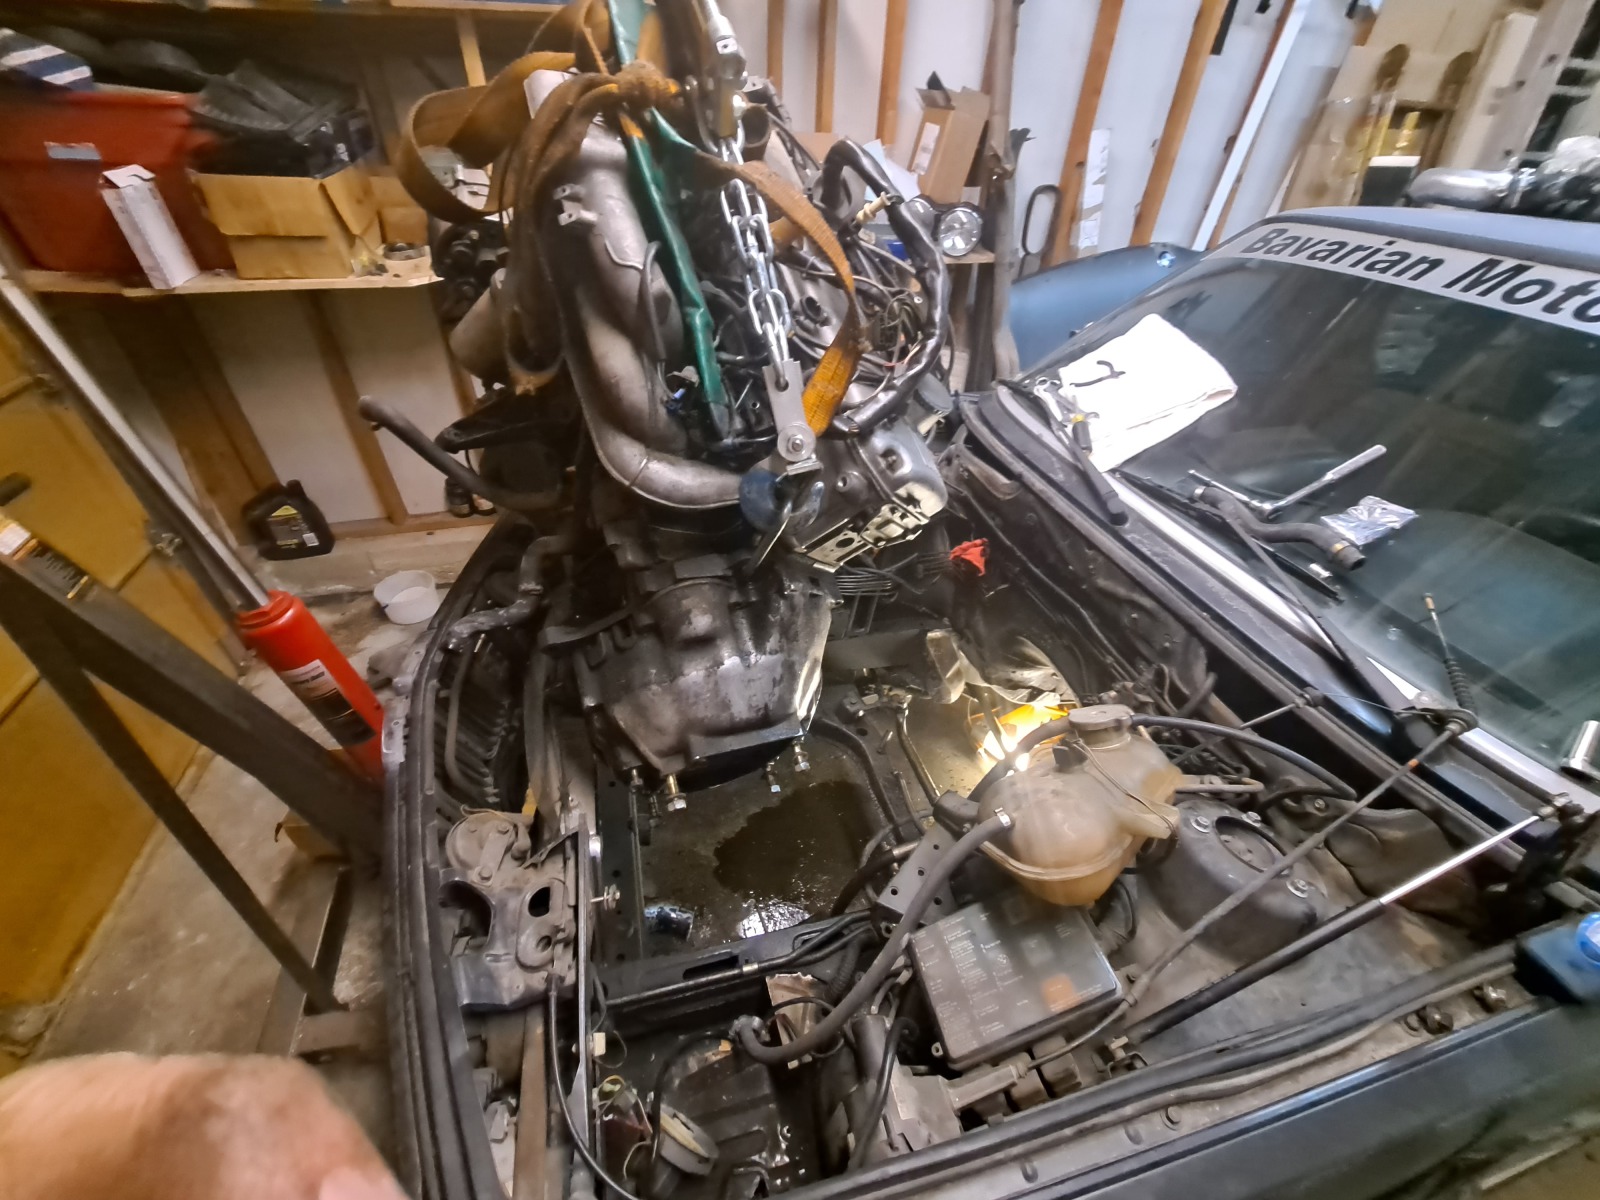
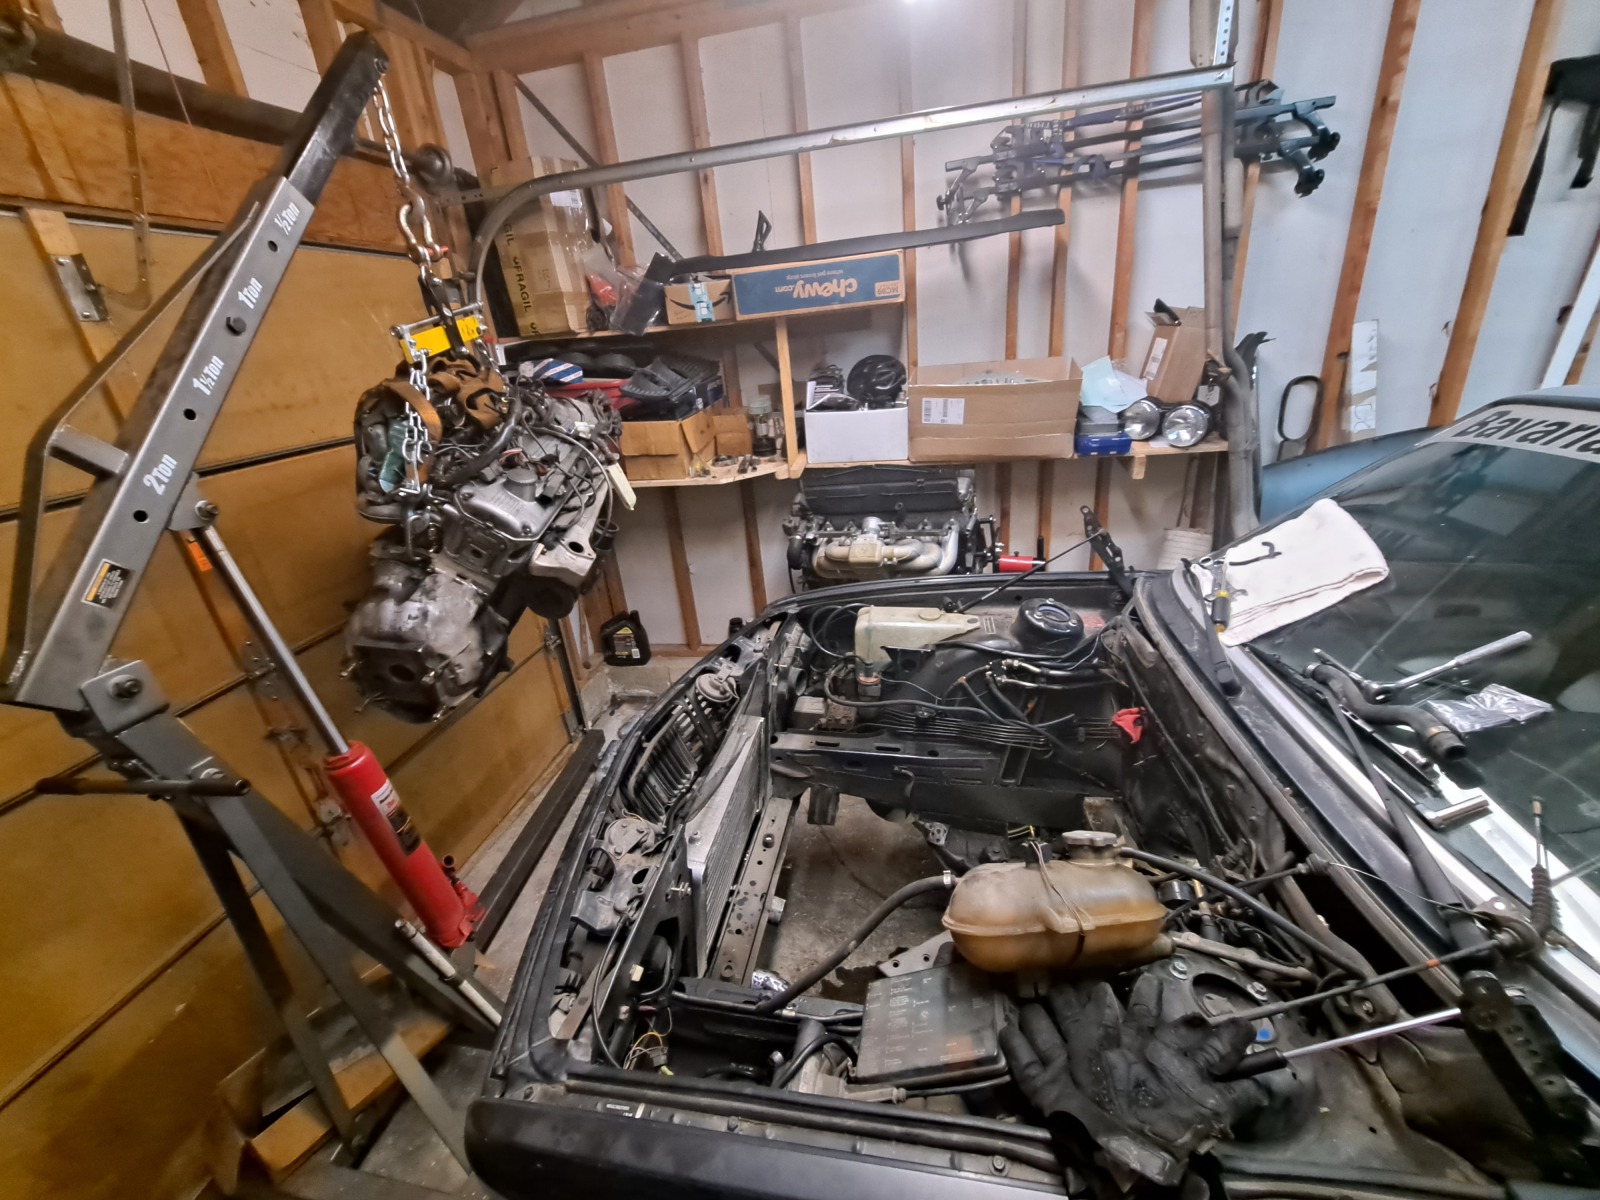
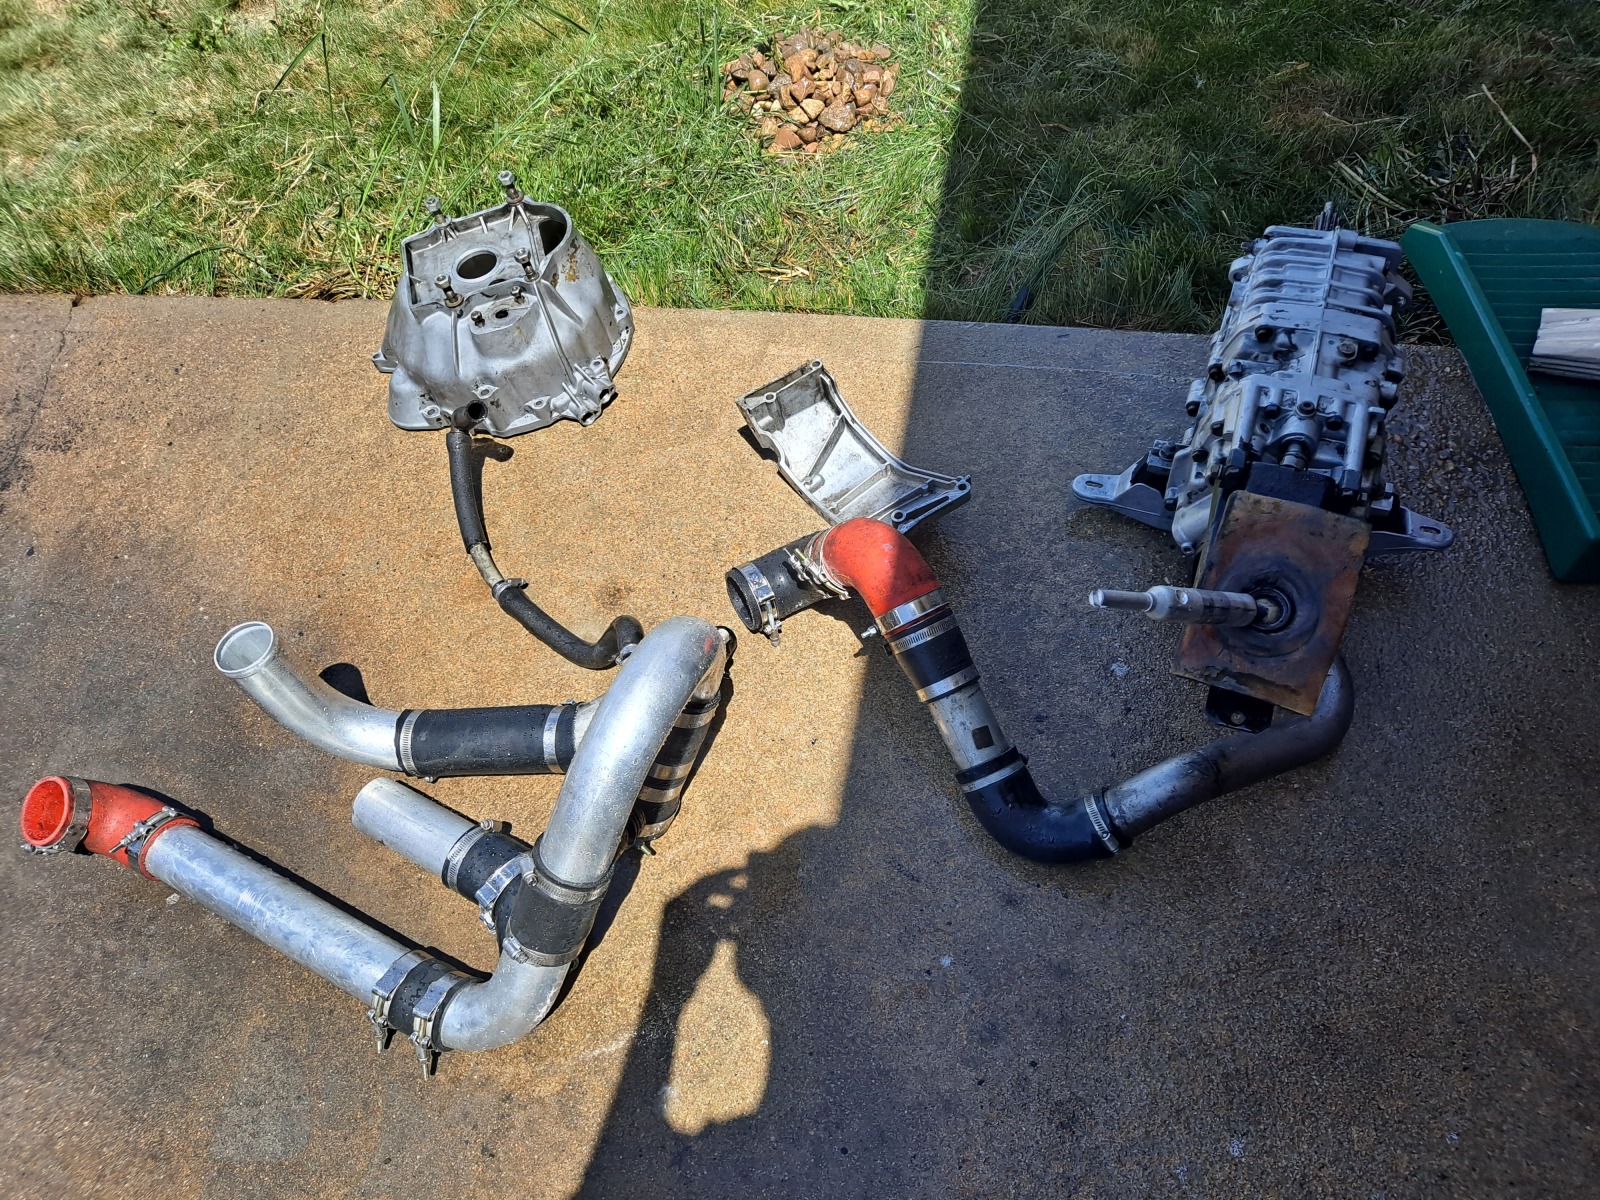
Couldn't get the trans bellhousing off due to the torx bolt that was partially stripped. So instead, I removed the trans and pulled it with the flywheel and bellhousing in place.

Image

I have just enough room in my garage to do this with the door closed and the car in the air and the height of everything. I knew this from the 635csi engine rebuild.

Image

Starting to swap a few parts, such as alternator, head bolts, wiring harness...

Image

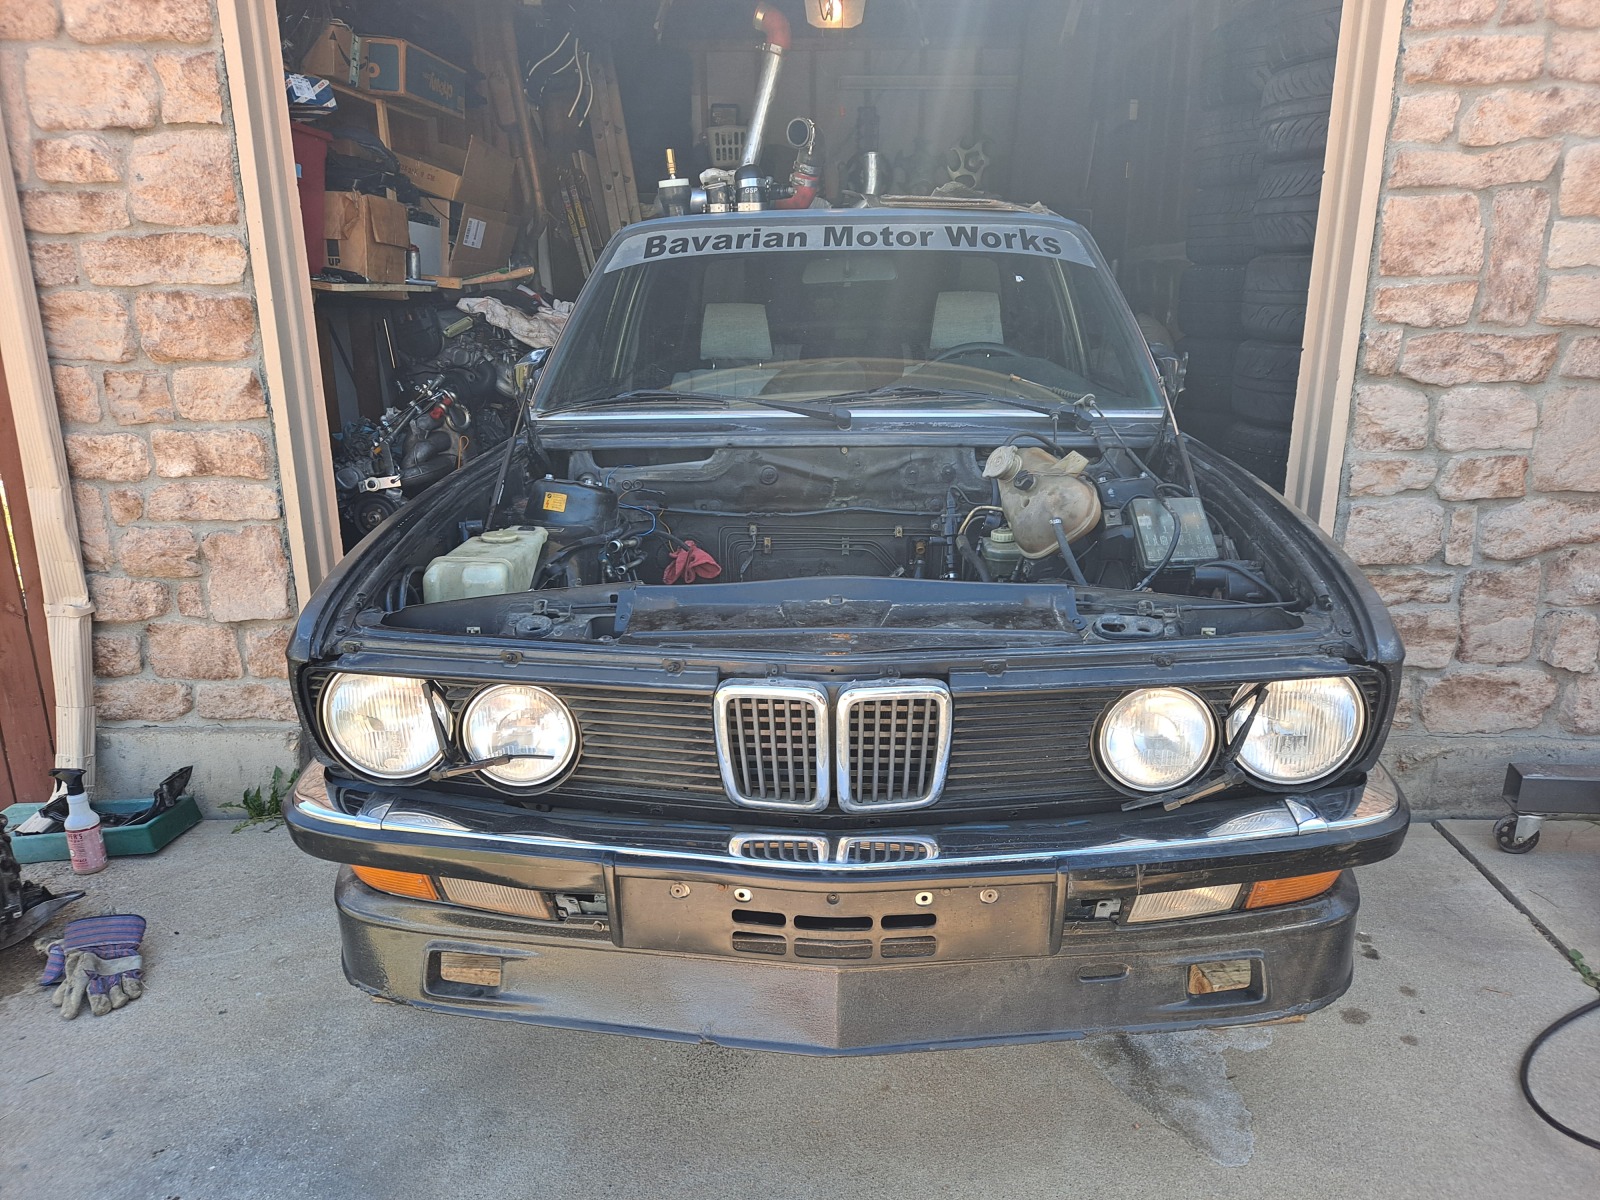
The euro look is pretty exciting for me, even if the paint is sort of rough. Here I was pulling the nose out to power wash off grease and grime while I was in here. It was pretty oily due to the blowby of the engine with oil in a lot of areas and some dirt stuck everywhere. I haven't really driven the car much with this setup with the new piping and euro bumpers, so it is still a bit new to me to be admiring. The wipers are replicas but complete the look :cool:

Image

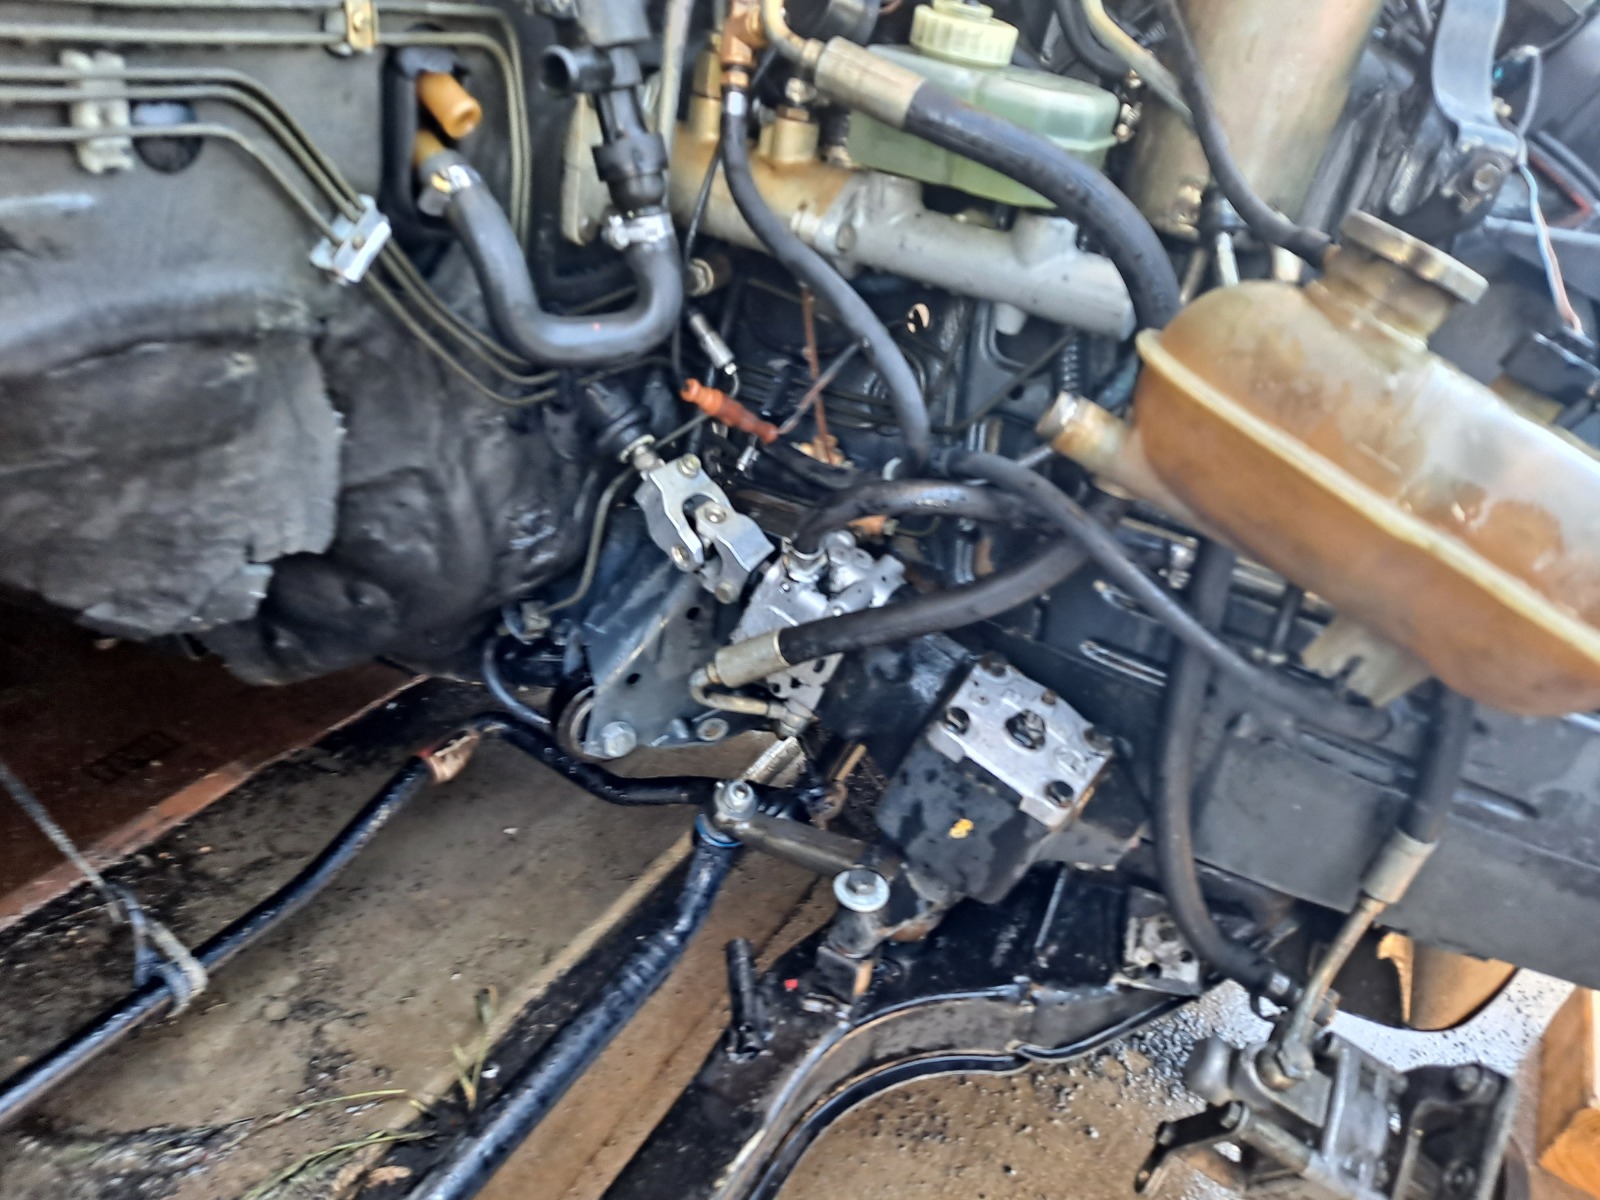
The biggest mess was by the hydroboost areas and steering box. Looking better...

Image

Also worked on really degreasing the G265 parts and intercooler piping. It makes it much nicer to work on when everything is clean.

Image

Here is the new engine build with 42# bosch injectors, B35 pistons, head and intake. New rings and bearings. I am keeping the B34 style oil filter housing, fuel rail and valve cover for the correct E28 look. I also kept the B32/B34 intake manifold support bracket

Image

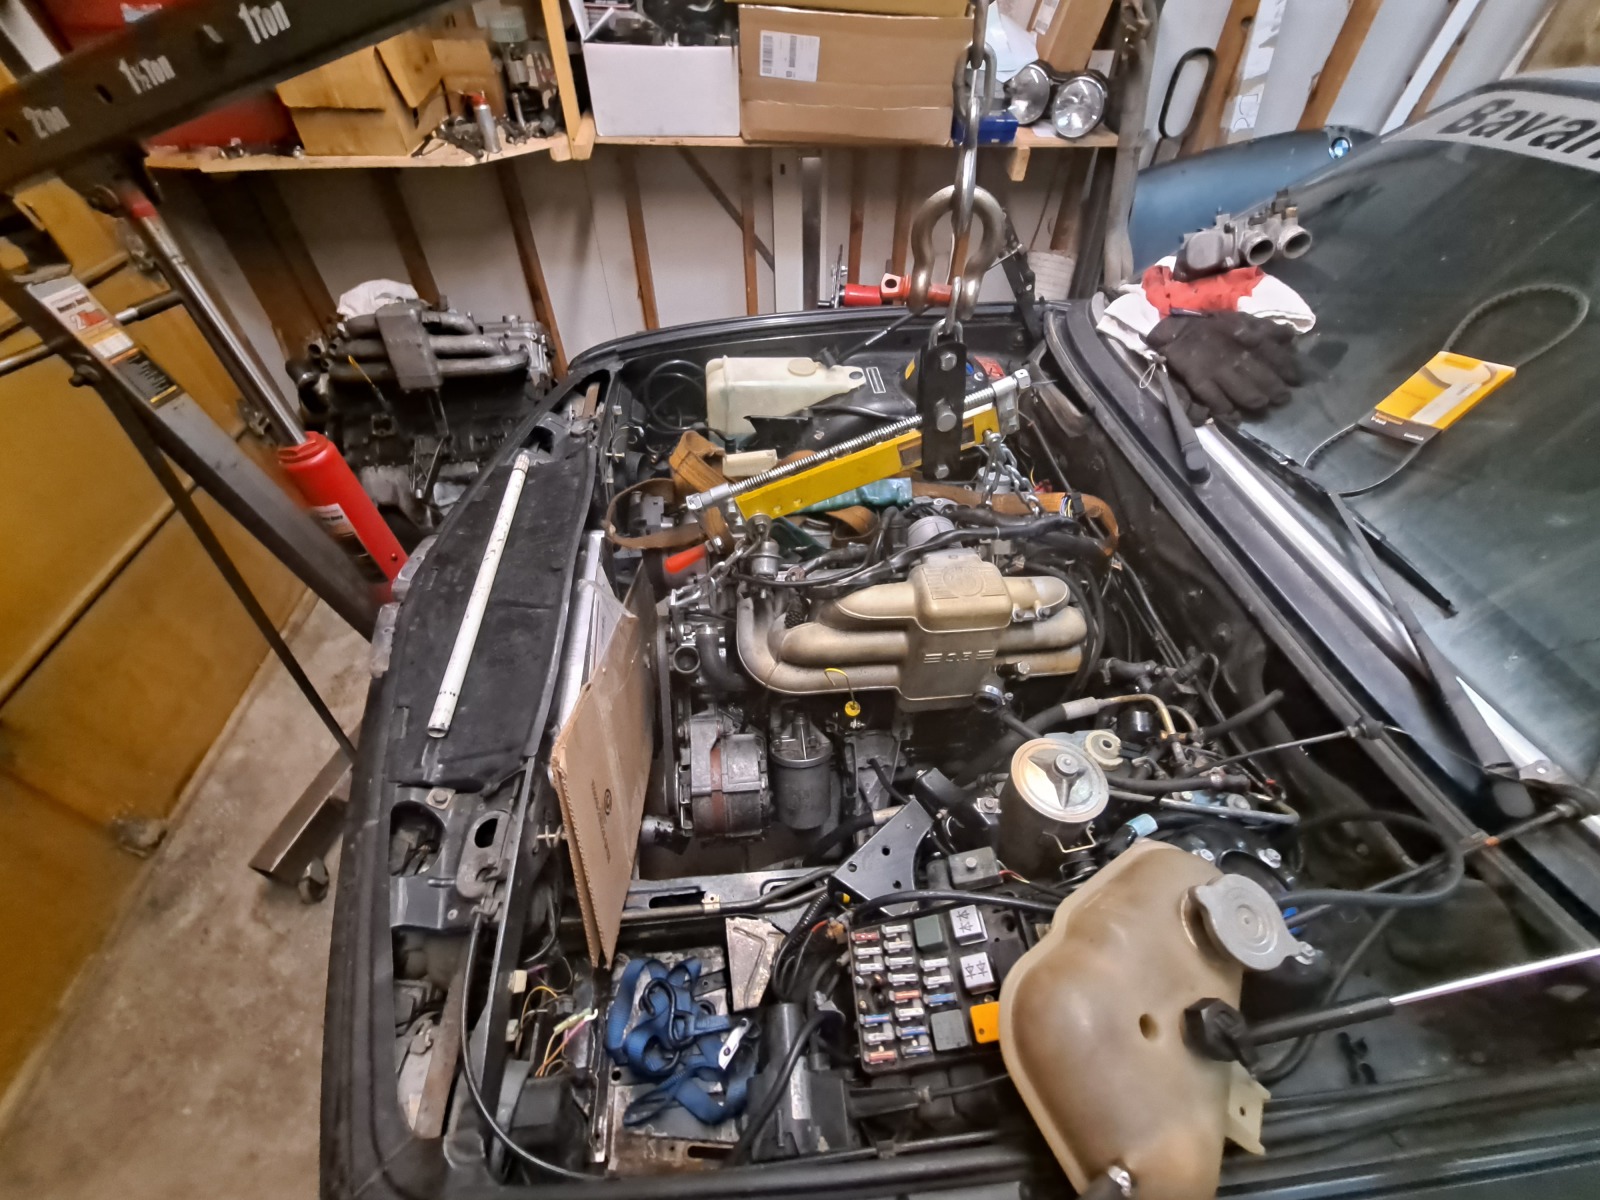
Engine going in recently.

Image

I wanted to mount the intercooler piping better and found this Ireland Engineering adapter to allow me to gain some clearance and remote mount the FPR. I think it is a pretty decent solution. I didn't want to try an adjustable FPR if I didn't have to. One less variable and I can keep things stock...

Image

I found that I had two different water pump pullies, so I went with the larger one to flow a little bit better. Can't recall when there were differences via models, maybe S38 vs M30 but I read about it here on mye28. I also added a new blow off valve and hope this one works a bit better than the recirculating one I had.

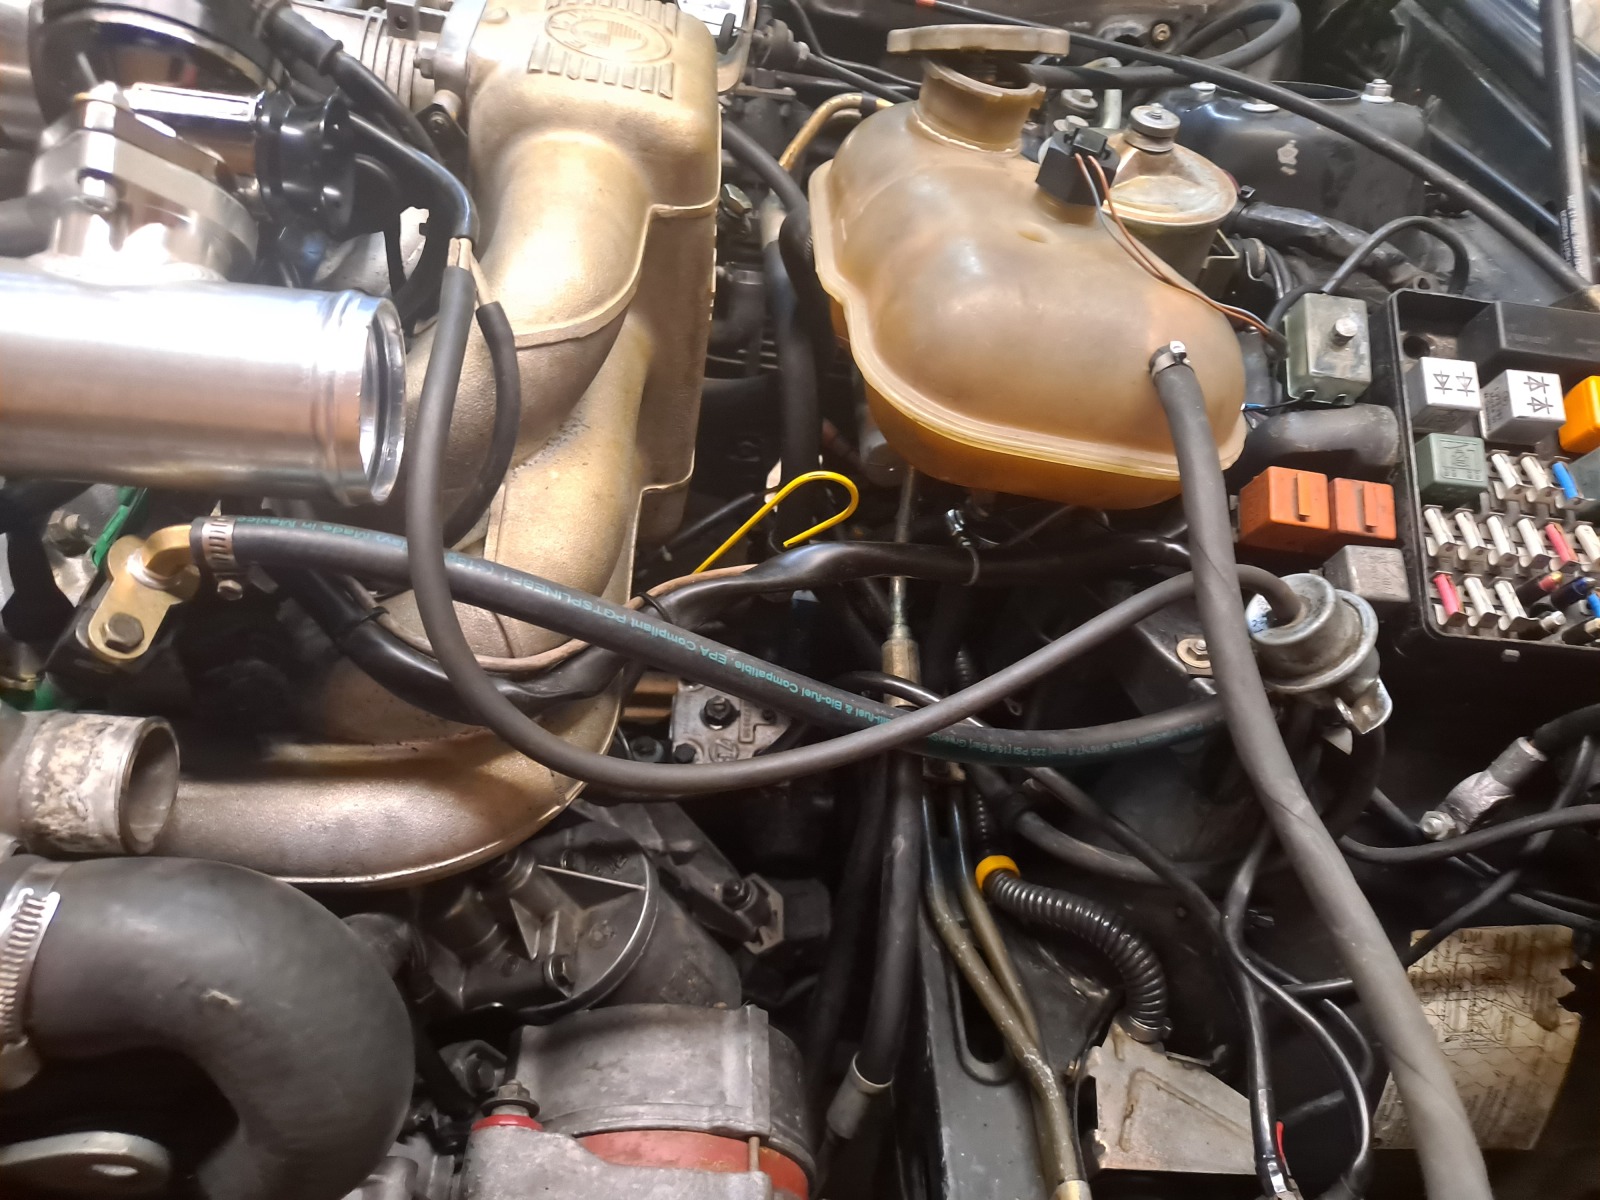
Downpipe, trans/flywheel/ clutch and all is back in place, I just need to finish putting the exhaust back on. Here is the engine and turbo setup with all piping in place. It sort of looks like a crazy mess of wires and hoses. Not sure it is 'pretty' but it should work ok.
Image

I am still running the boost control MAC valve and have a small oil separator on the valve cover breather. We will see how that works or if I need a bigger unit like Mann provent 200.

Unfortunately, the oil pressure sender seemed to have crapped out on me so I have another on order after confirming the oil pressure light works with an old OEM sensor. I ordered the M12x1.5 replacement for my gauge VDO 360-024.

I also found a battery drain coming from the passenger door central locking unit or maybe the door lock heater. Another weird issue, the parking brake light was on without the brake on. Then when I pull it, the light gets brighter. Weird thing I will have to figure out...

I checked my old engine virtual dyno numbers and plotted into BorgWarner's Matchbot. I used my torque and power numbers along with a similar turbo to see about where the compressor efficiency is and see things like airflow and back pressure at my elevation. With this engine, I expect better response with the higher compression as well as a little bit more power and torque-- maybe 10-15%?

Here's the estimate just for kicks
Image
Image
Image
Image

Probably a pretty decent estimate...


Stay tuned as I hope to make more progress soon here!

Re: 535is Turbo (ex 633 Callaway)- 2023 Update

Posted: Jun 08, 2024 12:57 PM
by austin8753
nice job, keep up the good work.

Re: 535is Turbo (ex 633 Callaway)- 2023 Update

Posted: Jun 16, 2024 4:13 PM
by turbodan
Did you have any luck with that tach output configuration?

Re: 535is Turbo (ex 633 Callaway)- 2023 Update

Posted: Jun 17, 2024 1:33 AM
by tschultz
I got the engine running this week! Turned out my spare water pump had a leak, so I replaced it with the one that had come off the B34 engine and all was resolved.

A little scary to turn the key waiting for oil pressure or firing. But I did that recently on another car so my nervous energy was a little less. A relief when it fired! Nice to hear it Rev and be running again.

I also installed a standard Nissan radiator since the behr south african unit seemed to run a few degrees hot.

I was able to change the req_fuel value and scale my map with no problems. I decided to cut my value in half again and get a little better resolution on my fuel map, that seemed to work pretty easy! Right now I am used about 180 characters out of the 255 maximum.

I used the dead time listed above (.763ms at 13.2V) and voltage correction of .17ms/V.

I went to check timing on my light to confirm tooth #1 angle just because this had confused me years back and I got the same result... Paint marks indicating TDC of the piston between the crank and the block. I mark near the alternator bracket which is convenient enough. Then Idle fixed advance at ~17degrees and turned on the timing light. The mark didn't line up until the gun showed ~45degrees.
I am not sure how this can be. I did this on my Ljet e28 and checked max advance without the distributor and got maximum ~38 degrees which is correct by the book. So I am pretty sure my gun and method for checking are good...

I am using falling edge triggering with the 60-2 wheel and set my trigger angle offset at 87 is based on some post by ianwood on this forum. he describes how he got to that number though I am not sure I do totally. From what I understand, and via the board FAQ, it should be about 87-89 degrees (falling edge, 84 degrees for rising edge) and I was hoping to get it timing dead on...
I checked the timing calculations in megasquirt and the only two calculations shown were base advance and cold advance, both at 17 degrees and 17.5 degrees, respectively (in my test the engine wasn't totally 100% warm).

So why the discrepancy? How else do I check this? I tried reading through this and get the 20 skip tooth setting, but not sure how it correlates to the 87-89degree setting. https://www.useasydocs.com/details/crankwheel.htm

If Charlie's B35 build was at TDC in this picture, maybe it could be visibly making sense in this picture?
https://www.flickr.com/photos/ckindel/14444019253/

Here's my estimate, of 84 degrees based on a rough estimate that sort of makes some sense. But it doesn't convince me how to check it manually with my light.
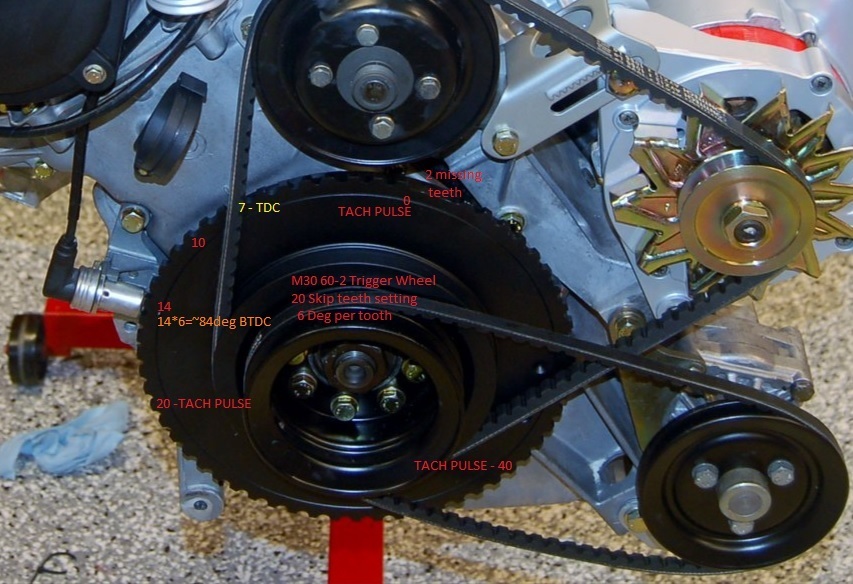
Image

According to a different poster on bimmerforums, this would be how to check:
The correct way to verify the timing on megasquirt is to set the timing to a fixed number. You can do this in the wheel decoder menu. Under the "fixed advanced" drop down select Fixed Advance, then set the fixed advance number to 12 degrees. Start the car and let it idle. Take a reading with your timing light. The #1 coil should be firing exactly 2 teeth before the O l T mark on the balancer. Adjust the trigger offset number until its perfect. Once you have it set turn the fixed timing off. Check it again while it is running on the timing table. It should match the ignition advance shown on the dashboard of tuner studio.
Maybe something to try but the M30 O|T is super hard to see!! If set to 89 degrees instead of 87 does this mean actual timing could be 2 degrees retarded?

Also from James of Ms extra:
Please ignore and remove the TDC pointer from your diagrams and thinking. As per the manual, set the engine to TDC and leave it there. It is intentional that the manual does not show a TDC mark on the wheel and shows the timing pointer and timing marks independantly. The Megasquirt does not care where the sensor is positioned on the engine or whether the missing tooth is at 1 o'clock, 7 o'clock or 11 o'clock.

What does matter and is critical is the number of tooth gaps between the sensor and tooth#1 when the wheel rotates in the normal direction.
turbodan wrote: Jun 16, 2024 4:13 PM Did you have any luck with that tach output configuration?
I had messaged Dan the other day about a post I read online with the tach settings. Dan's post suggested the output of the tach was being used to drive the advance and real advance wasn't as expected until the tach out setting was adjusted. My setup uses IGN (JS10). I tried to change this to off as well as a different output, and then the car just wouldn't start. So, obviously, I have to leave this setting alone.

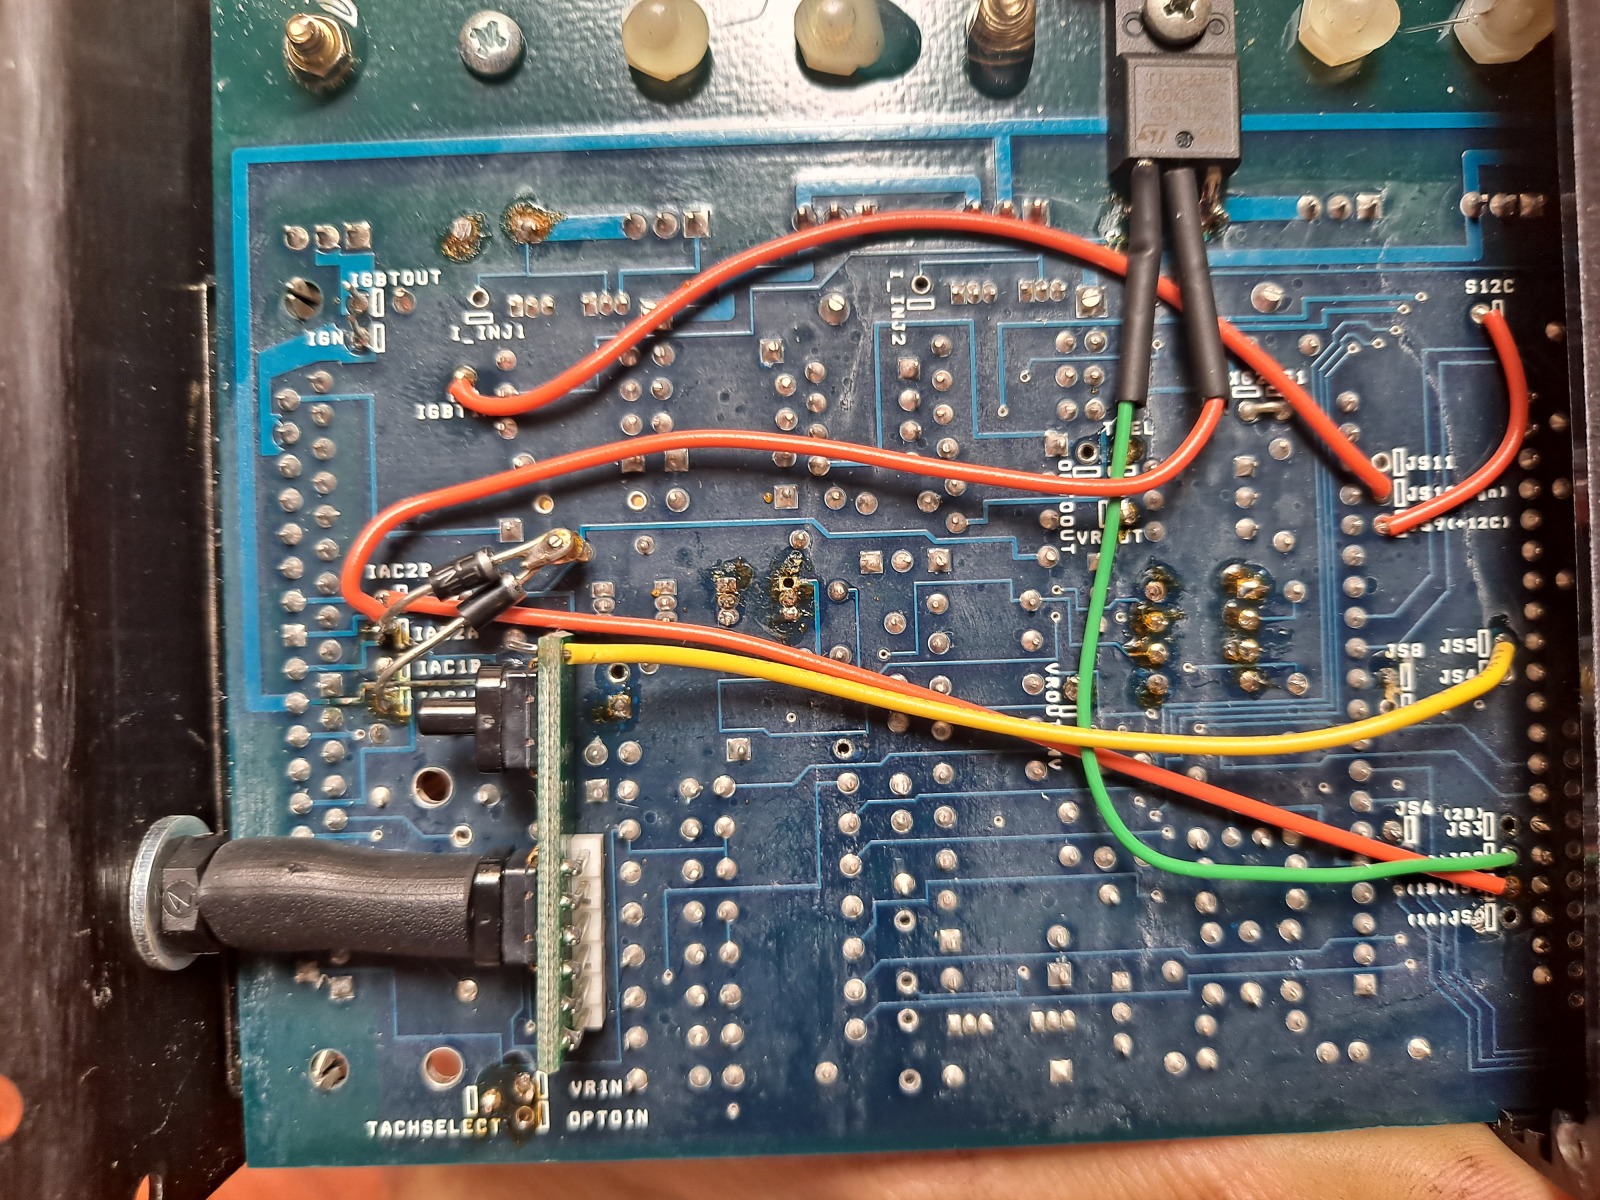
Speaking of, here's how my board is wired:
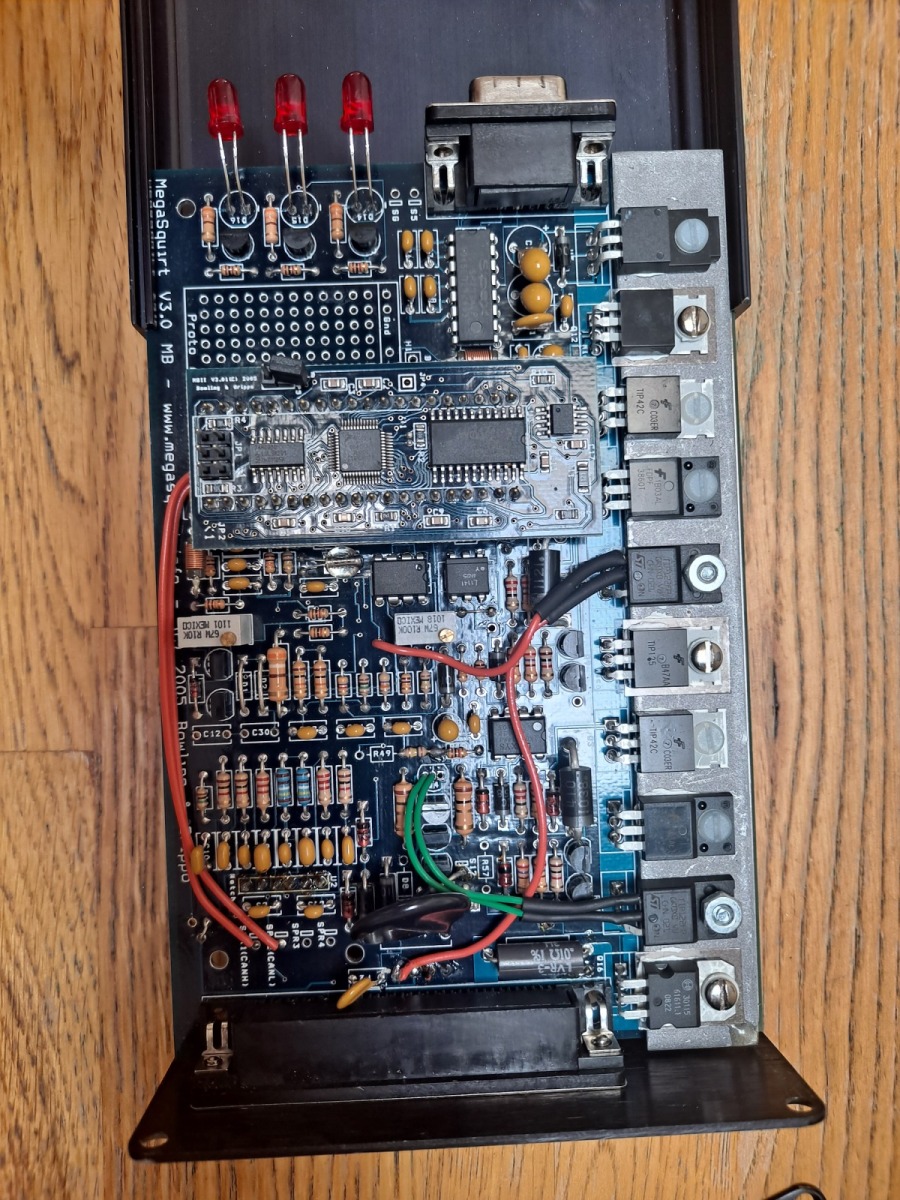
Image

Image

If I want wasted spark, I have to add BIP373 or equivalent, and the launch control is not wired in. I do have Map Daddy realtime baro correction and boost control, both functional features. I think my baro settings are decent based on my last mountain drive, but I am still unsure if MAT settings are correct or not. I have very little correction at this point in time (1-2% between 100F).

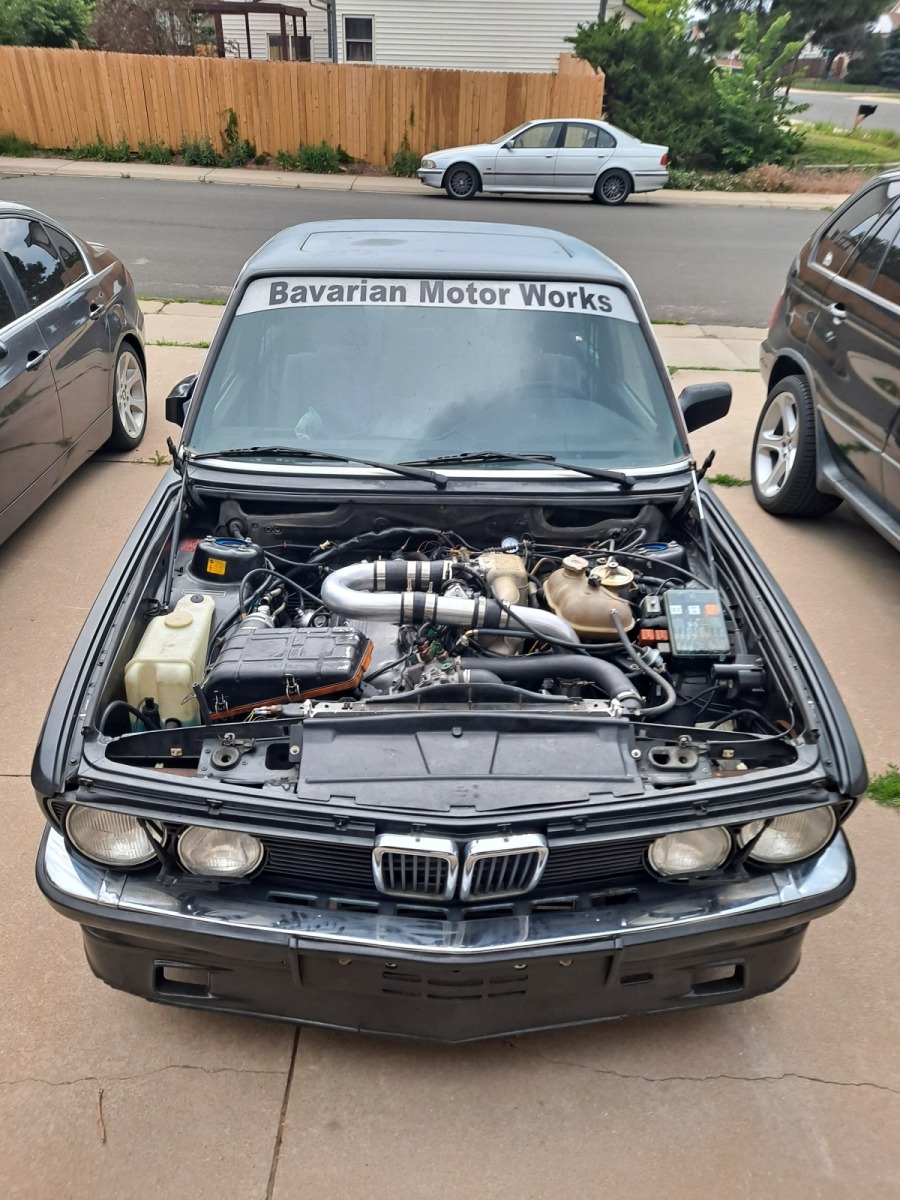
After starting the car, I was able to get it on the ground finally and drove it up and down the street and out of the garage.
Image

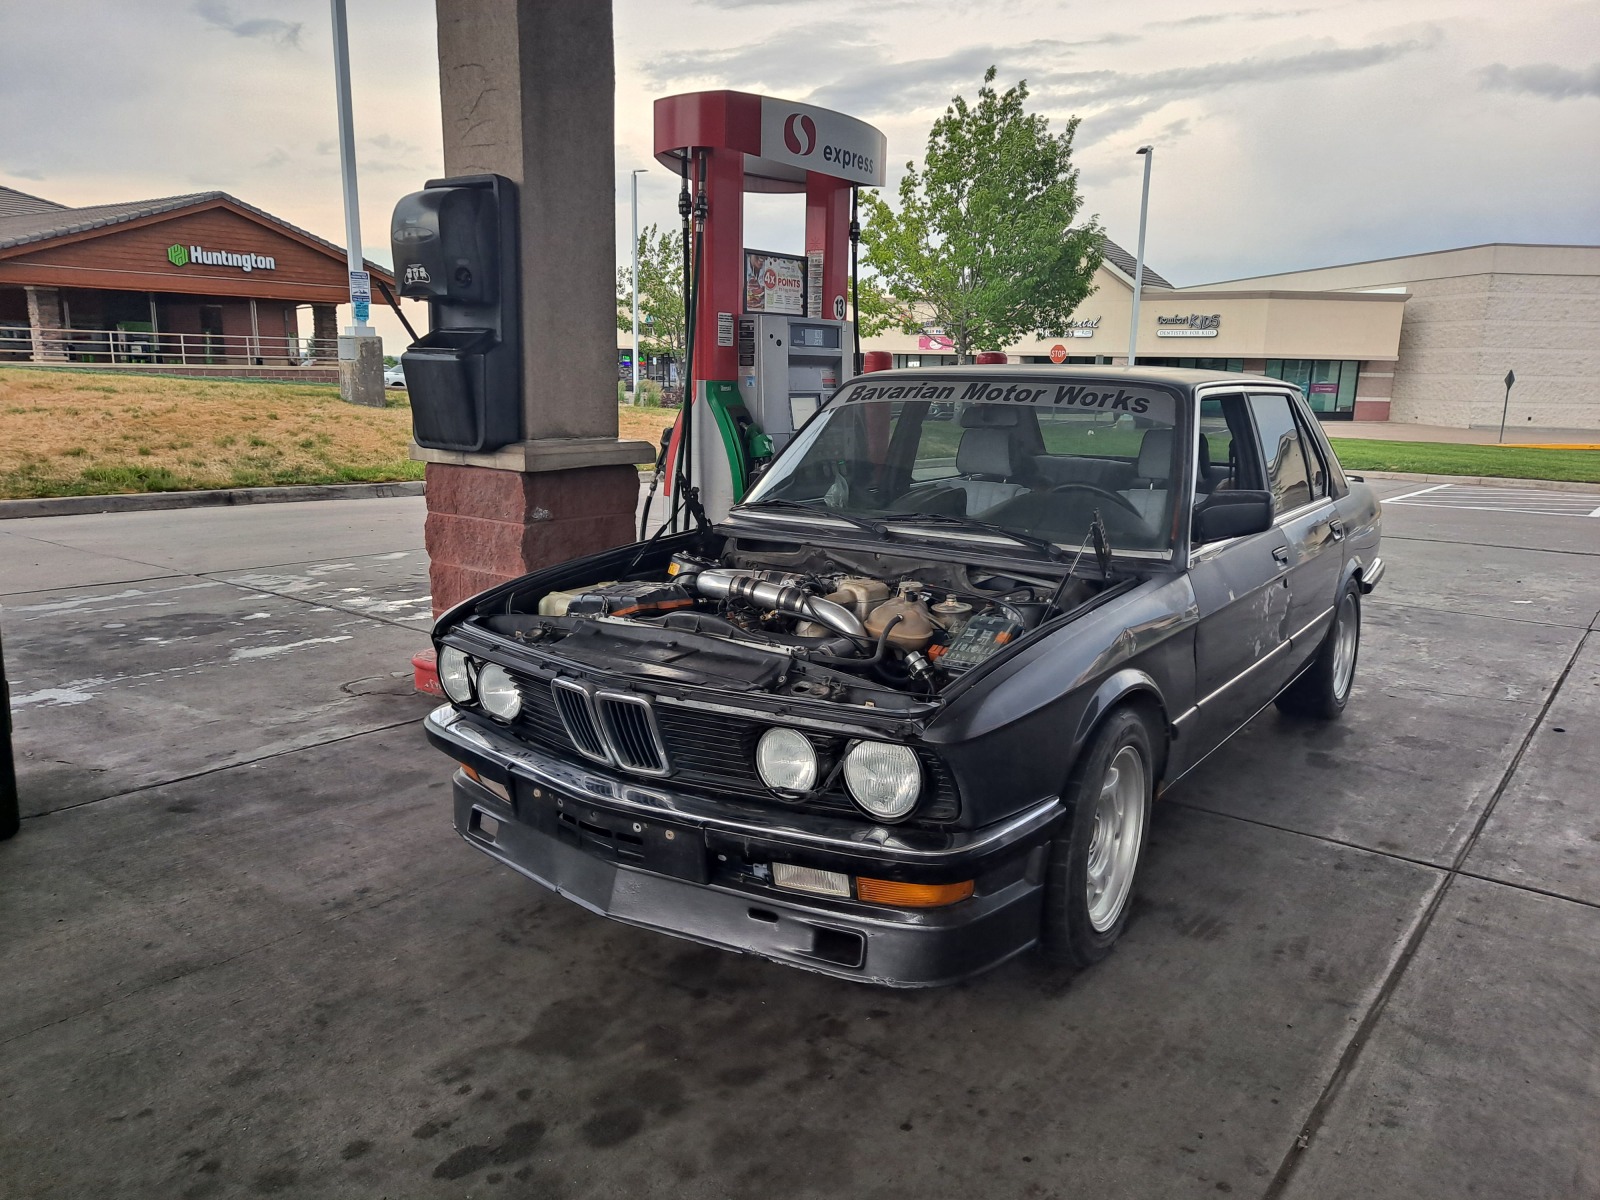
First stop was for some new fuel!

Image

I tried to vary the load and put about 5 miles and maybe 15 minutes run time. So the next day, I took the car out on the street and went up and down a number of times trying to check idle settings and also get some load, acceleration, deceleration and heat into the engine oil. After test driving, I had put about 50 miles on the car!

Speaking of intake temps, I have wondered if the standard intake is causing problems like heat soak. But when driving along, it seems like temps are 10-15F above ambient, which seems very reasonable to me as the sensor is in a pipe just above the valve cover and cylinder head! Moving faster benefits the A/A intercooler, and obviously slower could make it worse if stuck in traffic with no airflow.

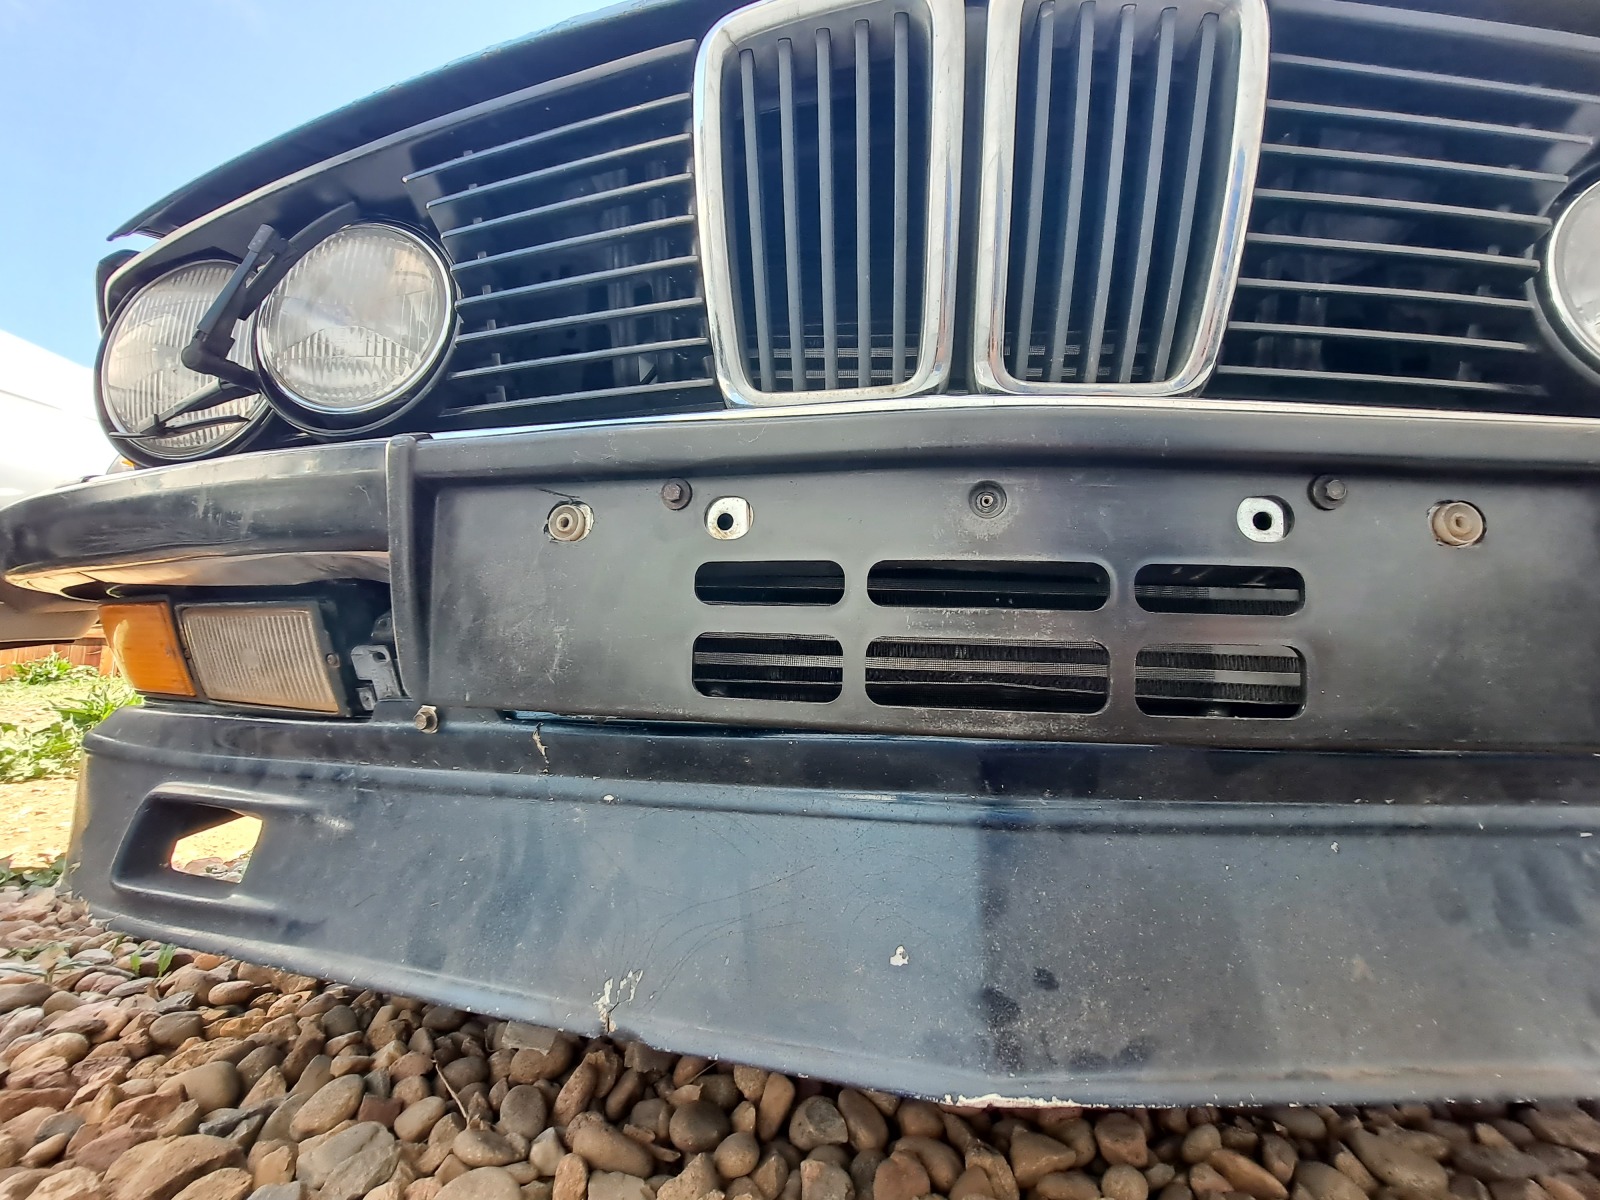
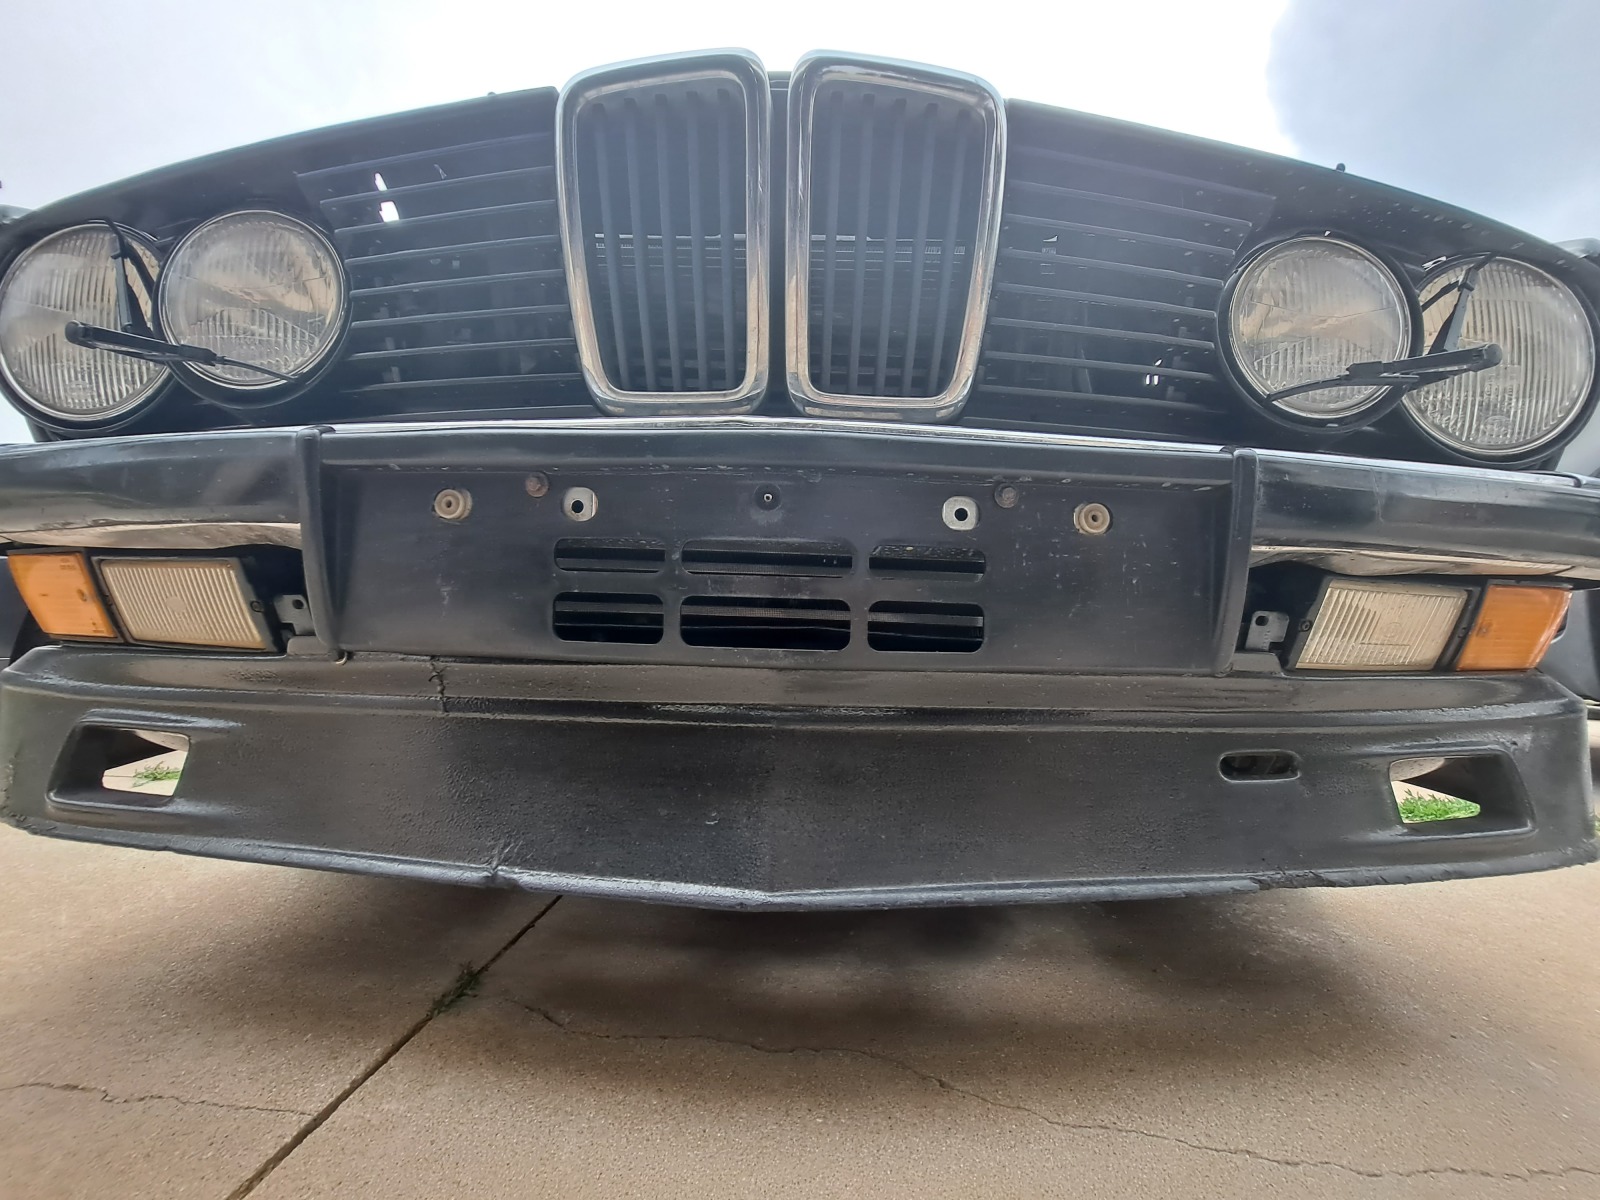
Here's my intercooler placement. Good airflow through the front grilles and a little blockage by the bumpers, but that's about it. The standard valance and license plate mount and spoiler has a nice opening area to allow airflow through. That is the bottom edge, and you can see it with the minor crunch on the lower edge of the intercooler
Image

Good news, the nissan radiator was holding temp of 180-190 F, only creeping up if idling in place without the fan and viscous fan cutch installed.


For break in, I am targeting a lowly 125kpa, but it sure is nice to be able to program it in the software and have the controller perfectly manage the boost level! I figure this boost level will allow the rings to be loaded plenty and I can up it later when more proven...

So far, I got the engine idling OK, though it seems to oscillate a little bit (200rpm every second or two) during warmup. When fully warm, the idle valve brings revs to about 1000rpm and then Closed Loop brings it down to about 800rpm. It holds fairly steady though that depends on the VE table. If idle is around 12.5:1, it seem steadier, though I am for 13.2AFR via closed loop control idle control and give 8% authority. No EGO control at idle.

Initial impression, it is running and I think just that little bit more responsive than the B34 in there before. I haven't noticed turbo lag like with the 8:1 engine...

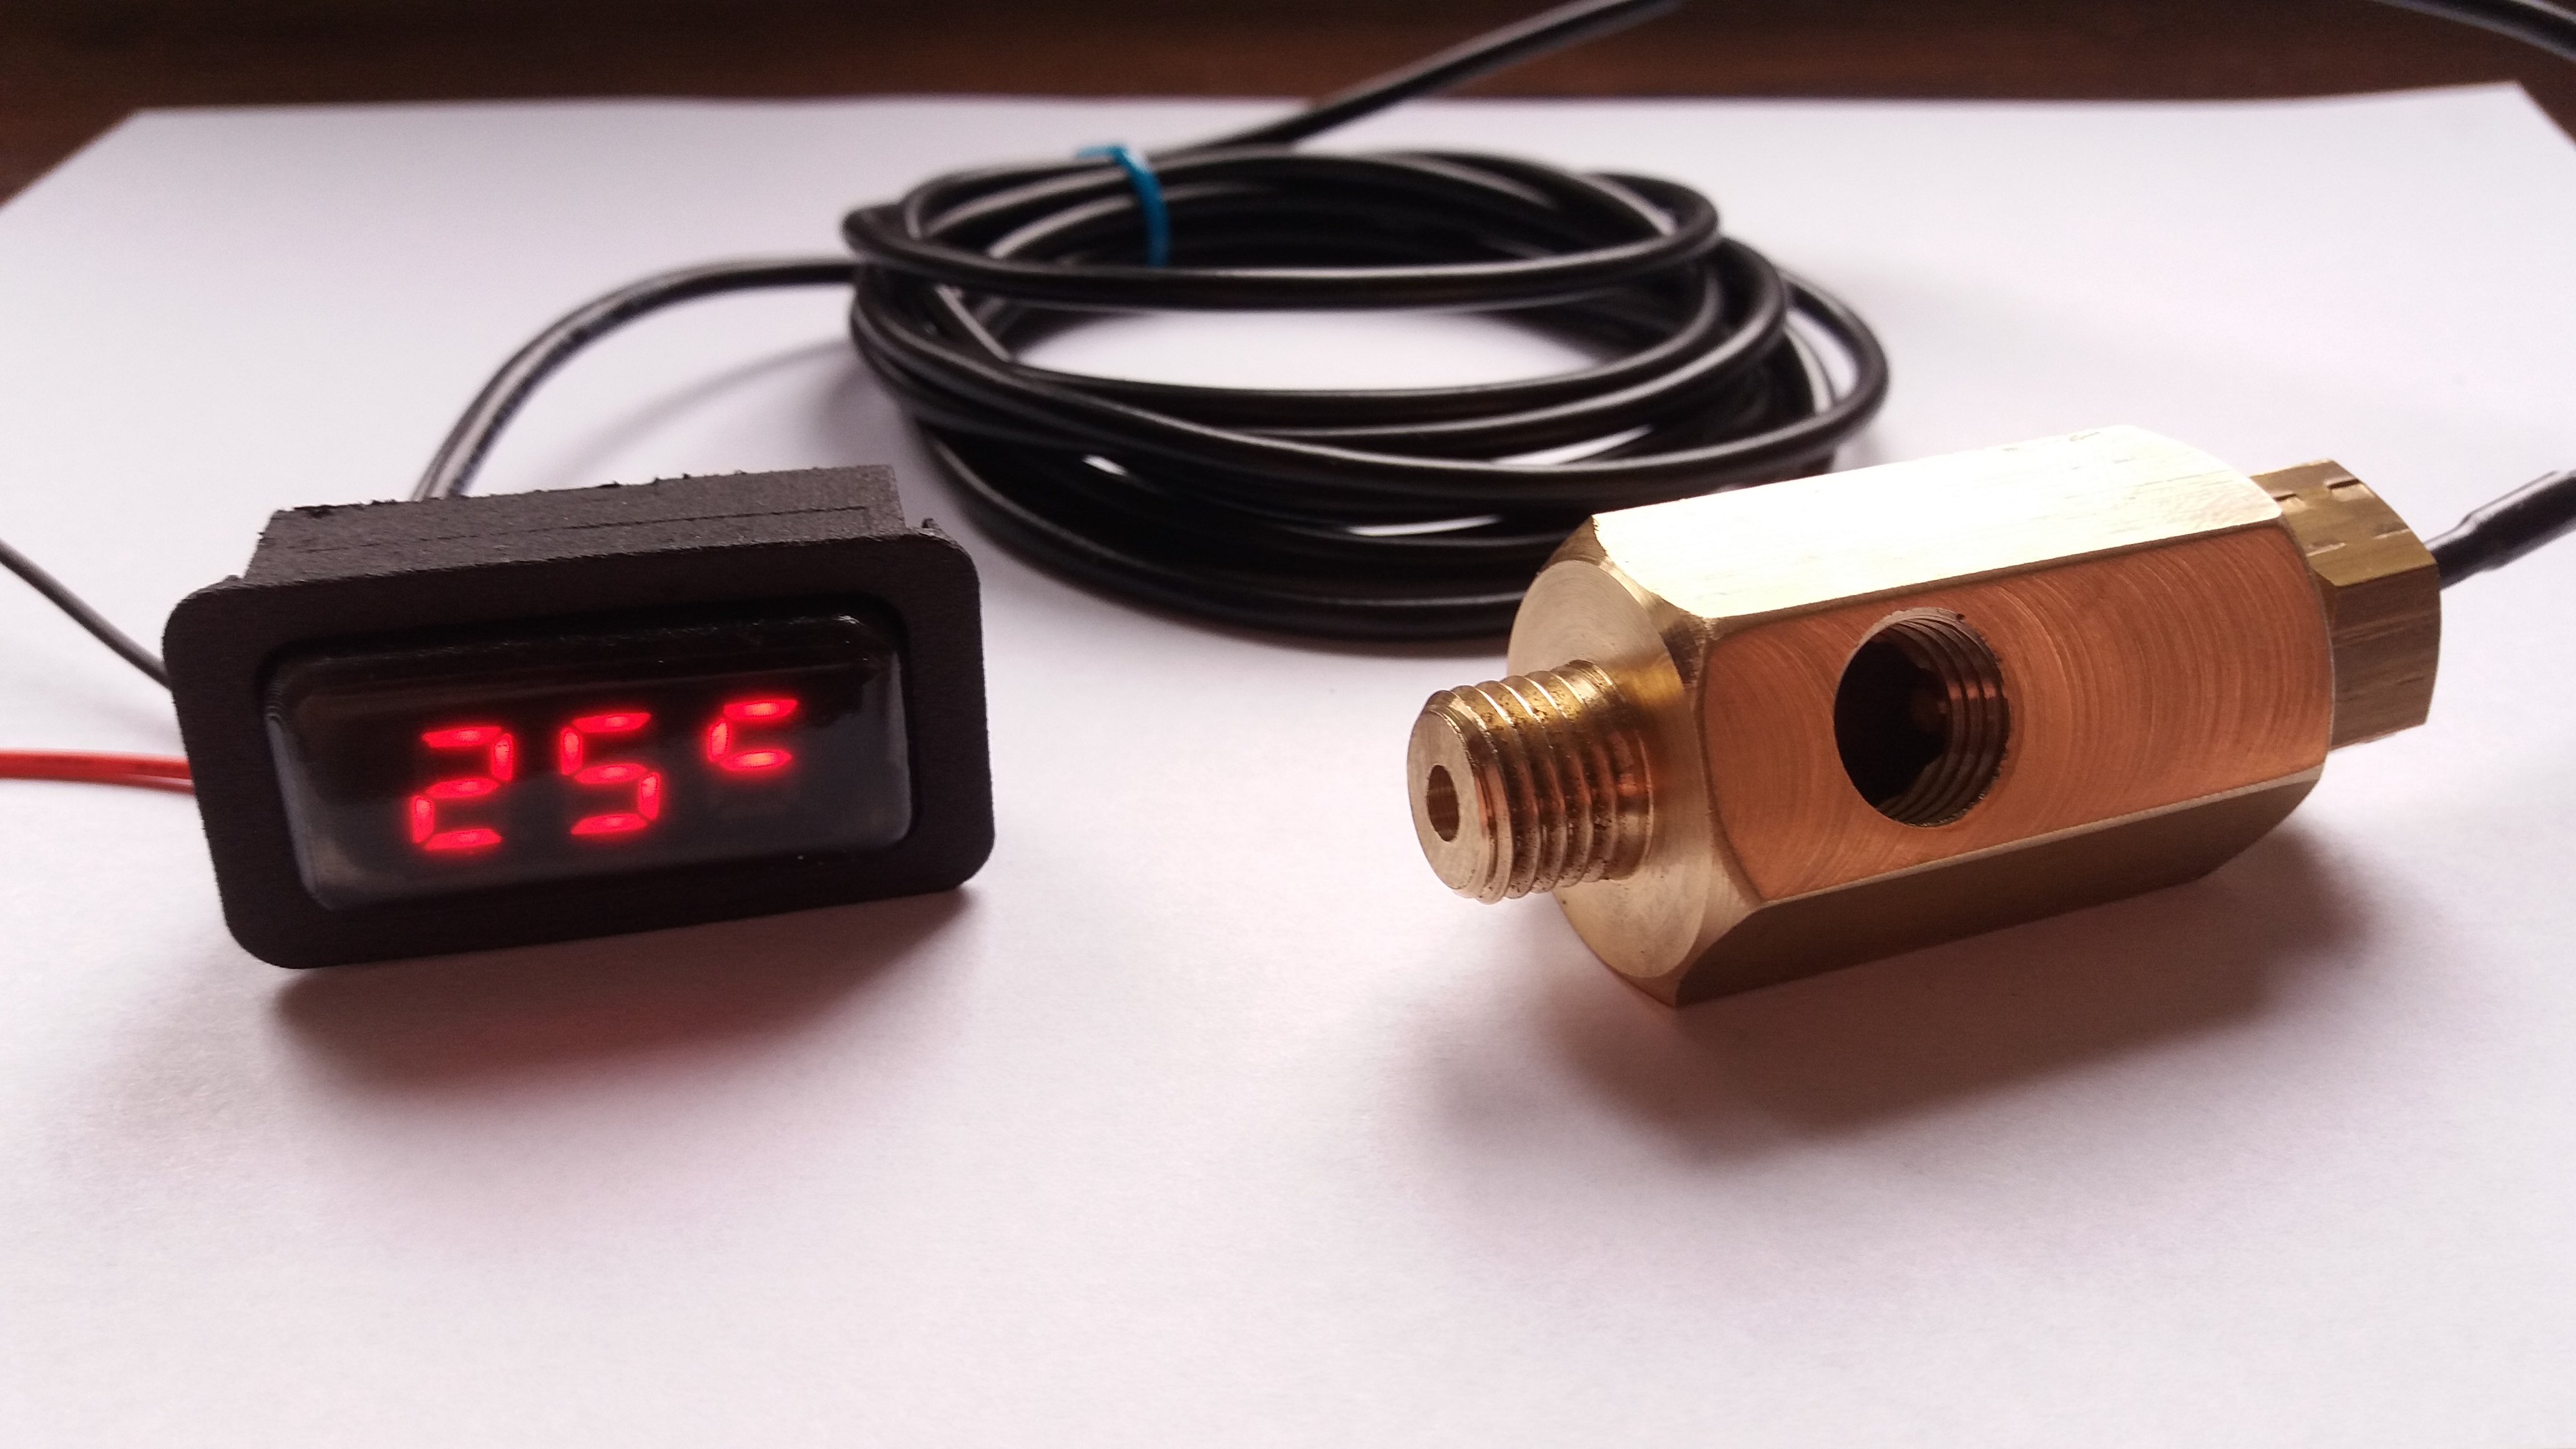
I need to share pics but just added an oil temp gauge from Blackstar labs and placed it in place of the Rear Defroster. So it is easily visible next to the OBC... If I didn't already have gauges, I would consider their 4in1 although I just bought the oil temp gauge since I have other gauges. Slick how it mounts.
https://blackstarmanufacture.com/produkt/multigauge/
Image

The new VDO pressure sender described above resolved my oil pressure gauge problem. I can get pictures of where these are located but right now, both are measuring from the back of the head with an adapter blackstar offered.


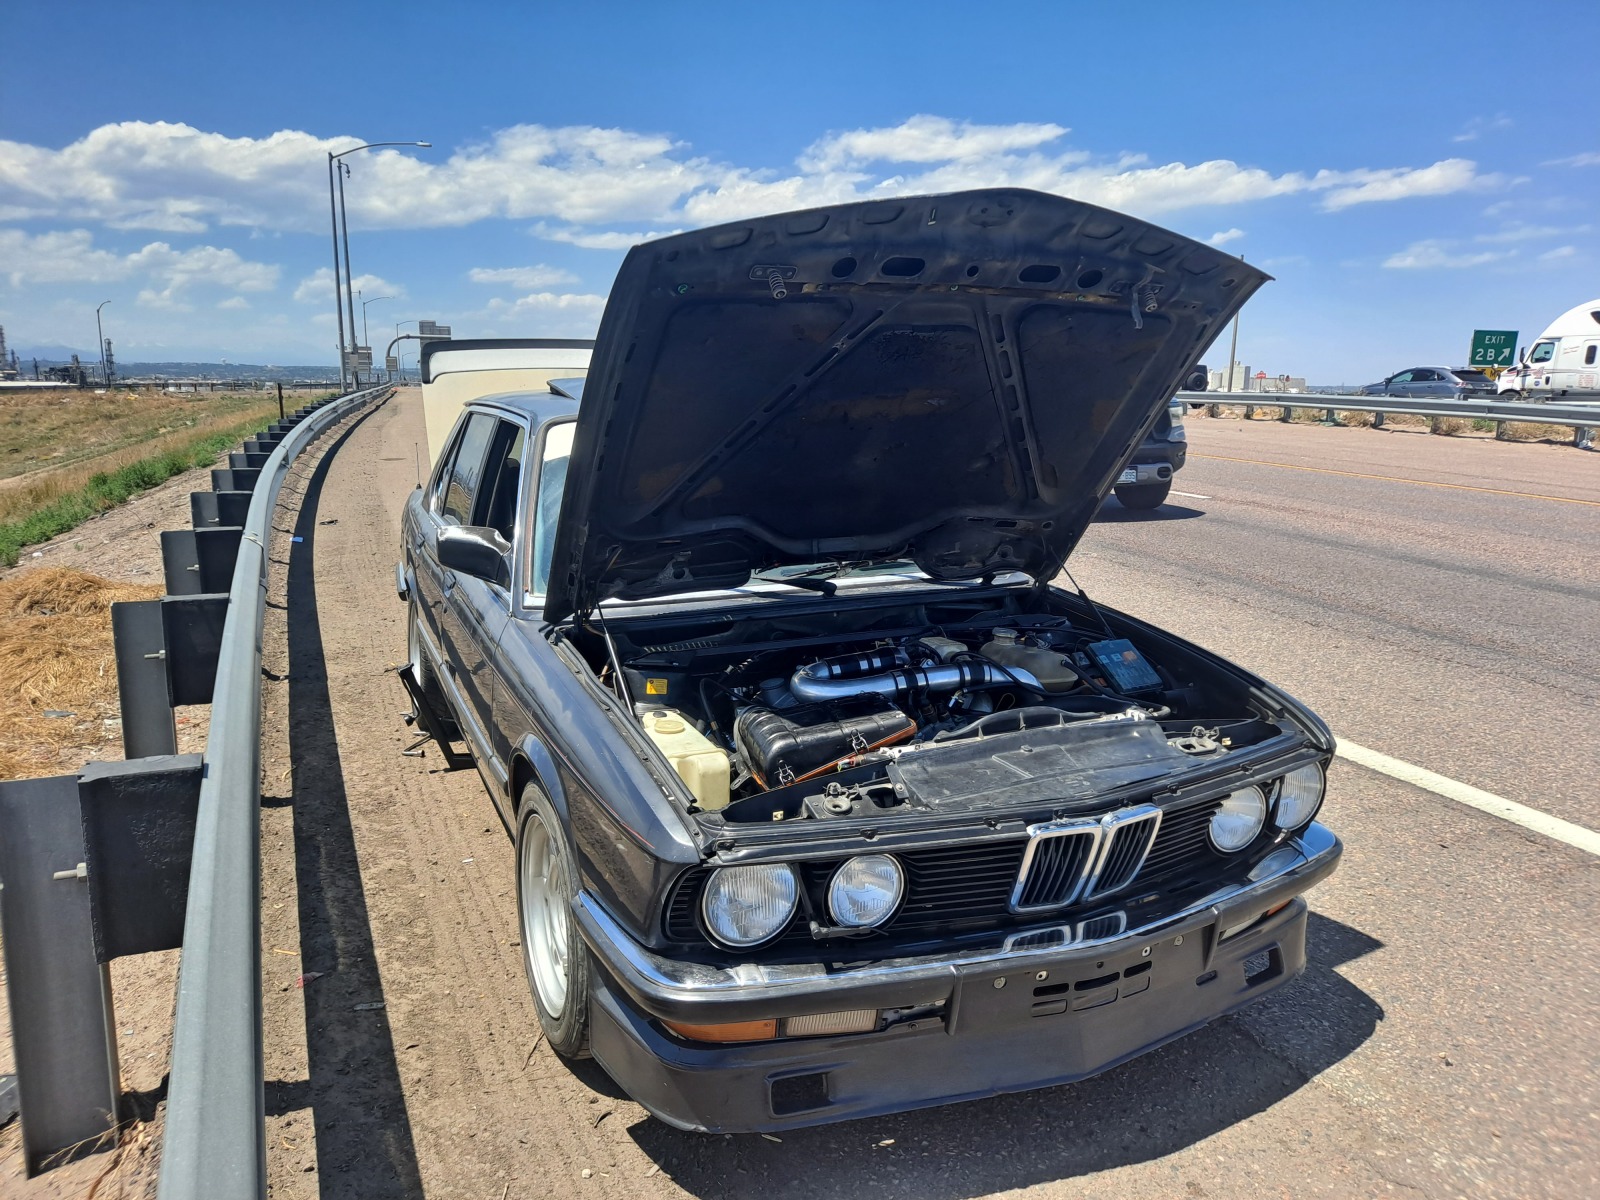
Update as of today. I felt confident after driving the car this past week and took the car down to see my dad and brothers. I figured it would be a good chance to get on the highway, get things up to temp and vary the load on the engine with some highway miles. Well on the highway, the engine cut out briefly though I continued driving without issue for another 10 minutes. Then, suddenly, the car shut off while cruising and afr gauge was totally lean. When I checked under the hood, my gauge (Still hooked up to the fuel supply) showed 0psi. No change when turning the ignition on/off when usually there is a priming pulse from the pump. Of course my 2 young boys were in the car and one started crying thinking we were stuck broken down there with nobody to help us.
Image

I was working on the replacement plan and took the rear wheel off and was about to pull the pump, waiting to see if I could get a spare replaced on the side of the road when I decided to check the ignition again. Suddenly the pump was running and we had pressure! I started the engine without issue :shock: Temps were warm, but 91 F while cruising shouldn't be problematic with a full gas tank! I put the wheel and tool back and swiftly merged back onto the highway.

I monitored oil temps for the first time and found that oil stays around 165-170 F and only started to rise while sitting in traffic where is got to about 180-185F in slow moving stop and go traffic.
I am contemplating putting a 745i oil cooler in the nose of the car under the plastic blanking plate above my intercooler. I think I can fit the 745i unit I have and slightly relocate the two horns that are sitting where it would go. I'd make some flexible lines and adapt to the 745i lines.

Any opinions? Any idea what temps the stock M30 oil cooler thermostat opens at?

I figure it would be cheap insurance for high performance driving since 1) it adds oil capacity and 2) provides actual cooling to the turbo itself as well as the engine internals. As long as oil temps are below 180 F when the cooler opens, it would aid in engine cooling and reducing stress on the radiator, not only just more consistent oil temps. Maybe it wouldn't be worthwhile after seeing temps never reach 200F, I don't know...

The car ran great the rest of the day and I put another 70 miles on it. The midrange torque is really nice and strong, even at this low boost level.
Though I do need to replace from LCAB's. I just need to disassemble, press the old ones out and reinstall. Additionally, I have a diff whine though I have thought about pulling the 3.46 and putting in a 3.25lsd. With higher boost, this may be a smarter ratio though the 3.46 isn't bad even at highway speeds.

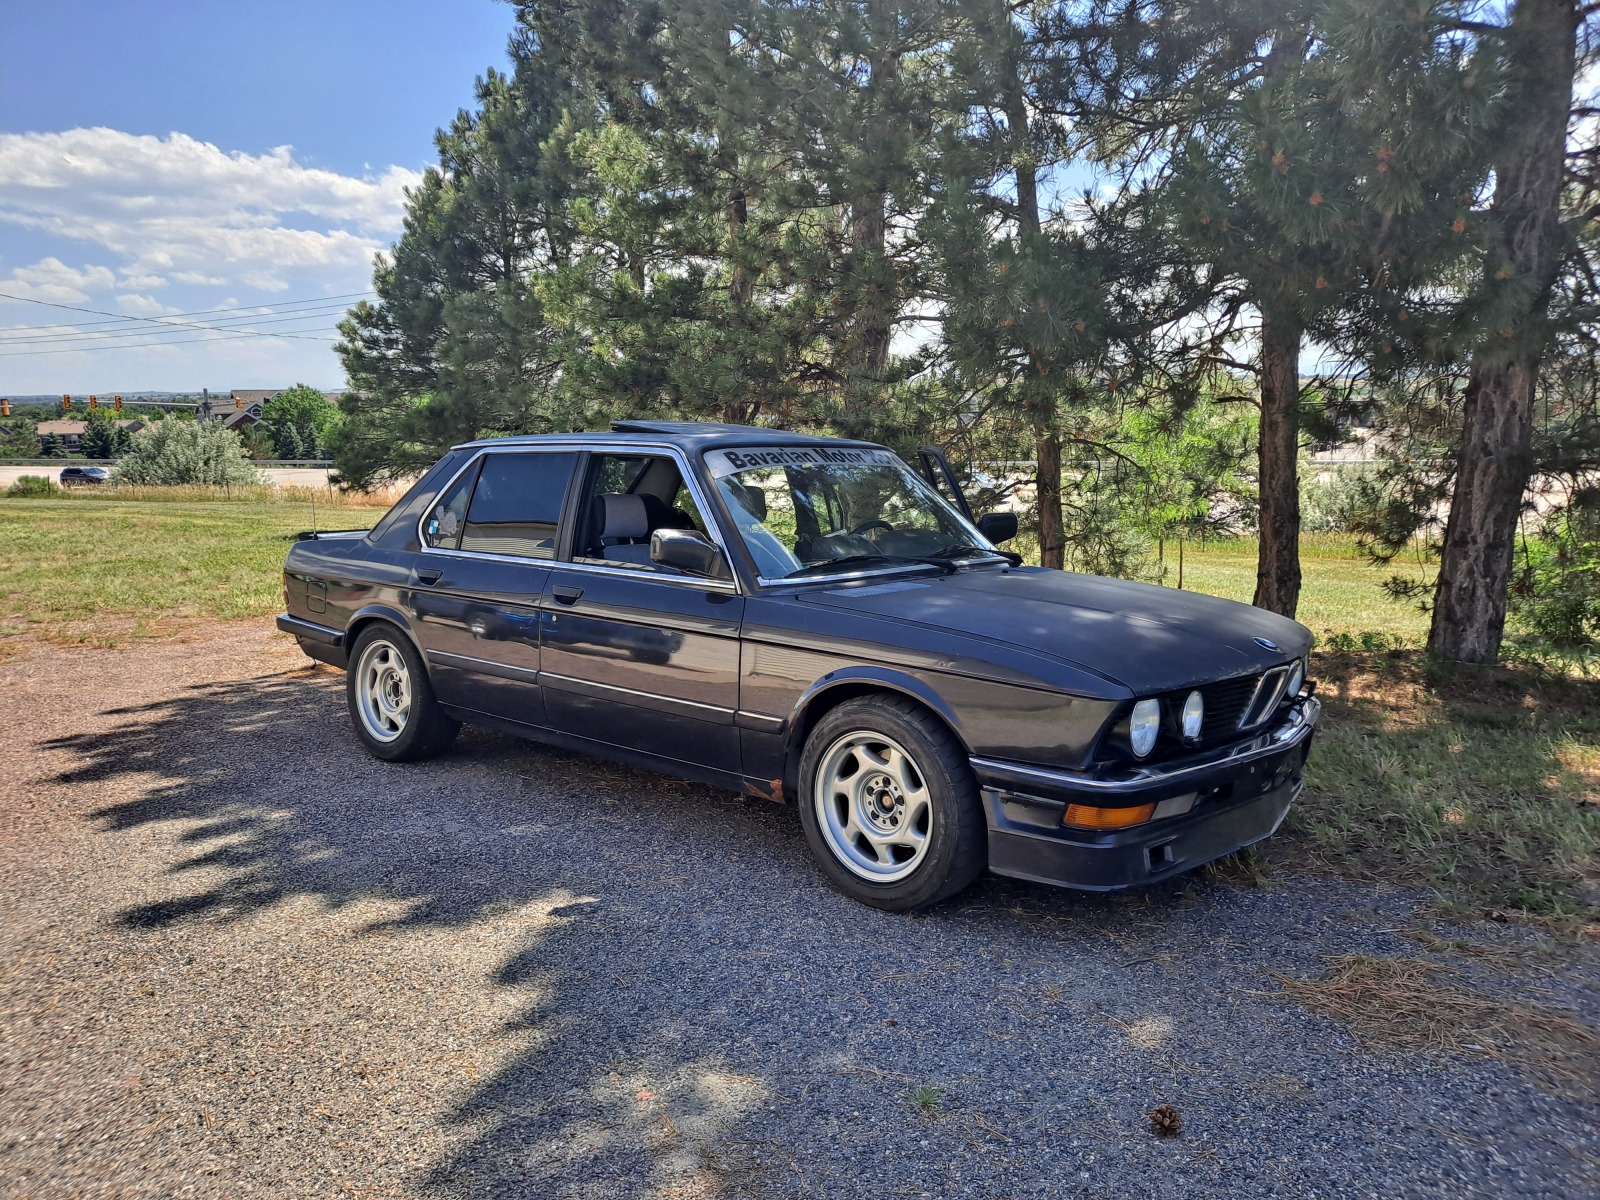
Here's a picture from the afternoon. Obviously, I got the hood on and have the strut bar and oil/water separator in place. I may share pics depending how functional it is...
Image

Current AFR and timing tables. I think I am pretty happy with both tables and have spent a fair amount of time on them for drivability, smoothness and safety. I may change timing depending on the 'correct' tooth #1 settings, but I know I am in the ballpark and within 3 degrees of the target.

Image

More updates soon!
Re: 535is Homebrew Turbo (ex 633 Callaway) - 2024 Update

Posted: Jun 20, 2024 11:08 PM
by tschultz
No pictures today but I am pretty sure that this schematic I made is correct.

Image

84 degrees for rising edge 87 for falling edge.

Weird thing today, I checked the setting to try to change the offset angle because of what I show above. I didn't move the engine to TDC and count my teeth, but I decided to try to see if I changed the offset angle for 10 degrees and see if the timing moved closer to the actual MS timing.

It did, so I tried a higher angle. It seemed that I was off by about 33 degrees (45 degrees@light-12 idle ignition advance). Thus, my setting of initial offset is 120 degrees. I am not quite sure how this is possible because everywhere says 87 or 84 degrees. I will power cycle tomorrow and see if it is still running 87 degrees and maybe that setting just wasn't taking effect. But if the angle is in fact 120, I think an offset of 0 degrees would work the exact same... (It also means my picture above it not where my trigger wheel is sitting when the engine is at TDC)

Then with those settings adjusted, suddenly my AFR gauge shut off. Maybe a stroke of luck because I noticed it as the ngine was running super rich without o2 feedback. But when I checked timing again real quick, the timing mark was dead nuts on at 15 degrees (with trigger tooth #1 angle at 87 I thought). This was confusing, but I realized that last year when I pulled power to the gauge for power with the ignition on, it must be somehow back feeding power or some thing. I tried unplugging the inline fuse for what I thought was the AFR gauge and it didn't shut off. I must have pulled power for that gauge from the radio circuit instead. Maybe it is a line hooked to the coil and the coil was grounding out when it wasn't supposed too? Maybe timing was fixed at the 40 degrees, I don't really know...

Either way when I hooked power up using my original schematic that I used for years previously, everything began working again and the timing is showing correctly... It was messed up when the power to the AFR gauge came through that orange wire. When I pulled from a red wire powering other gauges, all things worked properly!
Idle is much smoother and I can idle closer to 825rpm and it sounds better (Though MAP value isn't as low :( )

I found Dan's post https://www.mye28.com/viewtopic.php?t=161058 about the mounting 8 bolt pattern which seems like it may explain what is going on.
Problem is that the M30 uses an eight bolt pattern for the harmonic balancer, so you can only rotate by intervals of 45 degrees using the original bolt holes. You will end up either ahead or behind the desired trigger angle by 12 or 33 degrees. Option number two is much more involved but if you were to pull the crank hub off you could cut a new keyway and get the trigger angle anywhere you want.

Again, I don't know what has been done to this conversion in terms of software or tuning. If this trigger angle issue has been addressed then your problem lies elsewhere. If they attempted to address this in the manner I have described but ended up off by 12 or 33 degrees, that could still be your issue.
Not sure how the crank wheel could be offset though, because I thought it was keyed. I don't have a great photo of it on this engine. I think I will still check it manually at TDC and see what the number of teeth are away from the sensor to prove out my theory.

I also don't really know if the timing was set at 45 degrees fixed or what. But it might explain why I thought I heard rattling/pinging :shock: :shock: I was pretty patient in listening to it the other day and was worried that it was detonation. I had been surprised to hear detonation of a conservative tune and such low boost levels with a good 12:1 fuel mixture! I will test drive tomorrow and see if things are running smooth and nice.

I have about 150 miles on the engine as of tonight, though some idling and minimal runs revving out past 5000 rpm (maybe a few).

Lastly I had a small oil leak I had to track down at the new temp sensor at the head. I think it is resolved now, will see soon.

Re: 535is Homebrew Turbo (ex 633 Callaway) - 2024 Update

Posted: Jun 21, 2024 1:39 PM
by tschultz
Ok another update.

I took the car out for a drive with the 120 degree setting on trigger wheel and it felt lethargic and like timing was now super retarded. I changed my timing map and it didn't seem to make a difference with detonation... so obviously things aren't adding up here!! Same time it is happening at 120kpa, 3000rpm with pretty good fuel mixtures.

It took a minute to figure out, but i checked timing again and still showed 14 degrees as idle. But as I revved it, I noticed timing didn't change.

I decided to look back at ignition settings and I decided to change spark output to js10 instead of default d14.

After this change. I got an error for dual outputs shared and noticed tach setting on js10 was used here. I decided to shut tach setting off and try js10 for ignition.

Suddenly timing was super retarded via low idle rpm. So I reset trigger wheel angle to 87 and found it to be perfect and now suddenly changing with rpm via the timing light. Before timing with d14 had just stayed fixed!

So it seems I had a wrong setting for spark somehow and it must have been this way for a while since a few years back I had this same complaint with the trigger wheel.

Ignore my last post about power to the afr gauge, I don't think that is relevant as the true cause.

Quick test drive and the pinging is gone. I feel sort of dumb now. I need to see how long I've had this setting wrong...
EDIT: checked and this setting has been d14 since I got it. So maybe my timing had been off and caused some of my engine problems previously?

Re: 535is Homebrew Turbo (ex 633 Callaway) - 2024 Update

Posted: Jun 28, 2024 12:28 AM
by turbodan
Will run much better and be much more reliable now that it's actually running off of the table.

Re: 535is Homebrew Turbo (ex 633 Callaway) - 2024 Update

Posted: Jun 28, 2024 12:48 AM
by tschultz
Last week I thought I found a break through where I changed my spark output to IGN instead of D14. Finally, timing lined up at 14 degrees and changed with revs as we all expect. I test drove the car down the street and back and parked it thinking I got to the bottom of my issues. Things felt smooth and no more pinging but I had run out of time for tuning for the day and parked the car.

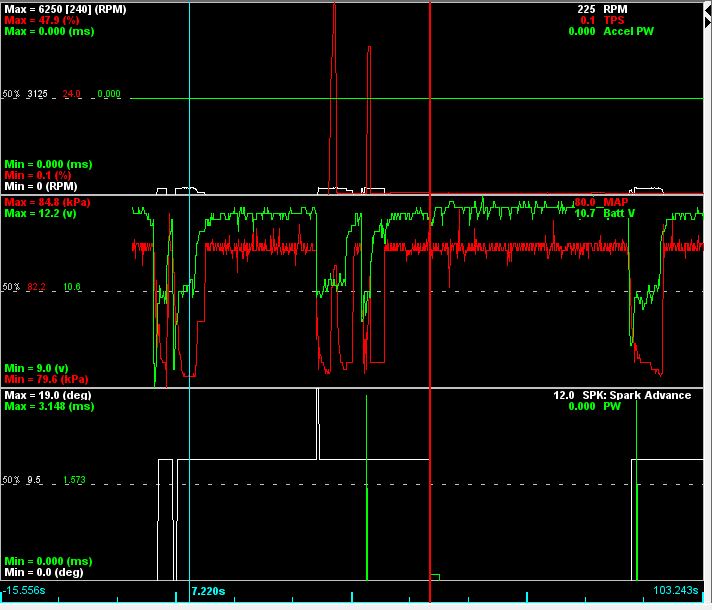
Well, I went to restart the car a couple days ago and it would not start! Good fuel pressure with a gauge on the supply line, pump running during prime sequence and all. I am getting a good rpm signal of 200 while cranking, similar to logs of the car years earlier, but alas no start. I checked and my PW of injectors is 0 with the very occasional 3mS (expected) blip. Not sure what happened here as I had only been playing with the spark output and Tachoutput values. I even reverted back to the tune I had on the car with D14 spark output and incorrect IGN as tachoutput value and still no luck.

I need some help and have posted on msextra but no luck. Maybe turbodan is the man to help me here! I have scoured the settings and don't see anything amiss with my tune. It is not Rev limit or something else with my ve table causing issues from what I can see! I had halved my req_fuel value and doubled my ve table when i first started the engine for a bit better resolution and all had been working. I also have mapdaddy and running realtime baro correction at 83kpa in Denver, CO.

Do I have a hardware problem? Doesn't seem like it since I do get the occasional pulse width of the injectors...

No start try showing some cranking with a pulse blip instead of a steady 3mS as I used to have.

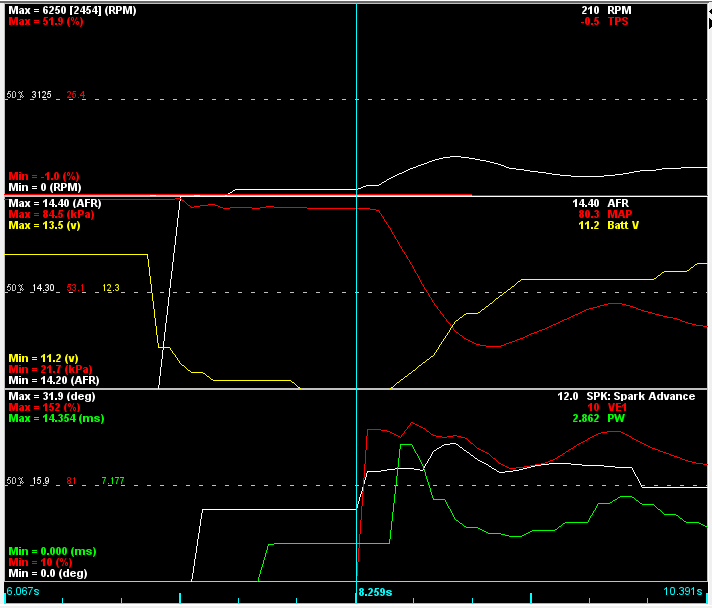
Image

Compared to a previous log where it did start.. same VE of 10 while cranking but the ms unit injected fuel
Image


Log and tune file:
https://fastupload.io/a5a7ad34520d8cb9
https://fastupload.io/51d5686504af9e15

What drives the injector pulse width besides VE table and cranking signal?
MegaSquirt Fuel Equation
Pulse width is: PW = REQ_FUEL * VE * MAP * E + accel + Injector_open_time

The "E" above is the multiplied result of all enrichments, like warm-up, after-start, barometer and air temperature correction, closed-loop, etc:

E = gamma_Enrich = (Warmup/100) * (O2_Closed Loop/100) * (AirCorr/100) * (BaroCorr/100)
and

Warmup is the warm-up enrichment value from the table the user enters in MegaTune,
O2_Closed Loop is the EGO adjustment based on the EGO sensor feedback and the EGO settings the user enters in MegaTune,
AirCorr is the adjustment for air density (based on the intake air temperature), and
BaroCorr is the barometric correction based on the ambient air pressure (usually taken at start-up, but a second baro pressure sensor can be added to MegaSquirt-II for continuous updates to the BaroCorr).
I am getting fuel calculation of 1.2-1.4mS deadtime and 99-100% fuel in all other indicators but no fuel shown and a minor occasional pulse blip. So maybe I should try to increase my req_Fuel value and see if that changes some setting in the system for a higher VE1 and higher pulse width demand/request while cranking?

Baro correction is also right at 99%, so I am not somehow inadvertently pulling out fuel... Not at rev limit or anything either.

Is there a battery voltage minimum required to run the injectors? Is my ~10.5V too low while cranking somehow and my battery just gone slightly too weak for injector pulse? Would battery ADC compensation be causing some sort of problem here? I think 10.5 volts during crank is enough to run the injectors... That is my main thought right now.